


Scan Using the Scan
Button on Your Fuji
Xerox Machine
Scan Using the Scan Button
on the Machine
1
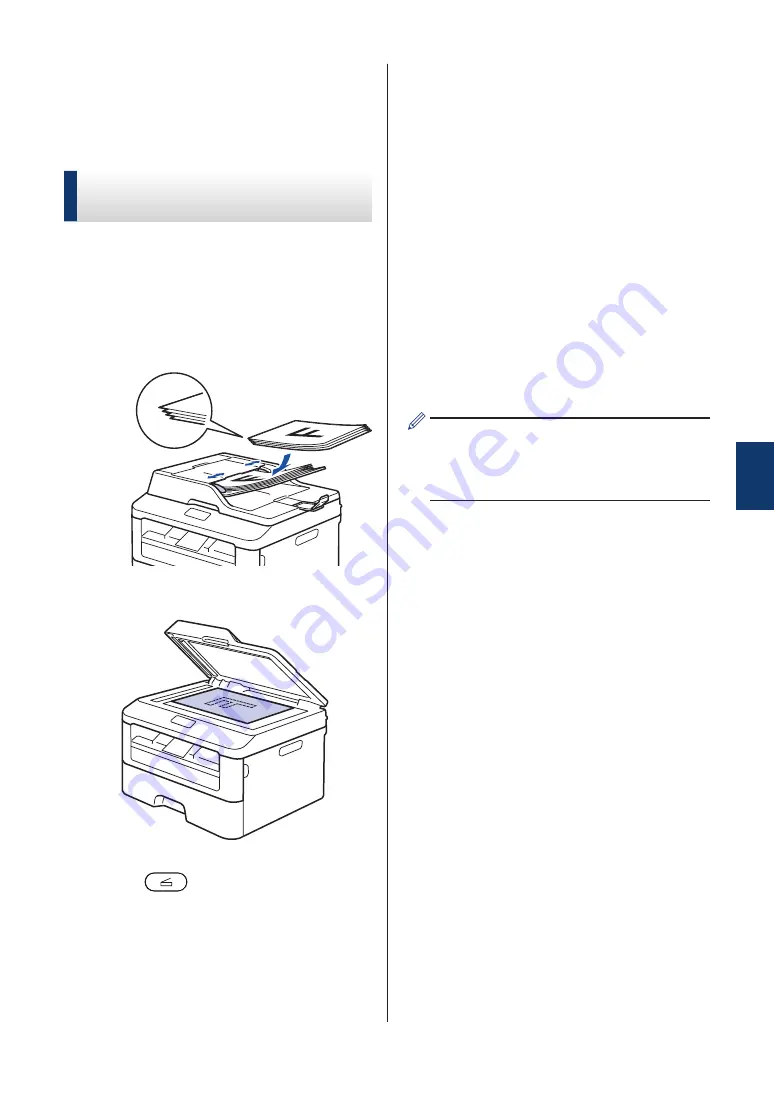
Do one of the following:
• Place the document
face up
in the
ADF.
(If you are scanning multiple pages,
we recommend using the ADF.)
• Place the document
face down
on
the scanner glass.
2
Press
(
Scan
).
3
Press
a
or
b
to display the
Scan to PC
option, and then press
OK
.
4
Press
a
or
b
to display the
File
option,
and then press
OK
.
5
If the machine is connected to a
network, press
a
or
b
to display the
computer where you want to send the
document, and then press
OK
.
6
Do one of the following:
• To change the scan settings for this
document, press
a
or
b
to select Yes,
and then press
OK
. Go to the next
step.
• To use the default scan settings,
press
a
or
b
to select No, and then
press
OK
. Press
Start
.
The machine starts scanning. If you
are using the machine's scanner
glass, follow the LCD instructions to
complete the scanning job.
• In order to change scan settings, Fuji
Xerox's Control Center software must
be installed on a computer connected
to the machine.
7
Select the scan settings you want to
change:
•
Scan Type
•
Resolution
•
File Type
•
Scan Size
•
Remove Bkg. Clr
(available only for the
Color
and
Gray
options.)
8
Press
Start
.
The machine scans the document.
5
Scan
27


