


www.foscam.com
S
S
h
h
e
e
n
n
z
z
h
h
e
e
n
n
F
F
o
o
s
s
c
c
a
a
m
m
I
I
n
n
t
t
e
e
l
l
l
l
i
i
g
g
e
e
n
n
t
t
T
T
e
e
c
c
h
h
n
n
o
o
l
l
o
o
g
g
y
y
C
C
o
o
.
.
,
,
L
L
i
i
m
m
i
i
t
t
e
e
d
d
T
T
e
e
l
l
:
:
8
8
6
6
7
7
5
5
5
5
2
2
6
6
7
7
4
4
5
5
6
6
6
6
8
8
F
F
a
a
x
x
:
:
8
8
6
6
7
7
5
5
5
5
2
2
6
6
7
7
4
4
5
5
1
1
6
6
8
8
51
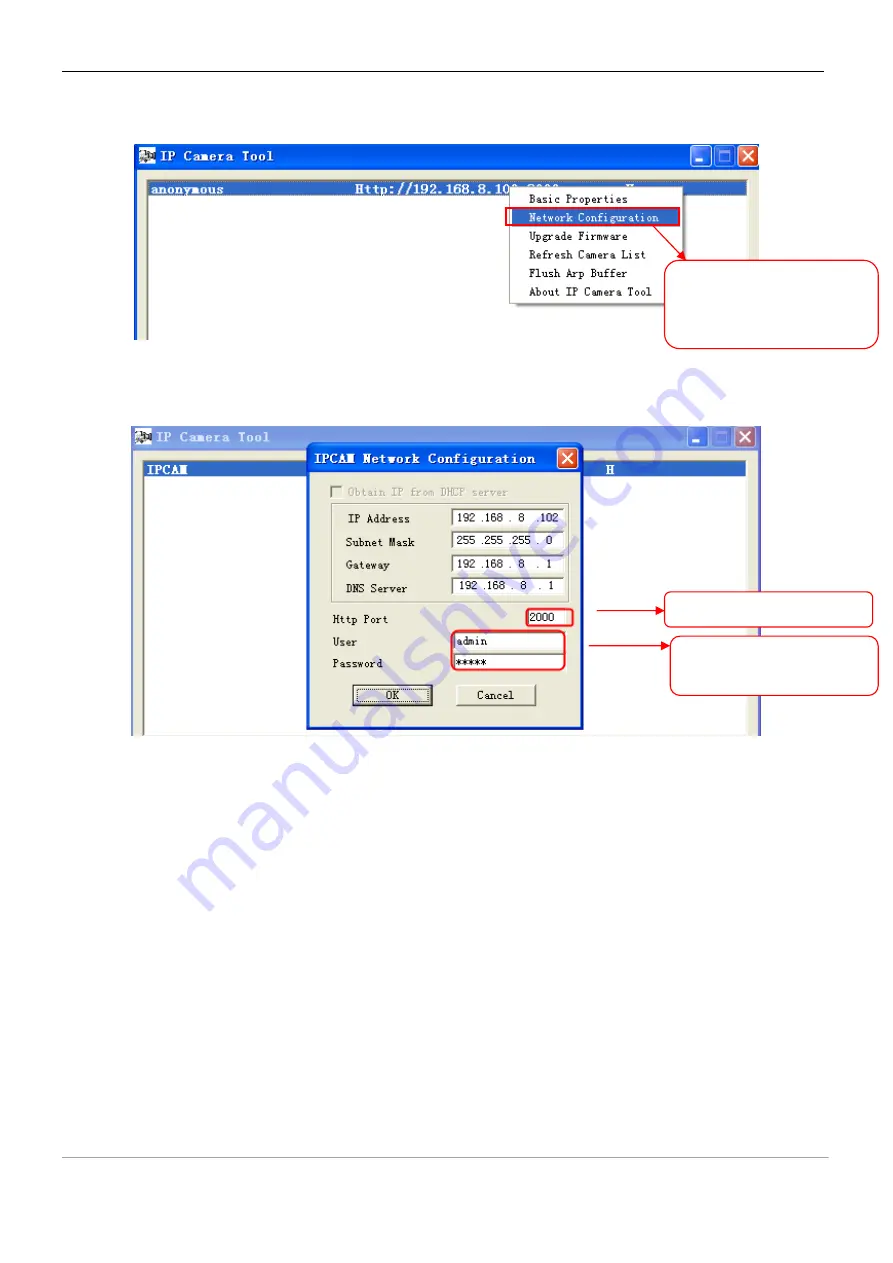
4.35 and 4.36.
Figure 4.35
Figure 4.36
Step 2:
Enter the username and password of the Administrator (default username is admin with a blank
password), and click “OK” to apply changes.
Step 3:
Wait around 10 seconds, you’ll see that the camera’s LAN IP address has changed. In our example it
was changed to 2000, so we see http://192.168.8.102:2000 in IP Camera Tool. Also, the LAN IP address is
now fixed at a static IP address of http://192.168.8.102:2000. This IP address will not change even if the
camera is powered off and back on, the camera will remain on this LAN IP address. This is very important that
a static LAN IP address is set, or you may have problems later with remote access and seeing the camera
remotely if the camera loses power and reconnects on a different LAN IP address. Make sure you set a static
Select which camera
you’d like to change the
port for, and right click
Modify the Http Port.
Enter the Username and
password, click OK.


