background image

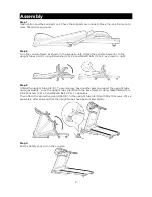
Assembly

Step 1

Open carton and take all parts out. Check that all parts are included. Place the main frame onto 
clear, flat and level ground.

Step 2

Turn the console frame, as shown in the image to left.  Attach the console frame (5) to the 
upright tubes (4L/R), using D8 washer (29) x 2 and M8x20 Bolts (13) x 2, as shown to right.

Step 3

Unfold the upright tube (4L/R). To avoid injury, have another person support the upright tube 
during assembly.  Lock the upright tube (4L/R) with the base frame (1) using M8x20 Bold (13) x 
2, D8 Washers (29) x 3 and M8x50 Bolt (10) x 1, separately.
Then attach the protective guard (55L/R) to the upright tube (4L/R) with M5x10 Screws (19) x 2 
separately after ensuring that the upright tubes have been locked tightly.

Step 4

Put the Safety Lock (II) on the console.

3

Summary of Contents for FSWDTRDMLXA

Page 1: ......

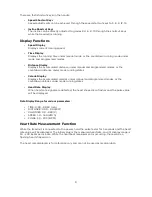
Page 2: ...e Frequency 5 Exercise Warnings 6 Warm Up Exercises 6 Maintenance 7 Cleaning 7 Running Belt Deck Lubrication 7 Belt Adjustment 7 Functions 8 LCD Screen Layout 8 Preset Programs 8 Safety Lock Function...

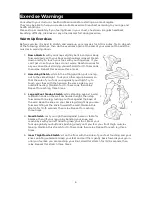
Page 3: ...dily Wear appropriate clothing when exercising on the treadmill Do not wear long loose fitting clothing that may get caught in the treadmill Always wear running or aerobic shoes with rubber soles Keep...

Page 4: ...x20 Bolts 13 x 2 as shown to right Step 3 Unfold the upright tube 4L R To avoid injury have another person support the upright tube during assembly Lock the upright tube 4L R with the base frame 1 usi...

Page 5: ...Once the pressure is released the base frame will lower itself automatically Please ensure that children and animals are not nearby when lowering base frame Technical Specifications Assembled size mm...

Page 6: ...increase to 5 3KM h for another 2 minutes then to 5 8KM h for a further 2 minutes After that add an extra 0 3KM h every 2 minutes until you feel that you are reaching your limit Do not exceed your ab...

Page 7: ...r leg up inwards so that the sole of your foot is up against your thigh Try to touch your toes with the hand on the same side as your outstretched leg Maintain for 10 15 seconds then relax Repeat for...

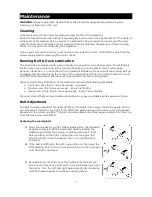
Page 8: ...the lubrication of the deck according to the following timetable Light user less than 3 hours per week Annually Medium user 3 5 hours per week Every Six Months Heavy user more than 5 hours per week E...

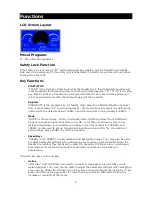
Page 9: ...E is the mode key While in a standby state MODE can select from 3 different kinds of countdown operations from H 1 to H3 H 1 is time countdown mode H 2 is distance countdown H 3 is calorie countdown O...

Page 10: ...lay Displays the accumulated calories under manual and programmed modes or the countdown calories under mode running states Heart Rate Display When heart rate signals are detected the heart shaped ico...

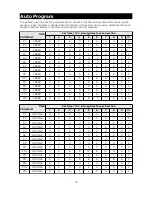
Page 11: ...6 2 P9 SPEED 2 4 5 5 6 5 6 3 3 2 P10 SPEED 2 5 7 5 8 6 5 2 4 3 P11 SPEED 2 5 6 7 8 9 10 5 3 2 P12 SPEED 2 3 5 6 8 6 9 6 5 3 P13 SPEED 2 5 6 9 7 8 5 2 3 2 P14 SPEED 3 4 5 6 7 8 5 4 3 3 P15 SPEED 3 5 7...

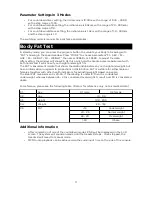
Page 12: ...ht fits The FAT measurement is data that shows the relationship between your height and weight but has no information in regards to proportions or distribution FAT is suitable for either males or fema...

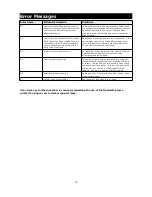
Page 13: ...t them If the problem persists please contact the Kogan com customer support team E4 Incline motor failure or error Recheck the incline motor by disconnecting the unit from the power supply for 10 sec...

Reviews: