6
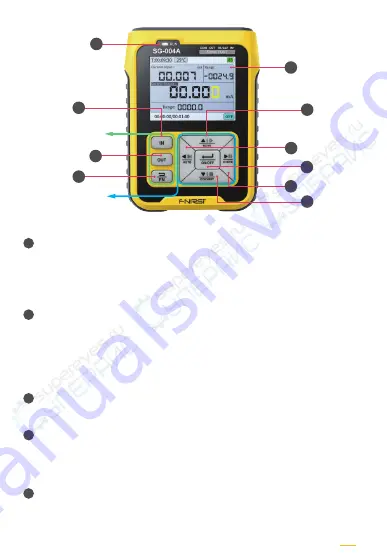
【 RCVK 】
Up function key: When the key is white, it is to add value or select upward
(when the output pulse is quantitative and the cursor is not in, it is the same as the
programming mode).In the history curve interface, it is a quick right shift of 100.
When the 【 FN 】 red light is on (the button is green), click 【 RCVK 】 to enter/exit
the preset output mode. At this time, the up, down, left and right buttons can
quickly recall the preset signal value
【 AUTO 】
Left function key: when the key is white, it is to select to the left (when
the output pulse is quantitative and the cursor is not present, it is the same as
the programming mode).
In the history curve interface, the cursor is moved to the left point by point.
When the 【 FN 】 red light, click 【 AUTO 】 to enter/exit the programming mode
(the button blue light), at this time, the up key-single output, the down
key-reset, the left key-end the output, the right key-pause/ continue
【 ON/OFF 】
confirmation button: when the main interface (turn on/off the
output); When the 【 FN 】 is red light (click to turn on/off the recording); when
setting the interface(Click for "OK")
【 CURVE 】
Right function key: When the key is white light (select to the right ~
when the output pulse is quantitative and the cursor is not in, it is the same as
the programming mode).In the history curve interface, the cursor is moved to
the right point by point.When 【 FN 】 is red light (click to switch curve
interface/character interface)
【 CONVRET 】
Down function key: When the key is white, it is to decrement the value
or select down (when the output pulse is quantitative and the cursor is not in, it is the
same as the programming mode; in the history curve interface, it is to move left
quickly by 100; When 【 FN 】 is red light (click to enter/exit the conversion mode)
7
8
9
10
【 Panel Display 】
1
2
7
10
6
9
8
5
3
【 3-key area 】
【 3-key area 】
4
��
PAGE


