6
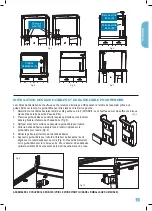
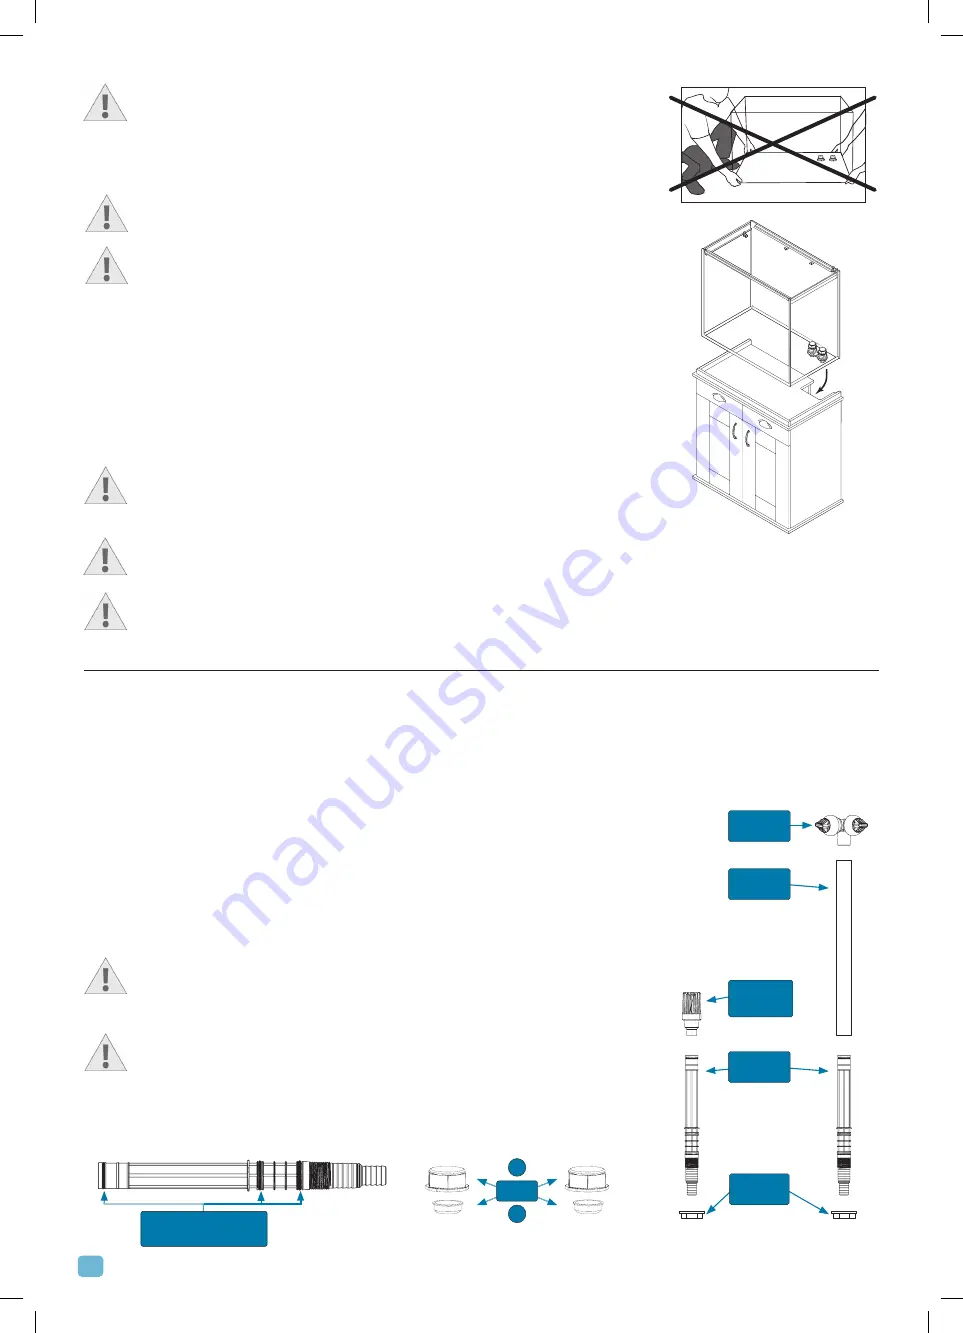
WARNING: Risk of breaking the glass tank base. The glass tank features
protruding fittings at the bottom, which can never be used as support points.
Never try to lay the tank on any support except its cabinet, which is fitted with
a special cavity to accommodate the fittings. When placing the tank onto its
cabinet, remove the tank from the box and rest it on the cabinet paying the
utmost attention not to damage the bottom fittings.
Never attempt to move or transport the cabinet with the glass tank or any other
load on top of it.
Although the glass tank was manufactured with the maximum care and the most
advanced techniques, we still recommend making a simple inspection prior to the
installation to verify that unexpected events during handling and transportation have
not damaged the tank or impaired its water-tightness.
1. Make a visual inspection of the glass tank to check for damage or cracks.
Do not continue the installation if the tank is damaged.
2. If no damages and cracks are detected, proceed with the normal aquarium set up.
3. After the full installation of the aquarium kit with filter, heater, LED strip light, decorations,
etc., has been completed, fill the tank with water 5 cm at a time, while making sure there
are no leaks.
Never attempt to move or transport the tank if it is not completely empty of water or
any other material.
Always take care not to damage the seals at the edges of the glass panels while
maintaining your aquarium, ie: with planters or algae scrapers.
Never use toxic or aggressive substances to clean your aquarium, such as household detergents.
QUICK CONNECTION SYSTEM INSTALLATION
This section only applies to Fluval Aquariums with Fluval External filter and “QuickConnect” System.
Installing water intake/output with “QuickConnect” system
(Intake/output fittings are included in the filter packaging)
These Fluval Aquarium models feature the “QuickConnect” system, which allows the direct
connection of the tank to the external filter through the bottom glass by means of special
fittings. Normally, the same type of connection is achieved through specially-made devices,
which are complex and require the intervention of expert technicians.
On the contrary, in just a few minutes the “QuickConnect” system can be easily and safely
installed, giving your aquarium a professional and tidy filtration solution.
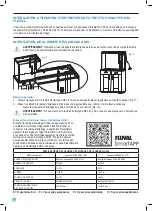
Before proceeding, identify and count all parts required by referring to the
exploded view in the side illustration. If any part is missing, do not proceed with
the installation and contact your local supplier.
Before proceeding, check stems (A) for the presence of all 3 rubber rings (C).
Do not proceed with the installation if one of the rubber rings (C) is missing and
contact your local supplier.
Locate the 2 openings in the tank bottom glass and assure that the corresponding openings
TANK BOTTOM SEALING
PLUGS
P
Q
Plugs
Connector Stem’s
Rubber Rings (C)
INTAKE
GROUP
OUTPUT
GROUP
Output
Nozzle (N)
Output
Stem (B)
Intake
Strainer (S)
Connector
Stem (A)
Ring Nut
(R)


