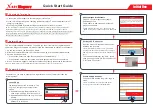
Vertical flanged machines – Static clock
Measure using Static measurement mode
l
Center the laser beam.
Note
Static measurement mode is used for vertically mounted machines.
l
Rotate the shafts to the first measurement position. If using the coupling housing num-
bering convention, the reference mark and the measurement position 0 should be
aligned or matched to each other.
l
Use
or
to position the displayed sensor and laser at the angular rotation
corresponding to the actual position of the components mounted on the shafts, then tap
M
(
1
) or
to take the first measurement point.
l
Rotate shaft to the second measurement position (e.g. 1:30). If the chosen meas-
urement position does not correspond to the angle selected automatically on the display,
use the navigation keys to manually position the sensor and laser at desired angle on the
display. Take the measurement point by tapping
M
(
1
).
l
Take the maximum number of measurement points to maximize the quality of results.
ROTALIGN touch EX
113
On-board help
Summary of Contents for PRUFTECHNIK ROTALIGN touchEX
Page 1: ...ROTALIGN touch EX On board help ...
Page 2: ...ROTALIGN touch EX On board help Version 2 3 Edition 03 2020 Part No DOC 52 202 EN ...
Page 11: ...This page intentionally left blank ...
Page 13: ...12 Version 2 3 On board help ...
Page 43: ...42 Version 2 3 On board help ...
Page 137: ...136 Version 2 3 On board help ...


