MAN_DZ7_001 Rev 1.1 Flightcell® DZMx Plus Installation Manual
Page 27 of 61
Effective Date: 28 Jun 2021
SIM Slot Designation
Where the DZMx has an Iridium modem and cell modem installed.
»
SIM 1 is allocated to the Satellite Iridium modem
»
SIM 2 is allocated to the Cellular modem.
Note: Iridium and cellular cards can be used in both slots depending on the unit
configuration purchased.
Installing SIM cards
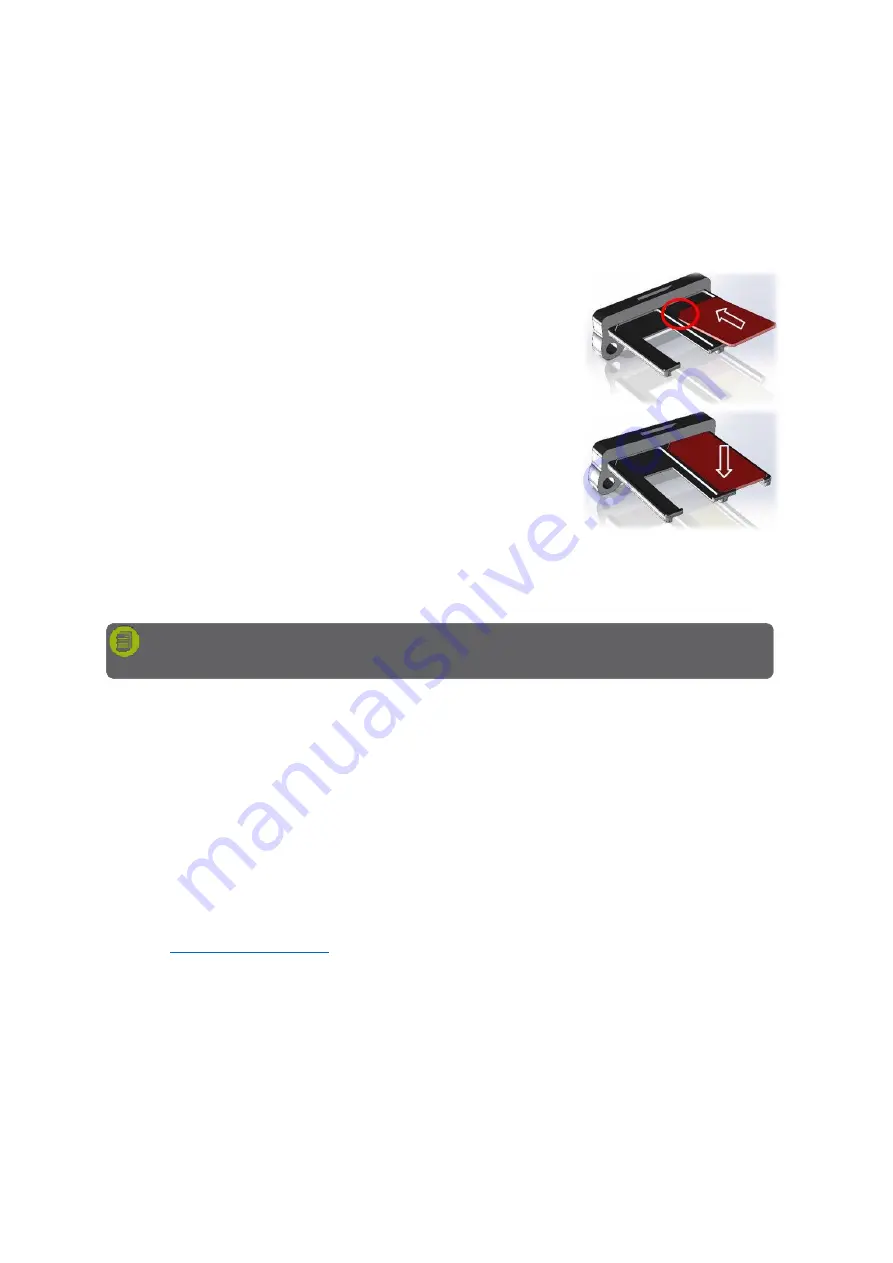
SIM cards are installed in the SIM card tray inserted in
the front of the DZMx Plus. To install SIM cards:
1.
Undo the screws securing the SIM card tray
and remove the tray.
2.
Preferably place the tray on the edge of a hard
surface such as a table or book.
3.
Position the SIM card with the bevelled corner
(circled in drawing) forward and contacts
downward, then slide the front edge into the
recess in the front of the tray.
4.
Tilt the card downward until it clicks into the groove in the tray.
5.
Insert the tray into the slot on the front of the DZMx Plus and secure in place
with the two cap screws.
AT&T SIM Cards
Not all AT&T SIM cards are compatible with non-AT&T devices. For troubleshooting
with AT&T SIM cards, visit the AT&T troubleshooting website
https://troubleshoot.att.com/devicetroubleshoot
.
Iridium SIM cards supplied with your DZMx
DZMx Plus with Iridium modems are shipped with an unregistered Iridium SIM
installed, unless otherwise requested. This can be registered to your Iridium Service
Provider’s account when you are ready to activate yo
ur Iridium service.
To transfer the SIM card to your ISP, please contact Flightcell International at
advising the serial number of your DZMx Plus and the name of
your ISP.
Configuring Modems
The DZMx Plus is configured prior to shipment with default settings for the installed modems.
However, you may need to check and modify these settings.
This is done using DZMx Connect. Go to Settings > Modems.
Note:
Ensure that the SIM cards are in the correct slots, as they may be permanently
damaged if incorrectly installed.


