


English 9
4.3 Installation
After startup, the lock is ready for installation.
NOTE!
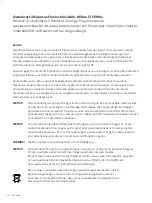
For Flexlock and its RFID technology to work optimally
with our cards, the lock can only be installed on fronts made
of wood, plastic and other non-conductive materials with
a maximum thickness of 25 mm.
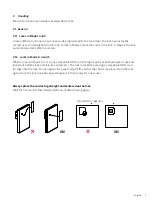
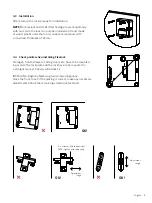
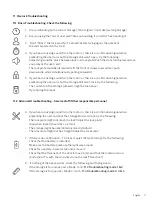
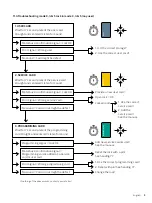
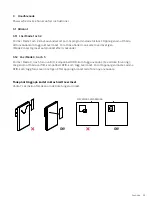
4.4 Check points when installing Flexlock
Storages, fronts, drawers, sliding doors etc. have to be mounted
in parallel. The lock plate and the lock have to be mounted in
a straight manner. See www.flexlock.se
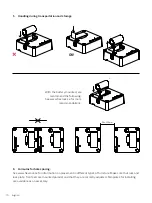
INSTALLING: Begin by fastening two screws diagonally.
Close the front to see if the placing is correct, make any necessary
adjustments before the remaining screws are fastened.
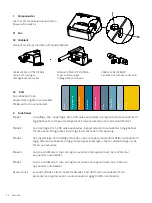
P
Z2
4,5x35mm (x4)
P
Z2
4x12mm (x3)
P
Z2
4x12mm (x2)
Min 14mm
0mm
= Justera ut Låsblecket
Justermån
3:e skruv låser placering!
OBS! dras efter injustering!
Justermån
Max åtdragningsmoment
MDF: 1,45Nm
Spånskiva: 0,8Nm
Min 12mm
Max åtdragningsmoment
MDF: 1,45Nm
Spånskiva: 0,8Nm
Min 12mm
Kontrollpunkter vid montage av Flexlock
Monteringssätt
Skruva 2st skruvar diagonalt
först. Provstäng förvaring och
justera ev. innan de 2
kvarvarande skruvarna dras!
2mm
Kontrollpunkter före montage av Flexlock
Kontrollpunkter före montage av Flexlock
OK!
Kontrollpunkter före montage av Flexlock
Kontrollpunkter före montage av Flexlock
Kontrollpunkter före montage av Flexlock
Kontrollpunkter före montage av Flexlock
3 rd screw will fix the position!
NOTE! Tighten after adjusting
Adjustment
range
Adjustment
range
OK!
OK!


