background image

11

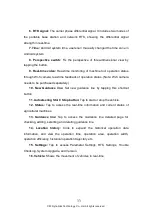
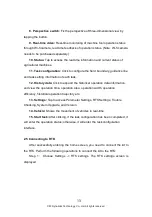
6. RTK signal: 

The carrier phase differential signal. It includes two modes of

the   portable   base   station   and   network   RTK,   showing   the   differential   signal

strength in real-time.

7.Time: 

Android system time, users can manually changed the time zone in

Android system.

8. Perspective switch:  

Fix the perspective of three-dimensional view by

tapping the button.

9. Real-time video:

  Real-time monitoring of machine tool operation status

through Wi-fi camera, real-time feedback of operation status. (Note: Wi-fi camera

needs to be purchased separately.)

10. New  Guidance line:  

Set new  guidance line by   tapping this  shortcut

button.

11. Autosteering Start / Stop button: 

Tap to start or stop the vehicle. 

12. Status:  

Tap to access the real-time information and current status of

agricultural machines. 

13.   Guidance   line:  

Tap   to   access   the   Guidance   line   detailed   page   for

checking, adding, selecting and deleting guidance line. 

14.   Location   history:  

Click   to   expand   the   historical   operation   data

information,   and   view   the   operation   time,   operation   area,   operation   width,

operation efficiency, historical operation trajectory etc.

15.   Settings:  

Tap   to   access   Parameter   Settings,   RTK   Settings,   Trouble

Checking, System Upgrade, and Version.

16. Vehicle: 

Shows the movement of vehicles in real-time.

©FJ Dynamics Technology Co., Ltd. All rights reserved.

Summary of Contents for FJNBD-2.5RD

Page 1: ...FJDynamics Autosteering Kit Software User Manual FJNBD 2 5RD FJ Dynamics Technology Co Ltd All rights reserved FJ Dynamics Technology Co Ltd All rights reserved ...

Page 2: ... FJ Dynamics Technology Co Ltd All rights reserved ...

Page 3: ...vehicles in the operation area 2 Please stay away from people livestock obstacles electric wires tall buildings airports signal towers etc So as not to interfere with the signal and affect the operation 3 Please work in good weather not extreme weather such as heavy rain heavy fog snow lightning strong wind etc 4 When the kit is under the testing calibration adjustment or automatic steering please...

Page 4: ... in time Others 1 Do not disassemble the product yourself or it will affect the warranty service 2 The equipment damages caused by force majeure lightning strike high voltage collision are not included in the free maintenance service 3 Please connect the device strictly according to the instructions in the manual For cables such as data cables you need to pinch the root of the plug and insert it g...

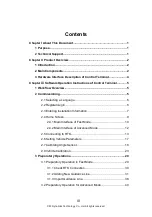
Page 5: ...2 2 Register Login 6 2 3 Entering Installation Information 7 2 4 Home Screen 9 2 4 1 Main Interface of Fast Mode 10 2 4 2 Main Interface of Advanced Mode 12 2 5 Connecting to RTK 13 2 6 Setting Vehicle Parameters 17 2 7 Calibratig Angle Sensor 18 2 8 Vehicle Calibration 23 3 Preparatory Operations 29 3 1 Preparatory Operation in Fast Mode 29 3 1 1 Check RTK Connection 30 3 1 2 Adding New Guidance ...

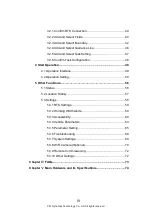
Page 6: ...on Setting 50 5 Other Functions 56 5 1 Status 56 5 2 Location History 57 5 3 Settings 58 5 3 1 RTK Settings 59 5 3 2 Working Width Alerts 60 5 3 3 Accessibility 60 5 3 4 Vehicle Parameters 63 5 3 5 Parameter Setting 65 5 3 6 Troubleshooting 68 5 3 7 System Settings 69 5 3 8 WiFi Camera Optional 70 5 3 9 Remote Commissioning 72 5 3 10 Other Settings 72 Chapter FAQs Ⅳ 73 Chapter Main Hardware and it...

Page 7: ...process is simple and clear so that the user can learn to perform each operation easily quickly and accurately 2 Technical Support Users will be provided with the technical support and upgrade services by FJ Dynamics Technology Co Ltd for a long time from the date of purchase of this product Official website of FJ Dynamics https www fjdynamics com FJ Dynamics Technology Co Ltd All rights reserved ...

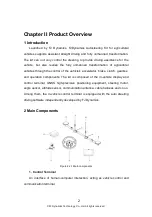
Page 8: ...elerator brake clutch gearbox and operation components The kit is composed of the in vehicle display and control terminal GNSS high precision positioning equipment steering motor angle sensor attitude sensor communication antenna cable harness and so on Among them the in vehicle control terminal is equipped with the auto steering driving software independently developed by FJ Dynamics 2 Main Compo...

Page 9: ...tenna It realizes communication with Portable Base Station RTK Precaution for the Installation of Antenna 1 Do not disassemble the antenna or plugin out the cable when the power is on 2 When installing antennas outdoors proper lightning protection should be taken to prevent lightning strikes 3 During the outdoor installation of the base station equipment the base station host should be waterproofe...

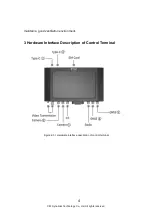
Page 10: ...aintain a good ventilation environment 3 Hardware Interface Description of Control Terminal Figure 2 3 1 Hardware interface description of control terminal FJ Dynamics Technology Co Ltd All rights reserved ...

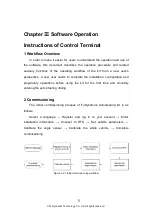
Page 11: ...omplete the installation configuration and preparatory operations before using the kit for the first time and smoothly entering the auto steering driving 2 Commissioning The initial commissioning process of FJDynamics Autosteering kit is as follows Select a language Register and log in to your account Enter installation information Connect to RTK Set vehicle parameters Calibrate the angle sensor C...

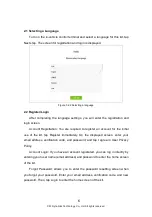
Page 12: ...tial use of the kit tap Register immediately On the displayed screen enter your email address verification code and password and tap I agree in User Privacy Policy Account Login If you have an account registered you can log in directly by entering your user name email address and password to enter the home screen of the kit Forgot Password allows you to enter the password resetting screen when you...

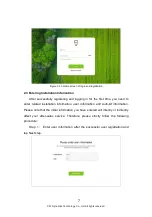
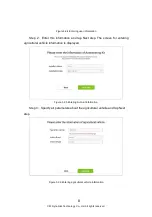
Page 13: ...ed installation information user information and Auto kit information Please note that the initial information you have entered will directly or indirectly affect your after sales service Therefore please strictly follow the following procedure Step 1 Enter user information after the successful user registration and tap Next step FJ Dynamics Technology Co Ltd All rights reserved ...

Page 14: ... screen for entering agricultural vehicle information is displayed Figure 3 2 5 Entering Auto kit information Step 3 Specify all parameters about the agricultural vehicle and tap Next step Figure 3 2 6 Entering agricultural vehicle information FJ Dynamics Technology Co Ltd All rights reserved ...

Page 15: ...arefully according to the actual usage and tap Save The home screen is displayed Fast mode The operation is simpler The task can be started directly after importing the guidance line Advanced mode Upgrade the field management function start the operation after completing the task configuration and have a more systematic management of the field data Note The guidance line used in the advanced mode ...

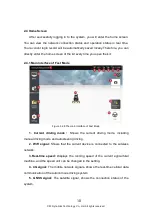
Page 16: ...face of Fast Mode 1 Current driving mode Shows the current driving mode including manual driving mode and autosteering driving 2 WiFi signal Shows that the current device is connected to the wireless network 3 Real time speed Displays the running speed of the current agricultural machine and the speed unit can be changed in the setting 4 4G signal The mobile network signals shows the real time cel...

Page 17: ...ance line Set new guidance line by tapping this shortcut button 11 Autosteering Start Stop button Tap to start or stop the vehicle 12 Status Tap to access the real time information and current status of agricultural machines 13 Guidance line Tap to access the Guidance line detailed page for checking adding selecting and deleting guidance line 14 Location history Click to expand the historical oper...

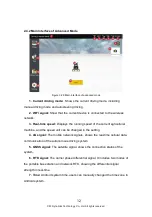
Page 18: ...e and the speed unit can be changed in the setting 4 4G signal The mobile network signals shows the real time cellular data communication of the autonomous driving system 5 GNSS signal The satellite signal shows the connection status of the system 6 RTK signal The carrier phase differential signal It includes two modes of the portable base station and network RTK showing the differential signal st...

Page 19: ...ata information and view the operation time operation area operation width operation efficiency historical operation trajectory etc 13 Settings Tap to access Parameter Settings RTK Settings Trouble Checking System Upgrade and Version 14 Vehicle Shows the movement of vehicles in real time 15 Start task After clicking if the task configuration has been completed it will enter the operation status ot...

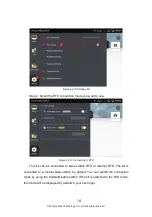
Page 20: ... can be connected to base station RTK or Internet RTK The kit is connected to a mobile base station by default You can switch the connection mode by using the Enable Disable switch If the kit is switched to the RTK mode this mode will be displayed by default in your next login FJ Dynamics Technology Co Ltd All rights reserved ...

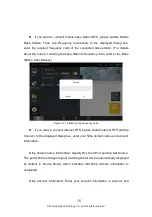
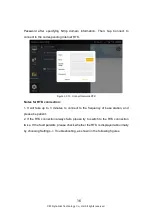
Page 21: ...g the frequency code If you want to connect Internet RTK please enable Internet RTK and tap Connect In the displayed dialog box enter your Ntrip domain name and account information Ntrip domain name information Specify Host and Port and tap Get Source The port with the strongest signal matching the kit will be automatically displayed by default in Source Node which indicates that Ntrip domain info...

Page 22: ... It will take up to 3 minutes to connect to the frequency of base station and please be patient 2 If the RTK connection always fails please try to switch to the RTK connection twice If the fault persists please check whether the RTK is displayed abnormally by choosing Settings Troubleshooting as shown in the following figures FJ Dynamics Technology Co Ltd All rights reserved ...

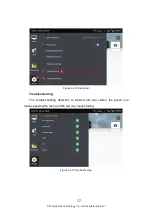
Page 23: ... list Troubleshooting The troubleshooting detection is divided into two states the green one means passing the test and the red one means failing Figure 3 2 15 Troubleshooting FJ Dynamics Technology Co Ltd All rights reserved ...

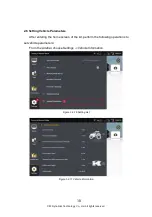
Page 24: ... the home screen of the kit perform the following operations to set vehicle parameters From the sidebar choose Settings Vehicle Information Figure 3 2 16 Setting List Figure 3 2 17 Vehicle information FJ Dynamics Technology Co Ltd All rights reserved ...

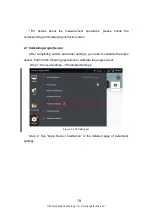
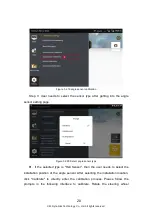
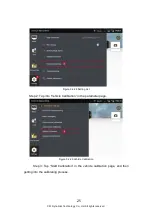
Page 25: ...fter completing vehicle parameter settings you need to calibrate the angle sensor Perform the following operations to calibrate the angle sensor Step 1 Choose Settings Parameter Settings Figure 3 2 18 Setting list Step 2 Tap Angle Sensor Calibration in the detailed page of parameter settings FJ Dynamics Technology Co Ltd All rights reserved ...

Page 26: ...ensor type If the selected type is Hall Sensor then the user needs to select the installation position of the angle sensor After selecting the installation location click Calibrate to directly enter the calibration process Please follow the prompts in the following interface to calibrate Rotate the steering wheel FJ Dynamics Technology Co Ltd All rights reserved ...

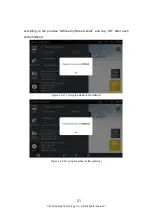
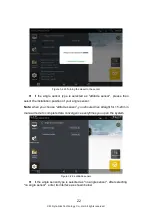
Page 27: ...e process leftmost rightmost center and tap OK after each action finished Figure 3 2 21 Turning the wheel to the leftmost Figure 3 2 22 Turning the wheel to the rightmost FJ Dynamics Technology Co Ltd All rights reserved ...

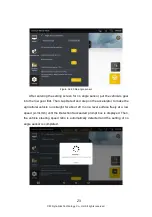
Page 28: ...gle sensor Note when you choose attitude sensor you shoule drive straight for 15 20m in manual mode to complete data convergence everytimes you open the system Figure 3 2 24 attitude sensor If the angle sensor type is selected as no angle sensor after selecting no angle sensor enter its interface as shown below FJ Dynamics Technology Co Ltd All rights reserved ...

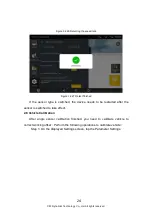
Page 29: ...nd step on the accelerator to make the agricultural vehicle run straight for about 20 m on a level surface freely at a low speed 2 3 km h until the Detection Succeeded prompt box is displayed Then the vehicle steering speed ratio is automatically detected and the setting of no angle sensor is completed FJ Dynamics Technology Co Ltd All rights reserved ...

Page 30: ...d after the sensor is switched to take effect 2 8 Vehicle Calibration After angle sensor calibration finished you need to calibrate vehicle to correct working offset Perform the following operations to calibrate vehicle Step 1 On the displayed Settings screen tap the Parameter Settings FJ Dynamics Technology Co Ltd All rights reserved ...

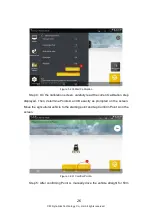
Page 31: ...ap into Vehicle Calibration in the parameter page Figure 3 2 29 Vehicle Calibration Step 3 Tap Start Calibration in the vehicle calibration page and then getting into the calibrating process FJ Dynamics Technology Co Ltd All rights reserved ...

Page 32: ...played Then determine Points A and B exactly as prompted on the screen Move the agricultural vehicle to the starting point and tap Comfirm Point A on the screen Figure 3 2 31 Comfirm Point A Step 5 After confirming Point A manually drive the vehicle straight for 50m FJ Dynamics Technology Co Ltd All rights reserved ...

Page 33: ... 50m based on this value Step 6 After confirming Point B please follow the instructions in Step 3 on the screen to manually turn the vehicle around and make it return to Point B on the guidance line just confirmed with the front end of the vehicle facing Point A After the adjustment is completed tap Start to make the vehicle run to Point A in the auto steering driving mode according to the guidanc...

Page 34: ...driving mode Figure 3 2 34 Stopping auto steering driving Step 8 Manually turn the vehicle around to make it return to Point A on the guidance line with the front end of the vehicle facing Point B Then tap Start to make the vehicle run from Point A to Point B in the auto steering driving mode FJ Dynamics Technology Co Ltd All rights reserved ...

Page 35: ...in the auto steering driving mode tap Stop to stop the current auto steering driving operation Figure 3 2 36 Stop autosteering driving after reaching the point A Step 10 tap Calibrating completed to complete the vehicle calibration and return to the home screen FJ Dynamics Technology Co Ltd All rights reserved ...

Page 36: ...n start to use control terminal for intelligent operations 3 Preparatory Operations 3 1 Preparatory Operation in Fast Mode Confirm RTK connection Add guidance line Import guidance line Start operation Figure 3 3 1 Preparatory operation procedure FJ Dynamics Technology Co Ltd All rights reserved ...

Page 37: ...to the RTK before performing preparatory operations 1 Check whether the current RTK connection mode is correct Figure 3 3 2 RTK Settings 2 Check whether the current RTK connection is stable Figure 3 3 3 Home page FJ Dynamics Technology Co Ltd All rights reserved ...

Page 38: ... save a new guidance line and import the new guidance line to the current operation as follows Linear Mode Step 1 Tap New Guidance Line in the home page to start the procedure for creating a new guidance line Figure 3 3 4 Home Page Or tap the sidebar Guidance Line to expand the guidance line details page and tap Add in the interface on the guidance line details page to start the process of creatin...

Page 39: ...e current position as Point A of the new guidance line After confirming Point A manually drive the vehicle straight for 15 20 m Figure 3 3 6 Confirming Point A Step 3 Brake the vehicle and tap Confirm Point B on the screen of the in vehicle control terminal to determine the current position as Point B on the guidance line FJ Dynamics Technology Co Ltd All rights reserved ...

Page 40: ... and enter the guidance line name in the prompt Then go back to the list of guidance lines after naming the new line And the newly added guidance line will be displayed on the top of the list Figure 3 3 8 Import Guidance Line Curve Mode FJ Dynamics Technology Co Ltd All rights reserved ...

Page 41: ... line Figure 3 3 9 Home Page Or tap the sidebar Guidance Line to expand the guidance line details page and tap Add in the interface on the guidance line details page to start the process of creating a new guidance line Figure 3 3 10 Guidance Line List FJ Dynamics Technology Co Ltd All rights reserved ...

Page 42: ...tch plotting mode to the curve Step 3 After switching to the curve mode please move the vehicle to the starting point of the operation and tap Confirm Point A on the screen to confirm the current position as Point A on the curvilinear guidance line Figure 3 3 12 Confirming Point A FJ Dynamics Technology Co Ltd All rights reserved ...

Page 43: ...ll be a point on another field edge 2 In multi line mode make sure to travel in the same line lengths as the curvilinear guidance line or the route beyond the curvilinear guidance line will gradually tend to a straight line 3 In curvilinear mode after comfirming Point A you cannot directly tap Linear to switch to linear mode Please cancel the plotting before switching the mode Step 5 After confirm...

Page 44: ...s shown in the following figure Figure 3 3 15 Auto working in Curve mode 3 1 3 Import Guidance Line You can directly import the required guidance line from the list of guidance lines to the current operation as follows Step 1 If you have already saved the guidance line before please find out FJ Dynamics Technology Co Ltd All rights reserved ...

Page 45: ...e current operation Figure 3 3 16 Guidance line list If Multi Line Mode is needed please enter into Settings Parameter Settings Working width Alerts to set the working width for the preparatory operation in multi line mode as shown in the following figure Figure 3 3 17 Setting the operating space FJ Dynamics Technology Co Ltd All rights reserved ...

Page 46: ...onfirm task configuration Start operation Figure 3 3 19 Preparatory operation flow chart 3 2 1 Confirm RTK Connection Before preparing the operation please confirm the current RTK connection For the specific operation steps see 3 1 1 Confirm RTK connection 3 2 2 Add and Select Fields Click Task button on the left to enter the task configuration interface First FJ Dynamics Technology Co Ltd All rig...

Page 47: ...figure below Figure 3 3 21 Configure field interface 1 Task configuration items Select the field boundary guidance line and task settings required for the operation Yellow represents the current configuration items Under each item it will display current selection If it has not FJ Dynamics Technology Co Ltd All rights reserved ...

Page 48: ... history data will be deleted after deletion and cannot be restored 7 Modify field information Click to modify the field name farm name and farm owner information 8 Add field Click to add a new field fill in field name farm owner and farm name 9 Run configuration If the task configuration is not completed it is impossible to click after the configuration is completed Click pop up task information ...

Page 49: ...select the boundary required by the operation in the list If the operation does not require a boundary user can select the No boundary option The configuration boundary interface is shown in the figure below Figure 3 3 23 Interface for configuring boundary FJ Dynamics Technology Co Ltd All rights reserved ...

Page 50: ...the recycle bin in 5 3 7 System Settings 3 Modify boundary name Click to modify the selected boundary name 4 Add boundary Click to enter the interface of adding boundary and guidance line Add boundary As shown in the figure below follow the prompts to Click Start Recording button to start driving the agricultural machine around the field edge to record the field boundary Figure 3 3 24 Interface fo...

Page 51: ...tional relationship between the field and the boundary and then save the boundary after filling in Figure 3 3 26 Save boundary interface When the recording is completed and click save if the distance between the beginning and the end of the boundary is less than 10m the system will intelligently complete the remaining boundary FJ Dynamics Technology Co Ltd All rights reserved ...

Page 52: ...record the boundary Table 3 3 1 The processing method for not connecting the beginning and end of boundary Distance x x 10m 10m x 50m 50m x method Intelligent completion boundary Connect the beginning and end of the boundary with straight line Continue recording boundary Diagram 3 2 4 Add and Select Guidance Line Click guidance line item add and select the guidance line required by the operation i...

Page 53: ...ycle bin after deletion For details about the recycle bin please refer to the introduction of the recycle bin in 5 3 7 System Settings 4 Modify the name of the guidance line Click to modify the selected guidance line name 5 Add guidance line Click to enter the interface of adding boundary and guidance line For specific operation steps see 3 1 2 Add guidance line 3 2 5 Add and Select Task Setting C...

Page 54: ...d task setting which cannot be restored after deletion 3 Modify task setting Modify the operation type and operation width of the selected task setting 4 Add task setting Add new task setting which requires filling in the operation type and operation width Figure 3 3 29 Setting interface for adding operation FJ Dynamics Technology Co Ltd All rights reserved ...

Page 55: ...confirmation window will pop up After confirming that the configuration information is correct click OK Click Start button on the homepage to enter the operation interface Figure 3 3 30 Interface for confirming configuration 4 Start Operation 4 1 Operation Interface FJ Dynamics Technology Co Ltd All rights reserved ...

Page 56: ... Real time speed Display the current driving speed of the agricultural machinery the speed unit can be changed in the settings 7 Offset distance The offset distance of the current operation relative to the guidance line is displayed in a real time manner and the offset unit can be changed in the settings 8 End task Click to end the task And user can view the details of this operation in the Histor...

Page 57: ...t Stop at the bottom right corner of the main interface to switch the driving mode Manual driving status The user manually controls the steering wheel to assist straight line operations When driving manually user can perform operations such as shifting the guidance line switching operation modes and marking the boundary Autopilot status Navigation automatically controls the steering wheel to assis...

Page 58: ...ance line in the current multi line mode by taping guidance line shift on the operation screen firstly Specifically you can then set the direction and distance in the current guidance line according to the actual needs Then tap OK to complete the settings after enter the adjusted distance tap Start Continue After shifting the current guidance line please tap Start Continue in the home screen and t...

Page 59: ... adjustment Click Offset fine tuning button in the operation setting the user can shift the current guidance line to the left and right according to the actual operation needs and click to complete an adjustment This operation will adjust the machine calibration parameters synchronously which can be used to quickly solve the problem of inconsistent row operation spacing FJ Dynamics Technology Co L...

Page 60: ...can click multi line mode single line mode in the operation setting to switch the current operation mode If the specific operation mode is easy to be confused please judge the current operation mode status based on the single line multi line interface background of the operation Multi line mode Auxiliary straight line operation under equidistant conditions Single line operation Auxiliary straight ...

Page 61: ...55 Figure 3 4 5 Multi line mode Figure 3 4 6 Single line mode FJ Dynamics Technology Co Ltd All rights reserved ...

Page 62: ...nt operation if you want to use this function drive the vehicle to the field edge and tap Mark the field edge to mark the current position of the vehicle as the field edge 2 The system will provide an alert sound and alert message for careful driving when the vehicle travels 20m away from the marked field edge 3 When the system warns driver you can tap Pause to suspend the current autosteering dri...

Page 63: ...vehicle Real time speed Real time speed of the vehicle Current heading Current heading angle of the vehicle Guidance line heading The heading angle of the AB line Pitching angle the overall pitching angle of the vehicle Rolling angle the overall rolling angle of the vehicle Longitude and latitude The real time latitude and longitude of the vehicle Mode Manual automatic interval such as AB line mis...

Page 64: ...iew the single information of historical operations here including operation time operation width operation area operation efficiency etc 2 Filter the job list Users can filter the operation information by month After the data is filled in click FILTERING to refresh the list 3 Filter the operation list In the Fast Mode users can filter the operation data by the operation time in the advanced mode ...

Page 65: ...The date on the list is the date on which the field was saved not the date of the last job operation 4 The acre and time are cumulative items of historical operations instead of a single data of the latest operation 5 3 Settings Figure 3 5 3 Setting list The user clicks Setting to expand the setting details page and display the setting items FJ Dynamics Technology Co Ltd All rights reserved ...

Page 66: ...l RTK service provider to get the ntrip account information 2 Based on the premise that the above ntrip information is available turn on the network RTK click the connect button to enter your Ntrip information Then tap Connect The system will automatically display a prompt box for you to enter domain name and account information Then tap Get Source to save the connection and finish the RTK setting...

Page 67: ...distance between adjacent guidance lines in multi line mode Speed alert indicates the warning speed preset It allows the system to prompt the driver to manually slow down the vehicle in auto steering driving mode in the case of speeding Offset range alert indicates the warning offset preset for the vehicle in autosteering driving 5 3 3 Accessibility NMEA Turn on the NMEA function to transmit the G...

Page 68: ...hicle display control terminal the T1 port is a USB Type C port if the mobile storage device is a Type A port it is required to purchase a connector converter Figure 3 5 7 Connection diagram of mobile storage device Step 2 Enter the data transfer interface user can export map information FJ Dynamics Technology Co Ltd All rights reserved ...

Page 69: ...ion of the importable format displayed in the interface Figure 3 5 8 Data transfer interface Terrain Compensation If the operation field contains more slopes the terrain compensation can be turned on to achieve a more precise navigation effect Super Low Speed When using the Hall angle sensor the ultra low speed mode can be turned on to ensure the accuracy and stability of the operation at ultra lo...

Page 70: ...ta to complete vehicle parameter settings For specific measurement details please refer to the instruction video Positioning antenna spacing calibration If there is a problem of large and small lines in the multi line mode during the operation the user is required to calibrate the positioning antenna spacing according to the following diagram FJ Dynamics Technology Co Ltd All rights reserved ...

Page 71: ... the offset error displayed on the screen is less than 2 cm stop after the driving distance is not less than 10 meters and mark at the right rear tire position of vehicle confirm the marking line L1 Second driving After marking the marking line L1 turn the vehicle around and continue driving in the reverse direction along the driving route just now When driving to the vicinity of the marking line ...

Page 72: ...he displayed screen you can set Angle Sensor Vehicle Calibration and Calibration of Accessories to ensure operational accuracy Angle Sensor Figure 3 5 11 Angle sensor settings Tap the Angle Sensor Calicration tab in parameter calibration page On the displayed details screen set Angle Sensor Type Installation Position and tap Calibration to calibrate the angle sensor in this position For details se...

Page 73: ...iving path has a offset within 3 cm after the implement is equipped please measure the value If the autodriving path tends to the left comparing to the pre set guidance line please select implement offset to the left and enter the deviation value a and then click OK to save the setting if FJ Dynamics Technology Co Ltd All rights reserved ...

Page 74: ...vehicle to enter the next guidance line when making a turn The larger the value is the shorter adjustment time the process needs However the driving instability is higher Online Aggressiveness affects the linear driving accuracy of the vehicle The smaller the value is the higher the control degree but the instability will increase accordingly For example the possibility of an S turn is greater FJ ...

Page 75: ...libration For detailed operations see section 2 8 Vehicle Calibration in Chapter IV Software Operation Instructions of In vehicle Control Terminal 5 3 6 Troubleshooting Figure 3 5 16 Troubleshooting FJ Dynamics Technology Co Ltd All rights reserved ...

Page 76: ...g operations to achieve a one tap upgrade of the auto steering kit 1 Turn on the in vehicle control terminal of the autosteering kit Make sure that the control terminal can access the Internet through network SIM card WiFi network and that the network status is stable please make sure the 4G antenna is connected properly 2 If there is a new version the system will automatically display a prompt fo...

Page 77: ...ch between Fast Mode and advanced mode here Recycle bin Boundary guidance line and History data deleted within 30 days can be restored in the recycle bin Unit settings User can choose the unit to display as metric or imperial units or define own unit combination based on unit usage habits 5 3 8 WiFi Camera Optional Two WiFi cameras can be connected via hotspot The operation is as follows 1 For the...

Page 78: ...eturn button in the upper left corner to enter the working interface and Click real time video button to open the main interface display 5 Click Switch button to switch the camera Click Full Screen button to maximize the camera interface and click again to restore Click Close to close the camera window in a real time manner FJ Dynamics Technology Co Ltd All rights reserved ...

Page 79: ...mote debugging function which should use with the background control program to realize the remote control screen function user should turn on the remote debugging switch in the settings Figure 3 5 20 Remote commissioning FJ Dynamics Technology Co Ltd All rights reserved ...

Page 80: ...ition to Parameter Settings RTK settings and Troubleshooting the Settings screen allows setting and querying other general information such as Volume Brightness and device information FJ Dynamics Technology Co Ltd All rights reserved ...

Page 81: ...correctly Check whether the GNSS antenna installation connector is correct Re calibrate the angle sensor on the Settings screen 3 No 4G signal Check if the SIM card is inserted Check if the 4G antenna is connected properly 4 No RTK signal When the mobile base station is connected please check whether the base station is powered used normally When the Internet RTK is connected please verify that 4G...

Page 82: ...ontrol Terminal Control Terminal Size 300 190 43mm 10 1 inch capacitive touch screen LED backlight 1280 800 pixels 700cd m2 LCD Dual speaker 2G RAM 8G ROM Various digital and analog output interfaces etc Power supply 10 30V RF signal Positioning satellite and 4G signal etc Operating temperature 30 70 Storage temperature 40 85 IP rating IP65 Relative Humidity 0 to 95 40 non condensation FJ Dynamics...

Page 83: ...G Antenna Suction cup antenna Frequency range B1 B2 B3 B5 B8 B38 B39 B40 B41 VSWR 2 0 Gain dBi 2 0 5 Impedance Ω 50 Polarization Linear Vertical Antenna size Ф370 82mm Operating temperature 20 60 4 Radio Antenna Suction cup antenna Frequency range 433 470MHz VSWR 2 0 Gain dBi 1 0 5 Impedance Ω 50 Polarization Linear Vertical Antenna size Ф490 82mm Operating temperature 20 60 5 IMU IMU Power input ...

Page 84: ...upply 5V Update frequency typical 3 4KHz Resolution 0 1 IP rating IP67 Operating temperature 40 85 7 Electric Steering Wheel Steering Wheel Power supply 12V 24V Peak torque 20Nm 12V 30Nm 24V IP rating IP65 8 Steering Motor 12V 24V Power supply 12V 24V Peak torque 20Nm 12V 30Nm 24V IP rating IP65 FJ Dynamics Technology Co Ltd All rights reserved ...

Reviews: