37
7.8
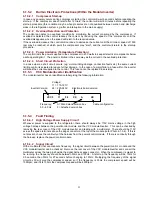
Removal Of Display Module
1. Unplug the refrigerator from the power supply.
2. Remove all PC shelving.
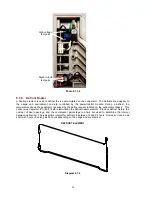
3. Remove bottom PC air duct cover.
4. Remove polystyrene duct cover insulation.
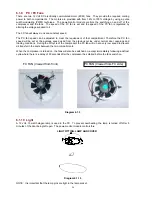
5. Disconnect low ambient heater – “T” model only.
6. Remove 1 screw from top duct cover and unclip – “T” model only.
7. Compress clips on display module and release it from the top duct cover.
8. Unplug the 5 and 3 way edge connectors from the display module.
9. Refit in reverse order.
7.9 Thermal
Fuse
This is part of the element assembly and is to be replaced as part of the defrost heater element assembly.
Having a tripping temperature of 72
o
C (162
o
F), they are not resettable.
7.10 Replacement Of Interior Lamp
1. Unplug the refrigerator from the power supply.
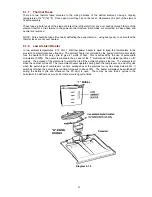
2. Remove the lens cover with the aid of a small flat bladed screwdriver.
3. Remove the faulty lamp.
4. With the protective wrapper still covering the new lamp, fit it into the holder.
5. Cut the wrapper from the lamp.
Avoid handling of the new lamp as this will shorten the life of the
new lamp.
6. Refit the lens cover and test.
NB: Only a 12 volt 10 watt halogen lamp should be fitted. It is important that the lamp terminal is tight in the
lamp socket.
Diagram 7.10
7.11 Replacement Of Low Ambient Heater - “T”
Model
1. Unplug the refrigerator from the power supply.
2. Remove all PC shelving.
3. Remove bottom PC air duct cover.
4. Remove polystyrene duct cover insulation.
5. Disconnect low ambient heater.
6. Refit in reverse order.
Summary of Contents for 790 Active Smart
Page 1: ...790 ACTIVE SMART REFRIGERATOR FREEZER 517800...
Page 2: ...2...
Page 42: ...42 8 WIRING DIAGRAM...


