- 9 -
Switching On/Off
To Switch the TV On
Connect the power cord to the 220-240V AC, 50
•
Hz.
Press STANDBY touch button. Then the standby
•
LED lights up.
To switch the TV on from standby mode either:
•
Press the “
•
” button,
P+ / P-
or a numeric button
on the remote control.
Press the
•
-P/CH
or
P/CH+
touch button on the TV.
The TV will then switch on.
Note: If you switch on your TV via PROGRAMME
UP/DOWN buttons on the remote control or on the
TV set, the programme that you were watching last
will be reselected.
Note: The standby light will blink while the TV is
powering up from Standby mode.
To Switch the TV Off
Press the “
•
” button on the remote control or press
the STANDBY touch button on the TV, so the TV will
switch to standby mode.
To power down the TV completely, unplug the power
•
cord from the mains socket.
Note: When the TV is switched to standby mode,
standby LED can blink to indicate that features such
as Standby Search, Over Air Download or Timer is
active. The LED can also blink when you switch on
the TV from standby mode.
First Time Installation
IMPORTANT: Ensure that the aerial is connected
and a Common Interface module is not inserted
before switching on the TV for the first time
installation.
When the TV is operated for the
fi
rst time, the
•
installation wizard will guide you through the
process. First, the language selection screen will
be displayed:
Use “
•
” or “ ” buttons to select your language
and press
OK
button to set selected language and
continue.
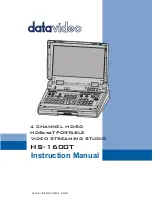
After selecting the language, “
•
Welcome!
” screen will
be displayed, requiring you to set
Country, Teletext
Language
and
Scan Encrypted
options.
By pressing “
•
” or “ ” button, select the
country
you want to set and press “ ” button to highlight
Teletext Language
option. Use “ ” or “ ” button
to select desired Teletext Language.
Press “
•
” button after setting Teletext Language
option.
Scan Encrypted
will be then highlighted.
You can set
Scan Encrypted
as
Yes
if you want to
scan coded stations. Afterwards select the desired
Teletext Language.
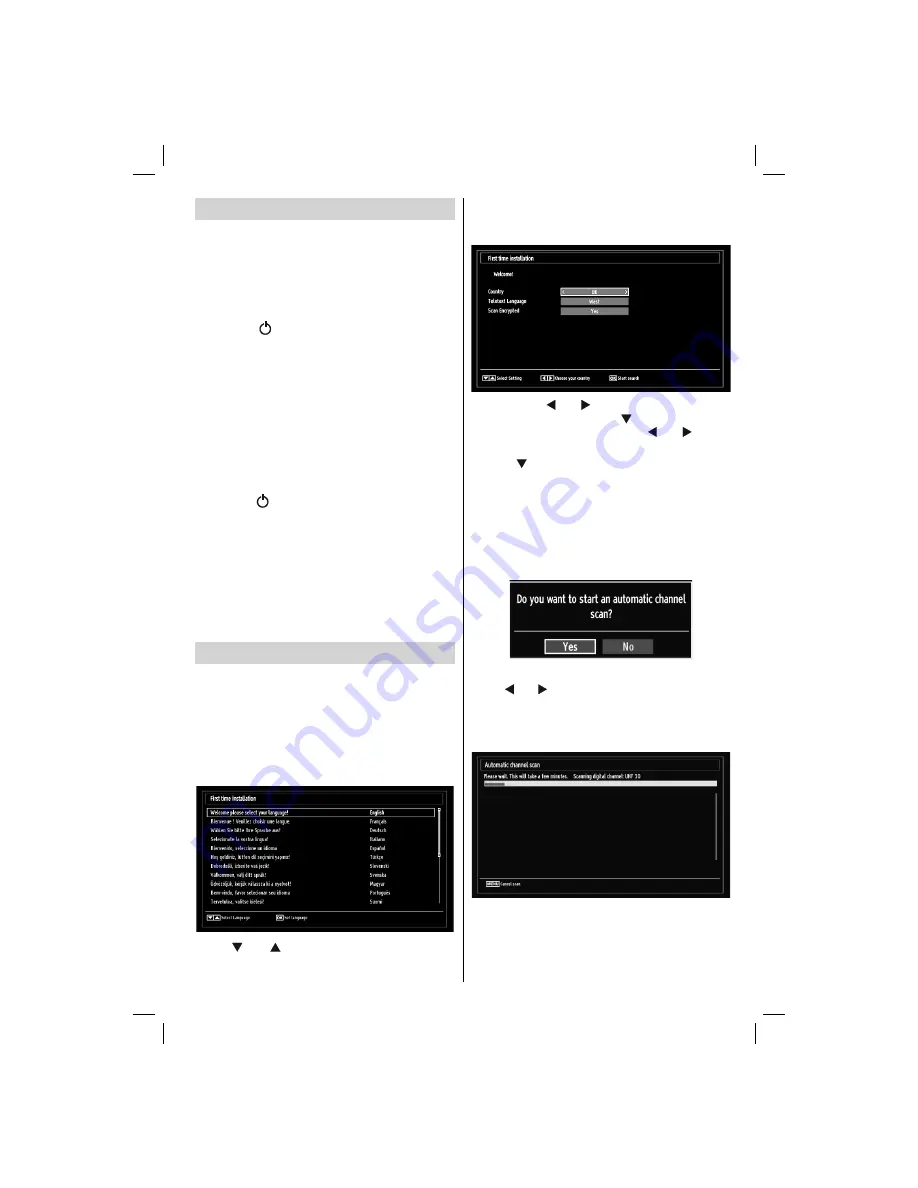
Press
•
OK
button on the remote control to continue
and the following message will be displayed on the
screen:
To select the “Yes” or “No” option, highlight the item by
using “ ” or “ ” buttons and press
OK
button.
Afterwards, the following OSD will be displayed on
the screen and the television will search for digital
and analogue TV broadcasts.
Note: You can press
“MENU”
button to cancel.
01_MB65_[GB]_IDTV_PVR_PLATINIUM7_5110UK_40965WLED_10074751_50197610.indd 9
01_MB65_[GB]_IDTV_PVR_PLATINIUM7_5110UK_40965WLED_10074751_50197610.indd 9
07.09.2011 14:30:08
07.09.2011 14:30:08