


12
EN
After running-in, the same piece may easily be cut in
about 2 minutes. If the running-in process is done correctly,
the finish and precision of the cut will be of better quality
and the blade will last longer.
4.2
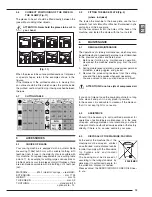
WORKING (Fig. 7)
Turn the main switch
D
to position
1
: in doing the switch
comes on and the machine is ready for operation.
ATTENTION: Before starting any cutting
operation, check that all the protections are
complete and in the correct position.
Once you have completed all the procedures and operations
described so far, you may start the working processes.
To perform the cut, move to the front of the machine and
grip the handgrip with your right hand.
ATTENTION: Keep your left hand away from the
cutting area and on no account try to reach it
when cutting is in process.
Use your right-hand thumb to press the side release button
B (Fig. 7)
: as such you will disable the safety system
that prevents any unintentional starts. Then use your right-
hand forefinger to press start button A and lower the body
gradually until the blade lightly touches the work piece to
be cut.
Now begin to apply gradual pressure on the part and
complete the cut.
ATTENTION: Always release button
A
between
one cutting operation and another, while you
are positioning the part. do not try to block it
or alter its functional characteristics in any
way.
If the machine suddenly stops after numerous
consecutive cuts, do not be alarmed. The heat protector
device of the motor has been activated, breaking the
power supply when the temperature of the coils
reaches the threshold limit defined by the insulation
class, to prevent damage to the motor.
In this case, release the button A and wait for automatic
reset which usually takes place after a few minutes.
Your sawing machine is equipped with an electronic
speed governor which also includes a motor
protection function obtained by means of an
amperometric limiter. In this way it can not absorb an
amount of current greater than the set one, expressed
by the maximum value of absorption (see 2.5).
If the limiter trips while the machine is in operation,
slightly decrease the cutting pressure in addition,
this enables to safeguard the blade life and
performance and to obtain always a sharp and clean
cut.
4.3
REPLACING THE BLADE (Fig. 9)
CAUTION: When you perform this operation,
always wear protective gloves to avoid contact
with the teeth of the blade.
- check that the main switch
D (Fig. 7)
is at position
0
;
- slacken the handles
Q
and slide the blades guide
P
as far
as it will go, following the direction on the arrow
(Fig. 8)
;
- remove the protective casing unscrewing the four screws;
- slacken the blade tension, turning the handwheel
B
in a
anti-clockwise direction
(Fig. 4)
;
- extract the blade first from the guides and then from the
rubber coated pulleys;
- insert the new blade first between the guides and then
onto the rubber coated pulleys,
with the teeth facing as
showed in (Fig. 9)
;
- put the blade under tension again as described in point
3.1.
- replace the protective casing;
- reposition the blade guides
P
in the correct position for
the next cut.
ATTENTION: This machine has been developed
for working with the blade rotating clockwise
(Fig. 9).
It is absolutely necessary to check that the blade
is produced according to this rotation mode.
4.4
CUTTING CAPACITY (Fig.10)
The table below specifies the cutting capacity at 0, 45
degrees which may be obtained in normal conditions of
use described in this manual and without placing any other
object between the jaws of the clamp.
0° = Ø 150 mm; 150 mm; 160x140 mm
45° = Ø 100 mm; 100 mm; 120x110 mm
4.5
USING THE VICE (Fig. 1)
The chuck of the saw is of the quick sliding type so that
the slider easily and rapidly approaches the pieces to be
locked.
To lock the piece to be cut in the chuck:
•
place yourself in front of the machine;
•
release the lever
3
towards the piece to be cut by
unlocking vice part
13
•
position the slider at a few millimetres from the
piece to be cut;
•
move the
3
towards the piece and lock it;
•
turn lever
12
clockwise so as to definitely lock the
piece between the jaws.
If more pieces of the same bar are to be cut, you only
need to unlock and then re-lock the chuck by means of
lever
12
.
If you need, instead, to change the bar, turn the lever
12
counterclockwise to unlock the chuck and then pull lever
3
towards you so that the slider moves away from the piece.


