background image

 Indicators and Controls

BOMAG

21

BPR 70/70 D

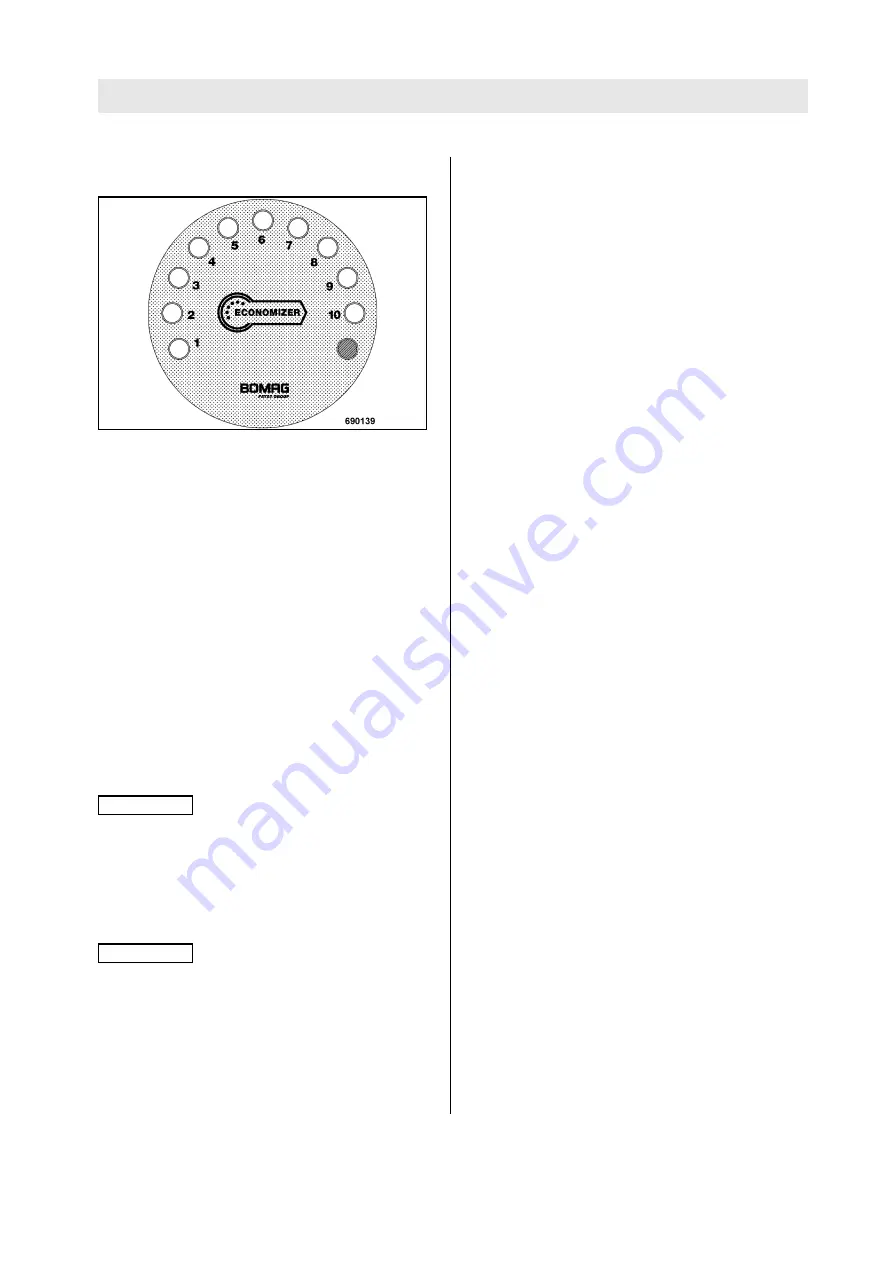
Evaluation and display module

Fig. 15

The yellow LEDs represent the measuring value
from the compaction control in 10 stages.

The brightness of the respective last LED varies in
order to show intermediate values (example: 4,5:
four LEDs are fully on, the fifth LED lights with re-
duced brightness).

The red LED informs about the system status.

Acceleration sensor

The sensor consists of a sensor element, which is
enclosed in a sensor housing, and a connecting
cable with plug-in connector. Actual sensor, hous-
ing, cable and plug-in connector come as a unit,
which cannot be repaired on its own.

The unit is mounted to the base plate of the ma-
chine.

i

Note

The Economizer is maintenance free.

Do not clean the front screen with hard objects!
The material may be destroyed. Possibly disturb-
ing scratches can be removed by polishing, e.g.
with lacquer polish.

i

Note

Vibrating plates of the same type show identical
measuring values when used on the same soil.

The measuring values achieved with different vi-
bratory plates with Economizer from BOMAG can
be made comparable by calibration to a reference
value.

Go to

Discount-Equipment.com 

to

order your parts

Summary of Contents for Bomag BPR 70/70 D

Page 1: ...nstructions Original operating instructions Catalogue No 008 067 61 10 2010 BPR 70 70 D S N 101 692 26 Reversible Vibrating Plate www discount equipment com G o t o D i s c o u n t E q u i p m e n t c...

Page 2: ...e needs We sell worldwide for the brands Genie Terex JLG MultiQuip Mikasa Essick Whiteman Mayco Toro Stone Diamond Products Generac Magnum Airman Haulotte Barreto Power Blanket Nifty Lift Atlas Copco...

Page 3: ...G o t o D i s c o u n t E q u i p m e n t c o m t o o r d e r y o u r p a r t s...

Page 4: ...note This manual was written for operators and mainte nance personnel on construction sites You should only operate the machine after you have been instructed and in compliance with these instruction...

Page 5: ...t the above data together with the com missioning protocol During commissioning our organisation will in struct you in the operation and maintenance of the machine Please observe strictly the safety r...

Page 6: ...Fuels and lubricants 39 5 3 Table of fuels and lubricants 41 5 4 Running in instructions 42 5 5 Maintenance table 43 5 6 Cleaning the machine 45 5 7 Check the engine oil level 45 5 8 Checking the fuel...

Page 7: ...5 23 Check clean the dry air filter 63 5 24 Tightening the screws 64 5 25 Engine conservation 65 Trouble shooting 67 6 1 General notes 68 6 2 Engine problems 69 6 3 Trouble shooting Economizer 72 G o...

Page 8: ...BOMAG 7 BPR 70 70 D 1 Technical Data G o t o D i s c o u n t E q u i p m e n t c o m t o o r d e r y o u r p a r t s...

Page 9: ...t CECE W1 kg 579 Operating weight CECE W2 kg 595 Basic weight kg 570 Travel characteristics Working speed max m min 28 Max gradability depending on soil 35 Drive Engine manufacturer Hatz Type 1D 81 Co...

Page 10: ...tem Frequency Hz 68 Centrifugal force kN 70 Filling capacities Fuel tank diesel l 10 Engine oil l 1 9 The right for technical modifications remains reserved BPR 70 70 D G o t o D i s c o u n t E q u i...

Page 11: ...ressure level on the place of the operator LpA 95 dB A determined acc to ISO 11204 and EN 500 Guaranteed sound power level LWA 109 dB A determined acc to ISO 3744 and EN 500 Danger Loss of hearing Wea...

Page 12: ...BOMAG 11 BPR 70 70 D 2 Safety regulations G o t o D i s c o u n t E q u i p m e n t c o m t o o r d e r y o u r p a r t s...

Page 13: ...e is the sole re sponsibility of the customer or driver operator the manufacturer cannot be made liable Examples for unintended use are l Dragging the machine along as a measure of transportation l Th...

Page 14: ...hs marked like this contain technical in formation for the optimal economical use of the machine Environment Paragraphs marked like this point out practic es for safe and environmental disposal of fue...

Page 15: ...alified and authorized persons Keep unauthorized persons away from the ma chine Do not perform maintenance work while the motor is running Park the machine on level firm ground Pull the key out of the...

Page 16: ...s es Dispose of old batteries according to regulations Working on the fuel system Avoid open fire do not smoke do not spill any fuel Catch running out fuel do not let it seep into the ground and dispo...

Page 17: ...l 4 Maintenance sticker 5 Operation sticker Throttle lever 6 Information sticker Guaranteed sound capac ity level 7 Operation sticker Travel lever 8 Instruction sticker Wear ear defenders 9 Brief oper...

Page 18: ...BOMAG 17 BPR 70 70 D 3 Indicators and Controls G o t o D i s c o u n t E q u i p m e n t c o m t o o r d e r y o u r p a r t s...

Page 19: ...are described in detail hereunder Paragraph 4 Operation contains only concise de scriptions of the individual operating steps 3 2 Description of indicators and control elements Fig 6 No 1 Steering ro...

Page 20: ...on warning buzzer on Position II Engine starts warning buzzer off Fig 11 No 10 Fuse 25 A i Note Only machines with electric starter Caution Always cover the fuse with the protective cov er Machines wi...

Page 21: ...egrat ed in the maintenance flap within the opera tor s view It shows the measuring value measured by the compaction control l The acceleration sensor is fastened to the base plate It converts the acc...

Page 22: ...plug in connector Actual sensor hous ing cable and plug in connector come as a unit which cannot be repaired on its own The unit is mounted to the base plate of the ma chine i Note The Economizer is m...

Page 23: ...Indicators and Controls BOMAG 22 BPR 70 70 D G o t o D i s c o u n t E q u i p m e n t c o m t o o r d e r y o u r p a r t s...

Page 24: ...BOMAG 23 BPR 70 70 D 4 Operation G o t o D i s c o u n t E q u i p m e n t c o m t o o r d e r y o u r p a r t s...

Page 25: ...ch working day or before a longer working period Danger Danger of accident Please observe strictly the safety regulations in chapter 2 of this instruction manual l Park the machine on ground as level...

Page 26: ...if the fuel tank has been driven empty the fuel shut off valve must be opened manually Caution The low oil level safety device does not release the operator from his duty to check the oil level every...

Page 27: ...starting operation Fig 18 l Set the throttle lever Fig 18 to position MAX Fig 19 l Turn the ignition key to position I Fig 19 the warning buzzer sounds l Then turn the ignition key further to position...

Page 28: ...ake off the vi bration damping mat l Check insulation mats brackets and screw connections replace if necessary Fig 22 l Join the plus poles on external battery and starter battery with the jump wire F...

Page 29: ...osition I the battery is charged when the engine is running as long the battery charge level is at least 9 V Fig 24 l Pull the decompression lever Fig 24 in direc tion of arrow to the end stop The com...

Page 30: ...ition after five revolutions the highest speed must be reached i Note If the engine does not start repeat the starting process In case of incorrect operation and repeated start ing the decompression l...

Page 31: ...osition and lift height the mean val ue indicated during the last pass is decisive l The displayed value rises when changing the travel direction the effective force applied to the soil by the vibrato...

Page 32: ...er of accident Operate the machine only with the steering rod folded down Guide the machine only by the steering rod Caution Operate the vibratory plate only in one of the three possible engine speed...

Page 33: ...be guided from the side by the steering handle Fig 34 l Press the upper part of the travel lever tip switch Fig 34 until the vibratory plate has reached the desired reverse travel speed The machines...

Page 34: ...ackwards to forward travel 4 11 Stopping the vibratory plate shutting down the en gine Fig 37 l Operate the travel lever tip switch Fig 37 until the vibratory plate vibrates on the spot Caution Do not...

Page 35: ...that it is secured against rolling sliding and turning over For lifting the machine attach the lifting gear only to the lifting hook Check lifting eye for damage before use Do not use a damaged or in...

Page 36: ...e Fig 43 on a transport vehicle Danger Danger of accident Minimum lifting capacity of lifting gear see op erating weight in chapter Technical Data Danger Danger of accident Tie the machine down on the...

Page 37: ...Operation BOMAG 36 BPR 70 70 D G o t o D i s c o u n t E q u i p m e n t c o m t o o r d e r y o u r p a r t s...

Page 38: ...BOMAG 37 BPR 70 70 D 5 Maintenance G o t o D i s c o u n t E q u i p m e n t c o m t o o r d e r y o u r p a r t s...

Page 39: ...mage the injection elements of the engine l Drums with inside zinc lining are not suitable to store fuel l Keep used filters in a separate waste contain er and dispose of environmentally l The fuel dr...

Page 40: ...lass CC SE the oil change intervals must be shortened Lubrication oil change intervals API CD CE CF CF 4 CG 4 250 operating hours ACEA B2 E2 250 operating hours i Note When changing to a higher alloye...

Page 41: ...BOMAG 40 BPR 70 70 D according to ISO 6743 3 The viscosity index VI must be at least 150 Observe the information of the manufacturer G o t o D i s c o u n t E q u i p m e n t c o m t o o r d e r y o u...

Page 42: ...C to 35 C SAE 5W 40 5 C to 45 C SAE 10W 30 5 C to 35 C SAE 10W 40 5 C to 45 C SAE 10W 40 0 C to 40 C SAE 30 15 C to 30 C SAE 10W 5 C to 5 C SAE 40 20 C to 35 C Fuel Diesel Winter diesel fuel 10 l 12...

Page 43: ...the oil consumption will drop to the normal level after approx 100 to 200 operating hours After 25 operating hours l Change the engine oil l Check engine and machine for leaks l Check the valve cleara...

Page 44: ...4 Check adjust the valve clearance X 5 15 Check the oil level in the exciter housing X 5 16 Change the engine oil at least every 250 operat ing hours X 5 17 Change the engine oil filter at least every...

Page 45: ...Maintenance BOMAG 44 BPR 70 70 D G o t o D i s c o u n t E q u i p m e n t c o m t o o r d e r y o u r p a r t s...

Page 46: ...eck the engine oil level i Note Park the machine on level ground so that the en gine is in horizontal position Fig 47 l Shut down the engine l Open the rear rubber cover l Pull the dipstick Fig 47 out...

Page 47: ...Close the fuel tank again tightly i Note If the tank was completely empty the mechanical oil pressure monitoring device must be activated See section Operating the low oil level safety de vice 5 9 Che...

Page 48: ...llows dry air filter o k Fig 50 contracted rubber bellows clean dry air filter l Before cleaning pull the rubber bellows up and start the engine i Note If the rubber bellows is contracted again clean...

Page 49: ...Maintenance every day BOMAG 48 BPR 70 70 D G o t o D i s c o u n t E q u i p m e n t c o m t o o r d e r y o u r p a r t s...

Page 50: ...m all cooling fins and cooling air intake openings and blow it off with compressed air Danger Fire hazard Do not use any inflammable solvents Caution Do not guide the water jet directly into the cooli...

Page 51: ...Note For this work the fuel tank should contain only a lit tle quantity of fuel Fig 52 l Unscrew the drain plug Fig 52 underneath the fuel tank drain off fuel and catch it l Once all fuel has run out...

Page 52: ...54 l Remove the vibration damper mat Non maintenance free batteries l Clean battery and battery compartment l Open plugs and check the acid level With control inserts l Check whether the acid level re...

Page 53: ...he valve clearance Caution Check and adjust only when the engine is cold The gasket for the cylinder head cover must be generally renewed Checking the valve clearance Fig 56 l Decompression lever 1 Fi...

Page 54: ...head cover with a new gasket l After a short test run check the valve cover for leaks 5 15 Check the oil level in the vi brator housing i Note Park the machine on level ground l Clean the area around...

Page 55: ...Maintenance every 6 months BOMAG 54 BPR 70 70 D G o t o D i s c o u n t E q u i p m e n t c o m t o o r d e r y o u r p a r t s...

Page 56: ...the machine on level ground so that the engine is in horizontal position Fig 61 l Pull the dipstick Fig 61 out i Note Clean the drain hose from dust and dirt Fig 62 l Unscrew the drain plug Fig 62 and...

Page 57: ...Catch running out oil and dispose of environ mentally together with the engine oil filter car tridge Fig 65 l Unscrew the cover Fig 65 l Wipe the sealing face on the engine clean l Insert the new fil...

Page 58: ...ving the flow direction l Fill the fuel tank again i Note If the tank was completely empty the mechanical oil pressure monitoring device must be activated See section Operating the low oil level safet...

Page 59: ...l refer to the table of fuels and lubricants l Clean level plug 1 and screw in with Omnifit FD 10 BOMAG PIN 00970016 l Screw vent plug 2 tightly back in 5 20 Check the rubber buffers Fig 69 l Check al...

Page 60: ...measurement approx 10 30 mm Caution Replace a damaged V belt The V belt cannot be tightened manually Al ways replace the V belt if the compression measurement is exceeded Changing the V belt Fig 72 l...

Page 61: ...Maintenance every year BOMAG 60 BPR 70 70 D G o t o D i s c o u n t E q u i p m e n t c o m t o o r d e r y o u r p a r t s...

Page 62: ...ironment Catch running out oil and dispose of environ mentally together with the filter Fig 73 l Loosen the engine hood fastening 1 Fig 73 on both sides and remove the hood fastenings on both sides l...

Page 63: ...d Fig 78 l Fasten the connecting flange Fig 78 with a new gasket on the hydraulic oil tank tightening torque 13 Nm Fig 79 l Fill in new hydraulic oil Fig 79 l Check the oil level in the inspection gla...

Page 64: ...come ineffective because of damage e g cracks and cause damage to the engine In case of wet or oily dirt replace the filter ele ment Fig 80 l Unscrew the wing nut for cover 1 Fig 80 and take off the...

Page 65: ...Strength classes for screws with untreated non lubricated surfaces The quality designations are stamped on the screw heads 8 8 8 G 10 9 10 K 12 9 12 K The values result in a 90 utilization of the scre...

Page 66: ...he cylinder head cover off spray the rocker chamber with a mixture of diesel fuel and 10 anti corrosion oil Then fasten the cover again l Crank the engine several times to spray the combustion chamber...

Page 67: ...As required BOMAG 66 BPR 70 70 D G o t o D i s c o u n t E q u i p m e n t c o m t o o r d e r y o u r p a r t s...

Page 68: ...BOMAG 67 BPR 70 70 D 6 Trouble shooting G o t o D i s c o u n t E q u i p m e n t c o m t o o r d e r y o u r p a r t s...

Page 69: ...a fault occurs you should there fore thoroughly read these instruction on correct operation and maintenance If you cannot locate the cause of a fault or rectify it yourself by following the trouble sh...

Page 70: ...hop manual additionally on engines with mechanical oil pressure moni toring no oil pressure Check oil level Activate mechanical oil pressure monitor ing With low tem peratures Temperature below starti...

Page 71: ...pty Fill in fuel Fuel filter clogged Replace the fuel filter The mechanical oil pressure monitoring shuts the engine down because of a lack off oil Check the oil level activate the oil pres sure monit...

Page 72: ...the top mark on the dipstick Insufficient cooling Dirt in the entire area of the cooling air flow Clean the cooling air duct Air guide plates not completely closed Check air guide plates for completen...

Page 73: ...y detected Engine not running Plug in connector defective Sensor cable defective Status LED flashing Frequency detected but outside permis sible range Engine speed too low Vibration frequency too low...

Page 74: ...e needs We sell worldwide for the brands Genie Terex JLG MultiQuip Mikasa Essick Whiteman Mayco Toro Stone Diamond Products Generac Magnum Airman Haulotte Barreto Power Blanket Nifty Lift Atlas Copco...

Reviews: