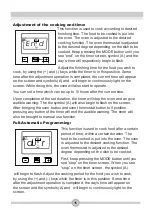


A cooking period between the time range of 0 and 10 hours
can be set.
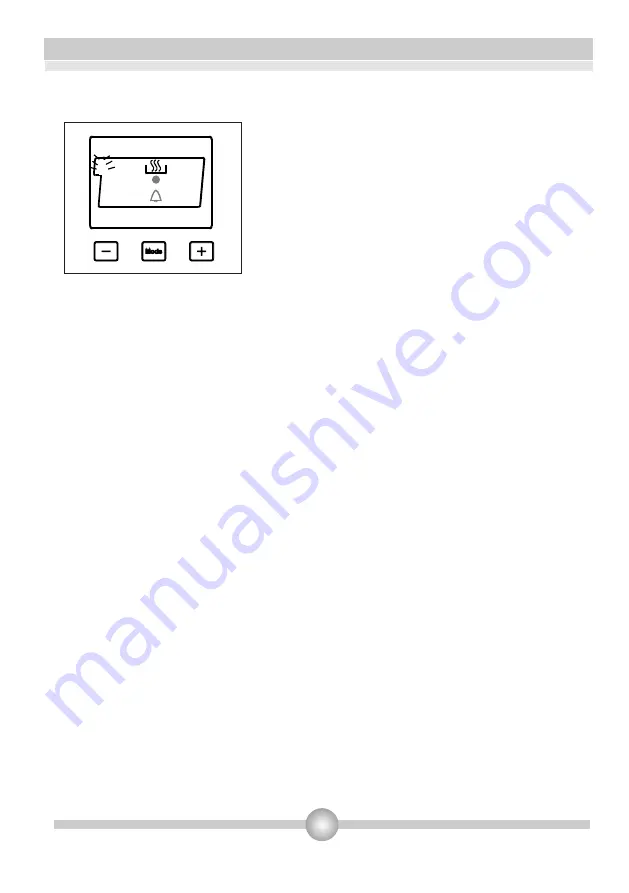
A
En d
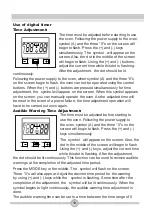
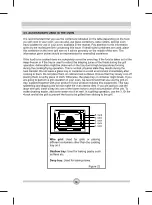
Second, keep pressing the MODE button until
you see “end” on the timer screen. When you
see “end” on the timer screen, the symbol (A)
and the cooking end time begin to flash. Adjust
the finishing time for the food by using the (+)
and (-) keys while the timer is in this position.
Some time after the adjustment operation is
completed, the day’s current time will appear on
the screen and the symbol (A) will begin to light
continuously on the screen.
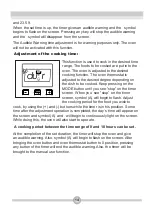
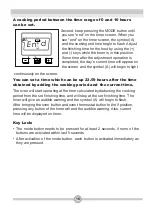
You can set a time which can be up 23.59 hours after the time
obtained by adding the cooking period and the current time.
The oven will start operating at the time calculated by deducting the cooking
period from the set finishing time, and will stop at the set finishing time. The
timer will give an audible warning and the symbol (A) will begin to flash.
After bringing the oven button and oven thermostat button to the 0 position,
pressing any button of the timer will end the audible warning. Also, current
time will be displayed on timer.
Key Lock:
•
The mode button needs to be pressed for at least 2 seconds, if none of the
buttons are activated within last 5 seconds.
•
After activation of the mode button, each button is activated immediately as
they are pressed.
16
Summary of Contents for 22 J LUX
Page 1: ...MK КОМБИНИРАН ПЛОТ УПАТСТВО ЗА УПОТРЕБА ...
Page 2: ...26 FAVORIT ...
Page 26: ......
Page 51: ......
Page 77: ...52211189 ...
Page 78: ...22 J LUX EN ...
Page 79: ......
Page 80: ......
Page 81: ......
Page 86: ......
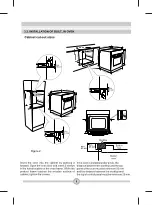
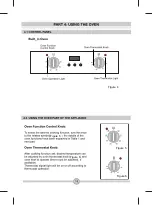
Page 87: ...Figure 2 ...
Page 88: ...Figure 3 3 ...
Page 89: ...50 200 Max 250 100 150 50 200 Max 250 100 150 Figure 4 Figure 5 Figure 6 Figure 5 Figure 6 ...
Page 96: ...17 ...
Page 97: ...18 ...
Page 98: ...19 ...
Page 99: ...20 ...
Page 100: ...21 ...
Page 101: ...22 ...
Page 102: ......
Page 103: ...MK 22 J LUX ...
Page 104: ......
Page 105: ......
Page 106: ......
Page 107: ......
Page 108: ......
Page 109: ......
Page 110: ......
Page 111: ......
Page 113: ...3 3 ...
Page 114: ...50 200 Max 250 100 150 50 200 Max 250 100 150 4 5 6 5 6 ...
Page 115: ......
Page 121: ...17 ...
Page 122: ...18 ...
Page 123: ...19 ...
Page 124: ...20 ...
Page 125: ...21 ...
Page 126: ...22 22 J LUX ...
Page 127: ...SR 22 J LUX ...
Page 128: ......
Page 129: ......
Page 130: ......
Page 134: ...1 ...
Page 136: ...Slika 3 3 ...
Page 137: ...50 200 Max 250 100 150 50 200 Max 250 100 150 Slika 4 Slika 5 Slika 6 Slika 4 Slika 5 ...
Page 138: ...1ϭ 4 KORIŠÆENJE PROIZVODA Funkcije rerne ...
Page 146: ...19 ...
Page 147: ...20 ...
Page 148: ...Slika 7 21 ...
Page 149: ...22 ...
Page 150: ...23 ...
Page 151: ...24 ...
Page 152: ...52209666 ...


