Montage- und Betriebsanleitung
Fastrax
1/4” Tag/Nacht HighSpeed All-In-One Domekamera
EDCH-144E/C, EDCH-142E/C
Installation and Operating Manual
1/4” Day&Night HighSpeed All-In-One Dome Camera
Page 1: ...d Betriebsanleitung Fastrax 1 4 Tag Nacht HighSpeed All In One Domekamera EDCH 144E C EDCH 142E C Installation and Operating Manual Fastrax 1 4 Day Night HighSpeed All In One Dome Camera EDCH 144E C E...
Page 2: ...Netzsynchronisation 18 Nachtaufzeichnungen 18 3 13 Kamera 22x Modell 19 Fokussteuerung 19 Wei abgleich 19 Automatische Belichtungssteuerung 20 Netzsynchronisation 20 Nachtaufzeichnungen 21 3 14 Einste...
Page 3: ...of Preset Program 40 3 7 Tour 40 3 8 Pattern 41 3 9 Alarm 42 3 10 Area Title 42 3 11 Privacy Zone 43 3 12 Camera 26x Model 44 Focus Control 44 WB Control White Balance 44 AE Control 45 Line Lock Contr...
Page 4: ...l ausgef hrt werden Vor ffnen des Geh uses ist eine Netztrennung erforderlich Das Ger t darf nur von qualifiziertem Servicepersonal ge ffnet werden Fremdeingriffe beenden jeden Garantieanspruch Verwen...
Page 5: ...Typical System Configuration Sensor oder bis zu 99 DVRs bis zu 255 Multiplexer Alarmeingang bis zu 4 Alarm ausgang Blinklicht Verbindungsbox bis zu 32 Kameras Bedienger t...
Page 6: ...der das Gewicht des Montagekits sowie der AIO tragen kann Bei der Anbringung an Gipsw nde wird die Verwendung einer festen R ckplatte empfohlen 1 Entfernen Sie das Schutzpolster und das Klebeband von...
Page 7: ...lich In diesem Fall stellen Sie nur an der dem Bedienger t n chstgelegenen Dome Kamera die DIP Schalter 2 und 3 von SW1 auf EIN um das externe ausfallsichere Netzwerk der RS 485 Leitung hinzuzuf gen 2...
Page 8: ...sich im Normalzustand nicht zu ndern braucht 2 6 Einstellung des Protokolls der Domekamera Wenn die Dome Kamera zusammen mit einem Fastrax Bedienger t installiert wird w hlen Sie das Protokoll F2E We...
Page 9: ...e auf diese reagiert Mechanische oder elek trische Schalter k nnen zwischen die Anschl sse AL Alarmeing nge und G Masse geschaltet werden Siehe Kapitel 3 unter Programmierung und Betrieb zur Konfigura...
Page 10: ...eige Kameratitel Kamera ID Schwenk und Neigungswinkel Ungef hre Blickrichtung Bildschirmmen Elemente DOME MENU AUTO SCAN PRESET TOUR PATTERN ALARM AREA TITLE PRIVACY ZONE CAMERA DOME SETUP EXIT ESC TO...
Page 11: ...d durch Bewegung nach links oder rechts auf die n chste Stelle springen Dr cken Sie die ENTR Taste oder ziehen Sie den Joystick nach vorn um die Titel eingabe zu beenden 4 Nach Eingabe des Titels und...
Page 12: ...sitionen nehmen Sie folgende Schritte vor 1 Rufen Sie mit der MENU Taste das Hauptmen auf W hlen Sie durch Bewegen des Joysticks nach rechts das Preset Setup Men auf Durch Dr cken der Prst Taste gelan...
Page 13: ...e auf einer programmierte Position kann eine programmierte Festposition gel scht werden 3 6 Festlegen von Shortcuts f r Festpositionen W hlen Sie eine abzuspeichernde Kameraeinstellung Bildwinkel Zoom...
Page 14: ...fzeichnung automatisch unterbrochen 5 Um eine andere Funktion als eine Festposition aufzurufen dr cken Sie entsprechend die TOUR PTRN Pattern oder Auto Scan Taste 6 Wiederholen Sie die Schritte 2 bis...
Page 15: ...n oder hinten und w hlen Sie die Spalte in der Sie Einstellungen vornehmen m chten Die gew hlte Position wird markiert 3 W hlen Sie Festposition PRS Eingangsstatus NC NO OFF und Ausgangsstatus OUT1 OF...
Page 16: ...amm ohne Speicherung der Einstellungen zu verlassen dr cken Sie die ESC Taste Durch Dr cken der HOME Taste k nnen die programmierten Daten gel scht werden Als Winkel erscheint in diesem Fall sofort 3...
Page 17: ...MAX Der Zoom Bereich ist auf das Maximum erweiterbar FOCUS CONTROL Fokussteuerung FOCUS SETUP MODE AUTO AF SENSITIVITY HIGH EXIT ESC TO EXIT MODE Modus AUTO MANUAL Verwenden Sie f r den normalen Einsa...
Page 18: ...n BGain k nnen der Rot bzw Blauanteil des Bildes ver ndert werden Diese Funktion steht nur im Modus MANUAL zur Verf gung Sie k nnen die Werte durch Bewegen des Joysticks nach rechts oder links ver nde...
Page 19: ...E LOCK CONTROL SHARPNESS 10 BACK LIGHT OFF DIGITAL ZOOM OFF MAX NIGHT SHOT CONTROL SAVE AND EXIT ESC TO CANCEL SHARPNESS Bildsch rfe Je gr er der Wert desto st rker werden die Kanten im Bild hervorgeh...
Page 20: ...Diese beiden Aufnahmen werden in einem Bild erfasst Dadurch wird jedes Detail erfasst selbst wenn ein Teil eines Bildes berstrahlt w hrend ein anderes Teil dunkler ist EXIT ESC TO EXIT ENDE ESC ZUM VE...
Page 21: ...CANCEL ENDE ESC ZUM VERLASSEN 3 14 Einstellung der Dome Kamera Neunter Men punkt des Hauptmen s NIGHT SHOT SETUP MODE MANUAL LOCAL CONTROL OFF EXIT ESC TO CANCEL NIGHT SHOT MENU Nachtaufzeichnungen Di...
Page 22: ...en 4 Touren 1 Bereichsabfahrt und 4 Auto Scans ausgew hlt werden 4 W hlen Sie die Wartezeit durch Dr cken des Joysticks nach vorn W hlen Sie durch Bewegen des Joysticks nach rechts oder links eine Zei...
Page 23: ...beim Verfolgen eines bewegten Objekts senkrecht nach unten blickt h lt sie an Modell 22x Lassen Sie den Joystick kurz los und ziehen Sie ihn dann nach vorn um die Flip Funktion zu nutzen Die Geschwin...
Page 24: ...Funktion erlaubt es eine neue Dome Kamera exakt an die Positionseinstellungen einer vorher installierten Dome Kamera anzupassen Die Funktionen AUSGANGSPOSITIONSANPASSUNG und ALLE DATEN INITIALISIEREN...
Page 25: ...der unteren Position gehalten wird Sobald der Joystick losgelassen wird und wieder in die Neutralposition zur ckkehrt arbeitet die Neigungssteuerung wieder in ihrem normalen Betriebsmodus Die Flip Fu...
Page 26: ...ter Geschwindigkeit das Progressive Scan CCD liefert eine horizontale Aufl sung von 470 Zeilen Das Ergebnis Die kombinierten Felder f hren zu qualitativ hochwertigen Bildern Wei abgleich Einstellung d...
Page 27: ...e sie 3 Ziehen Sie die f r den Anschluss der Dome Kamera erforderlichen Kabel aus der Wand oder verlegen Sie die Kabel in einem Rohr mit einem Durch messer von 19mm 4 Entfernen Sie die Abdeckplatte vo...
Page 28: ...s Geh use mit dem Ring am Rohr nachdem die Kabel durch das Rohr gef hrt wurden 6 Bringen Sie den Sicherheitsdraht des Geh uses an der selbstschneidenden M6x35 Schraube am Deckenmontageflansch an 7 Bef...
Page 29: ...die Domekamera automatisch um 180 in der 90 Neigeposition Digital Flip Dreht die Domekamera automatisch um 180 in der 90 Neigeposition Programmierbare Parkposition Vorhanden Fensterausblendung Dynami...
Page 30: ...ersorgung 18 30VAC 24VAC nominal 50 60Hz mit berspannungsschutz Leistungsaufnahme Ca 55W Temperaturbereich 40 C 50 C Schutzart IP65 Geh use Aluminium Farbe Pantone Coolgray 1C Abmessungen Siehe Ma zei...
Page 31: ...y becomes void if repairs are undertaken by unauthorized persons Do not open the camera housing Maintenance and repair have to be carried out only by authorized service centers Only use original parts...
Page 32: ...32 Typical System Configuration up to 255 multiplexer Alarm Input up to 4 Sensor Flashing light Alarm Output J box Keyboard up to 99 DVR up to 32 cameras or...
Page 33: ...t must be attached to a structural object such as hard wood concrete that will support the weight of the mount and AIO The use of a solid backboard is recommended when attaching to gypsum walls 1 Remo...
Page 34: ...e our keyboard the other keyboard may not control our dome At that time you set the DIP switch 2 and 3 of the SW1 to ON to add the external fail safe network of the RS 485 line at the nearest dome onl...
Page 35: ...e in normal condition 2 6 Setting Dome Camera Protocol If a dome camera is to be installed with a Fastrax keyboard controller select F2E protocol Consult service personnel if a dome camera is installe...
Page 36: ...lectrical switches can be wired to the AL Alarm In and G Ground connectors See Chapter 3 Program and Operation for configuring alarm input Connector 4 COM NC NO Alarm Output The dome camera can activa...
Page 37: ...TILT DEGREE VIEW DIRECTION OSD Position DOME MENU AUTO SCAN PRESET TOUR PATTERN ALARM AREA TITLE PRIVACY ZONE CAMERA DOME SETUP EXIT ESC TO EXIT 3 Program and Operation 3 1 Selecting Dome Camera Befo...
Page 38: ...d pushing the handle to the right or left to move to the next space Press ENTR key or push the Joystick down to finish title mode 4 When finish entering the title select START ANGLE with the Joystick...
Page 39: ...reset option by using the Joystick to the right Press PRST to go directly to the Preset menu without going through the main menu 2 Select the blank preset position to be stored by pushing the Joystick...
Page 40: ...e programmed by pushing the Joystick up down right or left 3 To see a stored preset view use the Joystick to move the cursor to a stored position By pressing PRST key the camera will move to the store...
Page 41: ...ern by twisting the Joystick Rotate the handle clockwise or counterclockwise to scroll through the alphanumeric cha racters push the handle to right or left to select next or previous space 7 Pressing...
Page 42: ...wn and push to right to enter the detail menu 2 Select the alarm input number by pushing the Joystick up or down and select the column you wish to setup Selected position will be highlighted 3 Select...
Page 43: ...o the right Press ESC to exit the program without saving 6 Pressing the HOME key will delete programmed data Angles will be turned immediately 3 11 Privacy Zone Seventh Item of Main menu Hide up to 8...
Page 44: ...m is extendable up to 4x of digital range MAX Zoom is extendable Max digital Zoom range FOCUS CONTROL FOCUS SETUP MODE AUTO AF SENSITIVITY HIGH EXIT ESC TO EXIT MODE AUTO MANUAL Use manual mode in nor...
Page 45: ...for normal use RGAIN BGAIN modes are controllable only in MANUAL Mode Push the Joystick to the right or left to change NOTE ONE PUSH means that when rotating the Joystick handle for a moment the lens...
Page 46: ...OL WB CONTROL AE CONTROL LINE LOCK CONTROL SHARPNESS 10 BACK LIGHT OFF DIGITAL ZOOM OFF MAX NIGHT SHOT CONTROL SAVE AND EXIT ESC TO CANCEL SHARPNESS The higher the value the more edges in the picture...
Page 47: ...two shutter speeds in alternative video fields high and normal every 60th or 50th of a second and combines two fields into one progressive scan frame It allows every detail to be captured accurately...
Page 48: ...hot mode of an individual camera EXIT ESC TO CANCEL 3 14 Dome Setup Ninth Item of Main menu NIGHT SHOT SETUP MODE MANUAL LOCAL CONTROL OFF EXIT ESC TO CANCEL NIGHT SHOT MENU The NIGHT SHOT option remo...
Page 49: ...aximum numbers For example you can have 80 Presets 4 Tours one Pattern and 4 Auto Scan options 4 Select Waiting Time by pushing the Joystick down Push the Joystick to the right or to the left to selec...
Page 50: ...the camera reaches the floor directly above the moving object it will stop Release the Joystick handle instantly and then pull down to run the flip function The tracking speed will be the same as prev...
Page 51: ...rientation of a selected dome camera Origin offset value is not affected by this function Offset is still valid after origin set SYSTEM INFORMATION SYSTEM INFORMATION CAMERA TYPE XXXXXXX H W VERSION V...
Page 52: ...f the preset or pattern that is running and alarm names The display of each type of name setting can be enabled or disabled When the display of camera or area title name is enabled the information app...
Page 53: ...10 OFF Night Shot off 11 ON BLC on 11 OFF BLC off 12 ON Digital Zoom on According to digital zoom setting 12 OFF Digital Zoom off 13 ON Dome OSD on 13 OFF Dome OSD off 14 ON Dome Area Title Display on...
Page 54: ...ange 3 Pull out cables required to connect to the dome camera from the wall or route cables through a section of 0 75 in 19mm conduit pipe 4 Remove the access plate from the wall mount bracket 5 Attac...
Page 55: ...ut 5 Tighten the housing with the pipe using the socket after routing cables through the pipe 6 Attach the housing s safety wire to the ceiling mount s M6x35 tapping screw 7 After connecting cables fi...
Page 56: ...with user defined four sided shapes and up to 8 character labels each Zones 8 each with programmable text labels IR cut filter Motorized switchable filter Automatic function depend on the amount of li...
Page 57: ...nium Colour Pantone Coolgray 1C Dimensions See drawing Weight 3 3kg Accessories EDP No Description 74088 System Keyboard with 3 axis Joystick 12VDC 230VAC 74092 System Keyboard with Joystick 5 Monitor...
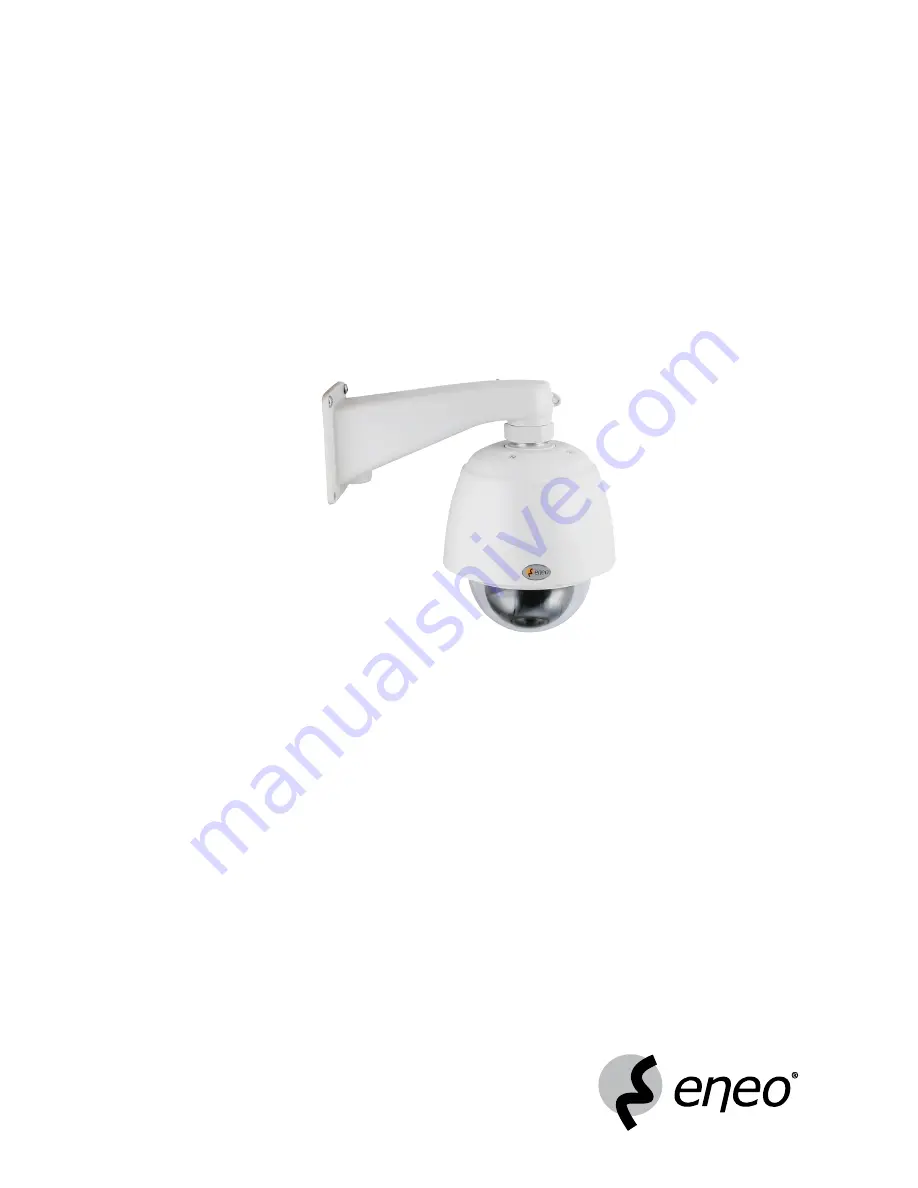
Page 58: ...eiling Mount Wandmontage Wall Mount Der Wandmontagearm und die Deckenhalterung sind im Lieferumfang der Domekamera nicht enthalten Wall bracket and ceiling tube are not included with the dome camera 2...
Page 59: ...59...
Page 60: ...istered trademark of Videor E Hartig GmbH Exclusive distribution through specialised trade channels only Videor E Hartig GmbH Carl Zeiss Stra e 8 63322 R dermark Germany Tel 49 0 6074 888 0 Fax 49 0 6...