background image

148

AUT

OCLA

VE SERIE SK07

148

AUT

OCLA

VE SERIE SK07

Aclarar  abundantemente  con  agua  y,  al  final  de  la  operación,  secar.  Durante  la  limpieza 

NO UTILIZAR paños de tipo metálico o especialmente abrasivos. El uso de estos puede 

provocar la abrasión de la superficie externa del visor.

- Limpieza del panel frontal externo

Comprobación:


Mensual o cada 50 ciclos.

Utilizar un paño suave humedecido en alcohol, procurando que no penetre en las partes in

-

ternas del autoclave. Está terminantemente prohibido el uso de detergentes a base de trielina, 

gasolina, aguarrás o disolventes en general.

- Limpieza junta del visor

Comprobación

Diaria o cada 5 ciclos.

Limpiar  la  junta  con  un  paño  suave,  humedecido  con  agua  o  con  vinagre  blanco,  para 

eliminar las incrustaciones de cal. Aclarar abundantemente en caso de que se utilice vinagre. 

Este procedimiento debe efectuarse para eliminar impurezas que podrían causar la pérdida 

de presión de la cámara de esterilización y el posible corte de la junta.

- Limpieza del filtro de la cámara

Comprobación:

 Mensual o cada 50 ciclos.

- Extraer los porta bandejas con las bandejas de la cámara.

- Girar hacia arriba el filtro de la cámara y tirar hacia sí para extraerlo.

- Sumergir el filtro de la cámara en agua y vinagre, esperar unos minutos y, a continuación, 


  con un cepillo limpiar cuidadosamente la zona del filtro.

- Aclarar con abundante agua el grupo del filtro.

- Para volver a montar el filtro proceder de la misma manera pero en sentido contrario.

- Volver a colocar el filtro en el fondo de la cámara.
Si la operación de limpieza no fuera satisfactoria, llamar al Servicio de Asistencia Técnica.

- Regulación de la puerta del visor

Comprobación: 

Cuando sea necesario. Normalmente no antes de seis meses desde el cambio 

de la junta del visor.
El sistema de cierre del autoclave necesita una regulación ocasional, a causa del asentamiento 

normal de las partes mecánicas y del desgaste de la junta de estanqueidad. Una estanqueidad 

no perfecta de la junta podría impedir la ejecución correcta de los ciclos de esterilización y, 

por lo tanto, comprometer un buen resultado.

Intervenir siempre con la máquina apagada y fría.

Realización:

- Mantener pulsada la tecla 17 fig. 4

- Girar el visor 19 fig. 4 hacia la izquierda un cuarto de vuelta

- Soltar la tecla y continuar la rotación del visor 19 fig. 4 hasta su bloqueo

- Comprobar que el cierre de la puerta se haya efectuado correctamente. Si el asa está de


  masiado dura para cerrarla, girar ligeramente desde la parte opuesta manteniendo pulsada 


  la tecla 17 fig. 4.

- Efectuar un ciclo de prueba para comprobar que la regulación haya sido eficaz.

Este procedimiento normalmente debe efectuarse ante la primera leve pérdida o dificultad de 

estanqueidad de la junta. Antes de proceder con la regulación del sistema de cierre del visor, 

efectuar la limpieza de la junta del visor tal y como se ha indicado anteriormente y repetir el 

ciclo de esterilización.

- Sustitución del filtro bacteriológico o Bio X

Comprobación: 

Trimestral o cada 500 ciclos (recomendada la sustitución)

Realización:

-  Abrir la puerta del compartimento de la impresora/CF Card del autoclave.

- Desenroscar el filtro (9 fig. 1) girándolo hacia la izquierda.

- Enroscar el nuevo filtro hacia la derecha, procurando enroscarlo completamente. 

Summary of Contents for SK07 1

Page 1: ...TION MANUAL MODE D EMPLOI GEBRAUCHSANLEITUNG MANUAL DE USO AUTOCLAVE 21 lt AUTOCLAVE 21 lt Dispositivo Medico conforme alla direttiva 93 42 CE FARO SPA Ornago Italy 0051 ED 04 12 COD 988221_REV 00 16...

Page 2: ...er evitare danni al dispositivo all operatore ed eventualmente al paziente AVVErTENZE Queste istruzioni avvisano che bisogna porre molta attenzione per evitare situazioni che potrebbero danneggiare il...

Page 3: ...ALLo ALTO FRAGILE NON BAGNARE NON ROTOLARE NON USARE GANCI PESO MAX SOVRAPPONIBILE TEMPERATURA DI IMMAGAZZINAMENTO CONDIZIONI DI TRASPORTO UMIDITA RELATIVA PRESSIONE ATMOSFERICA CARTONE RICICLABILE RH...

Page 4: ...tivo per la prima volta eseguire la pulizia della camera come descritto a pag 23 Non appoggiare l autoclave su tavoli o piani instabili Non appoggiare il dispositivo su di un piano infiammabile Non ef...

Page 5: ...ici o altri tessuti riutilizzabili essi devono essere lavati ed asciugati dopo l uso e prima dellasterilizzazione in modo da rimuovere il materiale organico e aumentare la vita del tessuto restituendo...

Page 6: ...i carichi cavi L autoclave disponibile in 2 varianti di capacit della camera di sterilizzazione 16 21 L autoclave disponibile con i seguenti dispositivi di memorizzazione o stampa dati stampante ester...

Page 7: ...la camera durante la fase di asciugatura e nella fase di bilanciamento barico PORTA USB Porta non alimentata destinata ad uso esclusivo dei tecnici qualificati Utilizzare un cavo usb standard con conn...

Page 8: ...per stampante esterna VEDI FIG 2 VISTAANTERIORE 11 Innesto per scarico serbatoio di scarico 12 Innesto per carico serbatoio di carico 18 Maniglie VEDI FIG 3 VISTA POSTERIORE 13 Innesto per scarico ser...

Page 9: ...ultiplo Asciugatura carico solido Asciugatura carico poroso Type test effettuati secondo norma EN13060 Cicli di tipo S Trafilamento dell aria X X X Dinamica di pressione nella camera di sterilizzazion...

Page 10: ...tervento sovratemperatura Test termometrico per piccolo carichi Test di asciugatura per piccolo carichi Test penetrazione vapore per carichi porosi Test termometrico per carichi solidi Test asciugatur...

Page 11: ...ione tray N 1 tubo carico N 1 tubo scarico N 1 imbuto N 4 tappi Per le versioni dotate di Memory Card Memory card inserita nell alloggiamento dedicato Lettore USB memory card per PC Cd di lettura e st...

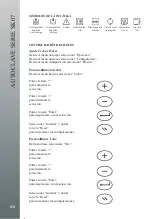
Page 12: ...la scelta con il tasto Premere il tasto per annullare l operazione MENU PRINCIPALE ISTrUZIoNI D USo 12 12 AUTOCLAVE SERIE SK07 Per l utilizzo dell autoclave procedere nel seguente modo Aprire il porte...

Page 13: ...12 AUTOCLAVE SERIE SK07 12 AUTOCLAVE SERIE SK07...

Page 14: ...13 AUTOCLAVE SERIE SK07 Configurazione Carcamento Acqua Stampa Ciclo Cancella Memoria Configurazione Carcamento Acqua Stampa Ciclo Cancella Memoria...

Page 15: ...durre l altra estremit nella tanica Premere il pulsante per avviare la pompa carico acqua Premere tasto oppure per interrompere l operazione Ilbloccodelriempimentoavvieneautomaticamenteunavoltaraggiun...

Page 16: ...CArD Per l uso della scheda Memory Card attenersi alle istruzioni in dotazione su cd Per scaricare i dati avvalersi del programma specifico fornito FUNZIoNE ULTIMo CICLo AVANZATo Per tutti i programm...

Page 17: ...ibile selezionare l unit della Pressione che si vuole visualizzare sul display Si pu scegliere tra KPa Kilo Pascal Bar assoluti Bar relativi FUNZIoNE CoNTrASTo DISPLAY Tramite il menu Opzioni Configur...

Page 18: ...st Helix e Bowie Dick 134 C 3 15 2 5 3 3 5 S SK07 Diagramma Test Helix 121 C 1 6 1 6 2 1 2 2 5 S SK07 Diagramma ciclo 134 C B Flash 0 24 1 3 0 24 1 1 25 1 25 0 3 3 15 0 0 5 1 1 5 2 2 5 3 3 5 Tempo P a...

Page 19: ...s bar Pressione B SK07 Diagramma ciclo Prion 1 1 0 15 1 6 1 6 1 2 0 15 3 15 0 0 5 1 1 5 2 2 5 3 3 5 Tempo P abs bar B SK07 Diagramma ciclo Standard 121 C 1 1 0 15 1 6 1 2 1 6 0 15 2 10 0 0 5 1 1 5 2 2...

Page 20: ...7 3 15 0 0 5 1 1 5 2 2 5 3 3 5 Tempo P abs bar Pressione S Bowie Dick Test 134 C 3 15 SK07 Diagramma Vuoto Test 1 1 1 1 1 1 SK07 Diagramma ciclo 121 C Porosi 0 3 1 1 1 5 0 7 2 1 0 0 5 1 1 5 2 2 5 Temp...

Page 21: ...bar 0 3 1 1 1 5 1 3 0 7 0 0 5 1 1 5 Tempo P abs bar Pressione SK07 Diagramma Bowie Dick Test 134 C 0 3 1 1 5 1 3 0 7 3 15 1 Tempo Pressione SK07 Diagramma Vuoto Test 1 1 0 42 1 0 4 0 2 0 3 0 4 0 5 0...

Page 22: ...cchi in salita pressione Sterilization xxxx xxxx x xx xx Pressione temperatura e tempo inizio sterilizzazione xxxx xxxx x xx xx Pressione temperatura e tempo in sterilizzazione xxxx xxxx x xx xx Press...

Page 23: ...el carico HollowA deve essere posizionato sul tray inferiore SELEZIoNE oPZIoNI Selezionando il sottomenu Opzioni si accede alla lista dei sottomenu di configurazione della macchina 1 Configurazione 2...

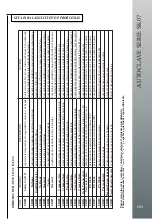
Page 24: ...hatch gasket X PERIODICAL CONTROLS Frequency Operation Before first Use Daily Yearly 2 Years Vacuum test EN 17665 X Bowie Dick Test EN 17665 X Helix Test EN 17665 X Safety Check electrical EN 62353 P...

Page 25: ...della camera Se l operazione di pulizia non dovesse essere soddisfacente chiamare l AssistenzaTecnica Regolazione portello obl Verifica Quando necessario Solitamente non prima di sei mesi dal cambio d...

Page 26: ...NZIoNE ANNUALE Dopo 1000 cicli o dopo un anno dall istallazione dell autoclave Al raggiungimento del ciclo n 1000 appare un messaggio di promemoria per l effettua zione della manutenzione La manutenzi...

Page 27: ...Dal men configurazione selezionare Base Per modificare la data Dal men base selezionare Data Premere il tasto per aumentare la selezione Premere il tasto per diminuire la selezione Premere il tasto En...

Page 28: ...ella stampante premendo il tasto OPEN come indicato vedi fig A 2 Posizionare il rotolo carta all interno del vano rispettando il verso di rotazione indicato vedi fig B 3 Tirarelacartafinoafarlauscired...

Page 29: ...il messaggio Sbloccare macchina Per ripristinare l autoclave PREMERE CONTEMPORANEAMENTE i tasti A B e C PORTELLO BLOCCATO Procedura di Sblocco Macchina in caso di comparsa del messaggio Aprire il port...

Page 30: ...ra di camera sotto il limite consentito Controllare la posizione della sonda di camera ER010 Pressione Alta pressione oltre il limite consentito Contattare l assistenza tecnica Faro ER011 Pressione Ba...

Page 31: ...ore di pressione Contattare l assistenza tecnica Faro AL007 Micro Portello apertura contatto micro portello non prevista Contattare l assistenza tecnica Faro AL008 Micro Sicurezza apertura contatto mi...

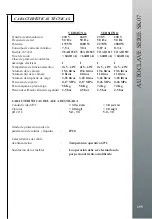
Page 32: ...era 15 6 litri 15 6 litri 19 6 litri 19 6 litri Volume utile camera 8 litri 8 litri 11 litri 11 litri Volume serbatoio di carico 3 65 litri 3 65 litri 3 65 litri 3 65 litri Peso area di sostegno 0 17...

Page 33: ...device harming the operator and possibly the patient WArNINGS These instructions warn you to pay utmost attention to avoid situations that could damage the device ProHIBITIoN This icon highlights what...

Page 34: ...CKAGING SYMBoLS HIGH FraGiLe DO NOT WET DO NOT ROLL DO NOT USE HOOKS MAX SUPPORTED WEIGHT STORAGE TEMPERATURE TRANSPORT CONDITION RELATIVE HUMIDITy ATMOSPHERIC PRESSURE RECyCLABLE CARDBOARD RH 10 I 90...

Page 35: ...onnect the plug Using an extension ensure the type of wire used is suitable for device absorption Before using the device for the first time clean the room as described on page 54 Do not rest the auto...

Page 36: ...possible Shirts or other reusable fabric should be washed and dried after use and before sterilization to remove any organic material and increase the useful life of the fabric by restoring its natura...

Page 37: ...steam penetration in hollow loads The autoclave is available in 2 capacity variants in the sterilisation chamber 16 21 The autoclave is available with the following data saving or data print out devi...

Page 38: ...Releases sterile air into the chamber during the drying phase and pressure balancing phase USB PORT Unpowered port to be used exclusively by qualified engineers Use a standard USB cable with connecto...

Page 39: ...printer compartment SEE FIG 2 FRONT VIEW 11 Coupling for discharge tank discharge 12 Coupling for filling tank filling 18 Handles SEE FIG 3 REAR VIEW 13 Coupling for filling tank discharge in case of...

Page 40: ...tiple wrapping Drying solid load Drying porous load Type test carried out according to standard EN13060 Type S cycles Air leakage X X X Pressure dynamic in sterilisation chamber X X X Vacuum chamber X...

Page 41: ...ad Small load dryness test Steam penetration test for porous loads Thermometric test for solid load Solid load dryness test Steam penetration test for solid loads Thermometric tests load selectedon us...

Page 42: ...umentation user manual The tray support 3 trays 1 tray extraction pincers 1 filling tube 1 discharge tube 1 funnel 4 plugs For versions equipped with Memory Card Memory card inserted in dedicated slot...

Page 43: ...procedere nel seguente modo Aprire il portello ruotando la manopola 2 fig 1 in senso antiorario Premere l interruttore generale luminoso 1 fig 1 USO DEI MENU Il men principale composto da 3 sottomenu...

Page 44: ...Save Exit Italiano Deutsch English Francais Espanol Configuration Fill Water Print Cycle Delete Memory Basic Advanced Special Exit Water fill options Saving Exit Printer Printer options Format Memory...

Page 45: ...tal Pressure LCD Contrast Password Management Exit Password 00000000 Enter Exit Increase Decrease Exit Saving Exit Configuration Fill Water Print Cycle Delete Memory Configuration Fill Water Print Cyc...

Page 46: ...e to empty the tank Water must be discharged in compliance with the standards in force on waste disposal Automatic emptying of discharge tank 16 fig 3 PLACING MATErIAL To STErILISE IN THE CHAMBEr Wrap...

Page 47: ...upplied on the CD To download the data use the specific program supplied LAST ADVANCED CYCLE FUNCTIoN The LASTADVANCED CyCLE function is activated automatically for all the programs 30 after the end o...

Page 48: ...ent that you want to be displayed You can choose from KPa Kilo Pascal Bar Absolut Bar relative DISPLAY CoNTrAST FUNCTIoN Use the Options Setup Special Display Contrast menu to select the desired inten...

Page 49: ...121 C 1 1 6 1 2 1 6 2 1 1 5 2 2 5 bs bar Pressione S SK07 Diagramma ciclo 134 C B Flash 0 24 1 3 0 24 1 1 1 25 1 25 0 3 3 15 0 0 5 1 1 5 2 2 5 3 3 5 Tempo P abs bar pressione B SK07 Diagramma ciclo S...

Page 50: ...essione B Pressione SK07 Diagramma ciclo Prion 134 C 1 0 15 1 6 1 6 1 2 0 15 3 15 1 0 0 5 1 1 5 2 2 5 3 3 5 Tempo P abs bar Pressione B Pressione SK07 Diagramma Test Helix e Bowie Dick 134 C 1 1 0 15...

Page 51: ...Diagramma ciclo 121 C Porosi 0 3 1 1 1 5 0 7 2 1 0 0 5 1 1 5 2 2 5 Tempo P abs bar pressione S SK07 Diagramma ciclo 134 C Imbustati 0 3 1 1 5 1 3 0 7 3 15 Tempo Pressione SK07 Diagramma ciclo 134 C N...

Page 52: ...Pressione clo 134 C Non Imbustati 0 7 3 15 Tempo Pressione SK07 Diagramma Bowie Dick Test 134 C 0 3 1 1 5 1 3 0 7 3 15 1 0 0 5 1 1 5 2 2 5 3 3 5 4 Tempo P abs bar Pressione S SK07 Diagramma Vuoto Tes...

Page 53: ...e Top ups during pressure increase Sterilization xxxx xxxx x xx xx Pressure temperature and time on starting sterilization xxxx xxxx x xx xx Pressure temperature and time during sterilization xxxx xxx...

Page 54: ...positioned on the lower tray oPTIoNS SELECTIoN By selecting the Options sub menu you access the list of configuration sub menus for the machine 1 Configuration 2 Fill water 3 Print cycle 4 Delete memo...

Page 55: ...quency Operation Before first Use Daily Yearly 2 Years Vacuum test EN 17665 X Bowie Dick Test EN 17665 X Helix Test EN 17665 X Safety Check electrical EN 62353 Protective Hearth continuity Insulation...

Page 56: ...he back of the chamber If the cleaning operation is not satisfactory call Technical Support Porthole door adjustment Check When necessary Normally no earlier than six months from the porthole gasket c...

Page 57: ...0 cycles or a year after installing the autoclave On reaching cycle no 1000 a memo appears to carry out maintenance Maintenance includes replacement cleaning and checking the parts as indicated in the...

Page 58: ...ation From the configuration menu select Basic To change the date From the Basic menu select Date Press the key to increase selection Press the key to decrease selection Press the Enter key to move wi...

Page 59: ...en the printer lid by pressing the OPEN key as indicated see fig A 2 Position the paper roll inside the chamber respecting the indicated rotation direction see fig B 3 Pull the paper until it exits th...

Page 60: ...re l autoclave PREMERE CONTEMPORANEAMENTE i tasti A B e C PORTELLO BLOCCATO Procedura di Sblocco Macchina in caso di comparsa del messaggio Aprire il portello Nel caso di portello bloccato alla compar...

Page 61: ...Low chamber temperature under permitted limit Check chamber probe position ER010 High Pressure pressure over permitted limit Contact Faro technical support ER011 Low Pressure pressure under permitted...

Page 62: ...in can AL006 Pressure Transducer pressure transducer fault Contact Faro technical support AL007 Door Micro unplanned door micro contact opening Contact Faro technical support AL008 Safety Micro unpla...

Page 63: ...volume 15 6 litres 15 6 litres 19 6 litres 19 6 litres Chamber useful volume 8 litri 8 litri 11 litri 11 litri Filling tank volume 3 65 litri 3 65 litri 3 65 litri 3 65 litri Support area weight 0 17...

Page 64: ...au dispositif l op rateur et ventuellement au patient AVErTISSEMENTS Ces instructions signalent de rester tr s prudent afin d viter toute situation susceptible d endommager le dispositif INTErDICTIoN...

Page 65: ...HAUT FRAGILE NE PAS MOUILLER NE PAS FAIRE ROULER NE PAS UTILISER DE CROCHETS POIDS MAX EMPILABLE TEMP RATURE DE STOCKAGE CONDITIONS DE TRANSPORT HUMIDIT RELATIVE PRESSION ATMOSPH RIQUE CARTON RECyCLA...

Page 66: ...l absorption de l appareil Avant d utiliser le dispositif pour la premi re fois effectuer le nettoyage de la chambre comme il est d crit la page 85 Ne pas poser l autoclave sur des tables ou des surf...

Page 67: ...le plus d espace possible entre les deux partis En cas de blouses ou autres tissus r utilisables ceux ci doivent tre lav s et s ch s apr s utilisation et avant la st rilisation de mani re liminer les...

Page 68: ...euses L autoclave est disponible dans 2 versions de capacit de la chambre de st rilisation 16 21 L autoclave est disponible avec les dispositifs de m morisation ou d impression de donn es suivants imp...

Page 69: ...rile dans la chambre durant la phase de s chage et dans la phase d quilibrage du poids PORTE USB Porte non aliment destin l usage exclusif des techniciens qualifi s Utiliser un c ble USB standard avec...

Page 70: ...iment pour imprimante ext rieure VOIR FIG 2 VUE AVANT 11 Enclenchement pour d chargement du r sevoir de vidange 12 Enclenchement pour chargement du reservoir d eau 18 Poign es VOIR FIG 3 VUE ARRI RE 1...

Page 71: ...te Charge creuse A Emballage multiple S chage charge solide S chage charge poreuse Type de tests effectu s selon la norme EN13060 Cycles de type S Fuite d air X X X Pression dynamique de la chambre d...

Page 72: ...tes charges Test p n tration de vapeur pour des charges poreuses Test de temp rature pour des charges solides Test de s chage pour des charges solides Test p n tration de vapeur pour des charges solid...

Page 73: ...teaux 1 pince d extraction du plateau 1 tuyau de chargement 1 tuyau de d chargement 1 entonnoir 4 bouchons Pour les versions dot es de Carte M moire Carte m moire ins r e dans le logement appropri Lec...

Page 74: ...autoclave procedere nel seguente modo Aprire il portello ruotando la manopola 2 fig 1 in senso antiorario Premere l interruttore generale luminoso 1 fig 1 USO DEI MENU Il men principale composto da 3...

Page 75: ...Sortir Italiano Deutsch English Francais Espanol Configuration Chargement Eau Impression du Cycle Annuler M moires Base Avanc Sp cial Sortie Options charg eau M morisation Sortie Impression Options i...

Page 76: ...rtie Mot de pas se Augmenter Diminuer Sortie M morisation Sortie Configuration Chargement Eau Impression du Cycle Annuler M moire Configuration Chargement de l Eau Impression du Cycle Annuler M moire...

Page 77: ...e la vidange du r servoir La vidange de l eau doit tre r alis e conform ment aux normes en vigueur sur l limination des d chets Vidange automatique du r servoir de d charge 16 fig 3 INTroDUCTIoN DANS...

Page 78: ...AVANC Pour tous les programmes la fonction de DERNIER CyCLE AVANC s active auto matiquement Une fois coul es 30 compter de la fin du cycle de st rilisation les l ments chauffants s teignent et un seco...

Page 79: ...r relatifs FoNCTIoN CoNTrASTE D ECrAN Avec le menu Options Configuration Sp cial Contraste d cran il est possible de configurer l intensit de l cran qu on souhaite avoir Il est possible de choisir ent...

Page 80: ...K07 Diagramma Test Helix 121 C 1 1 6 1 2 1 6 2 1 1 5 2 2 5 bs bar Pressione S SK07 Diagramma ciclo 134 C B Flash 0 24 1 3 0 24 1 1 1 25 1 25 0 3 3 15 0 0 5 1 1 5 2 2 5 3 3 5 Tempo P abs bar pressione...

Page 81: ...essione B clo Standard 134 C 1 3 15 Pressione SK07 Diagramma ciclo Prion 134 C 1 0 15 1 6 1 6 1 2 0 15 3 15 1 0 0 5 1 1 5 2 2 5 3 3 5 Tempo P abs bar Pressione B clo Standard 121 C 1 0 Pressione SK07...

Page 82: ...ramma Vuoto Test 1 1 1 1 1 1 SK07 Diagramma ciclo 121 C Porosi 0 3 1 1 1 5 0 7 2 1 0 0 5 1 1 5 2 2 5 Tempo P abs bar pressione S mma ciclo 134 C Imbustati 3 0 7 3 15 Tempo Pressione mma ciclo 134 C No...

Page 83: ...ar pressione 0 3 1 1 5 1 3 0 7 Tempo Pressione SK07 Diagramma ciclo 134 C Non Imbustati 0 3 1 1 1 5 1 3 0 7 3 15 Tempo Pressione SK07 Diagramma Bowie Dick Test 134 C 0 3 1 1 5 1 3 0 7 3 15 1 0 0 5 1 1...

Page 84: ...ventuels compl ments en mont e pression Sterilization xxxx xxxx x xx xx Pression temp rature et d lai d but de st rilisation xxxx xxxx x xx xx Pression temp rature et d lai de st rilisation xxxx xxxx...

Page 85: ...r le pour la v rification de la charge Hollow A doit tre positionn sur le plateau inf rieur S LECTIoN DES oPTIoNS En s lectionnant le sous menu Options on acc de la liste des sous menus de configurati...

Page 86: ...placement of the hatch gasket X PERIODICAL CONTROLS Frequency Operation Before first Use Daily Yearly 2 Years Vacuum test EN 17665 X Bowie Dick Test EN 17665 X Helix Test EN 17665 X Safety Check elect...

Page 87: ...lacer le filtre sur le fond de la chambre Si l op ration de nettoyage n est pas satisfaisante appeler l Assistance Technique R glage de la porte du hublot V rification Si n cessaire G n ralement six m...

Page 88: ...00 me cycle est atteint un message appara t pour rappeler d effectuer l entretien L entretien comprend le remplacement le nettoyage et la v rification des composants comme l indique le tableau suivant...

Page 89: ...ion s lectionner Base Pour modifier la date Depuis le menu base s lectionner Date Appuyer sur la touche pour augmenter la s lection Appuyer sur la touche pour diminuer la s lection Appuyer sur la touc...

Page 90: ...l imprimante en appuyant sur la touche OPEN comme indiqu voir fig A 2 Placer le rouleau de papier dans le compartiment en respectant le sens de rotation indiqu voir fig B 3 Tirer le papier jusqu ce q...

Page 91: ...ir il messaggio Sbloccare macchina Per ripristinare l autoclave PREMERE CONTEMPORANEAMENTE i tasti A B e C PORTELLO BLOCCATO Procedura di Sblocco Macchina in caso di comparsa del messaggio Aprire il p...

Page 92: ...en dessous de la limite autoris e Contr ler la position de la sonde de chambre ER010 Pression Haute pression au del de la limite autoris e Contacter l assistance technique Faro ER011 Pression Basse p...

Page 93: ...transducteur de pression Contacter l assistance technique Faro AL007 Micro porte ouverture contact micro s curit porte non pr vue Contacter l assistance technique Faro AL008 Micro s curit apertura co...

Page 94: ...i 19 6 litri 19 6 litri Volume utile en chambre 8 litri 8 litri 11 litri 11 litri Volume r servoir d eau 3 65 litri 3 65 litri 3 65 litri 3 65 litri Poids zone de support 0 17 MPa 0 17 MPa 0 26 MPa 0...

Page 95: ...und eventuell am Patienten vermieden werden WArNHINWEISE Diese Anleitungen weisen darauf hin dass sehr vorsichtig zu handeln ist damit Situationen vermieden werden k nnen welche das Ger t besch digen...

Page 96: ...IE VErPACKUNG OBEN ZERBRECHLICH TROCKEN HALTEN NICHT ROLLEN KEINE HAKEN VERWENDEN MAX STAPELBARES GEWICHT LAGERTEMPERATUR TRANSPORTBEDINGUNGEN RELATIVE FEUCHTIGKEIT LUFTDRUCK reCYCeLBarer KarTOn RH 10...

Page 97: ...die Stromaufnahme des Ger ts geeignet ist Nehmen Sie vor der erstmaligen Ben tzung des Ger ts die Reinigung der Kammer vor wie auf Seite 116 beschrieben Stellen Sie den Autoklav nicht auf unstabile T...

Page 98: ...n oder anderen wiederverwendbaren Stoffen muss man diese nach dem Gebrauch und vor der Sterilisation waschen und trocknen um organische Materialien zu entfernen und die Lebensdauer des Gewebes zu erh...

Page 99: ...n Der Autoklav ist im Bezug auf das Fassungsverm gen der Sterilisationskammer in 2 Varianten erh ltlich 16 21 Der Autoklav ist mit folgenden Vorrichtungen zum Speichern oder Daten ausdrucken erh ltlic...

Page 100: ...phase und der Phase des Bariumgleichgewichts sterile Luft in die Kammer ein USB PORT Nicht versorgter Port der ausschlie lich von qualifizierten Technikern verwendet wird Das USB Standardkabel mit Ste...

Page 101: ...r externer Drucker SIEHE ABB 2 VORDERANSICHT 11 Anschluss f r den Ablauf des Abflussbeh lters 12 Anschuss f r Beladung des Ladebeh lters 18 Griffe SIEHE ABB 3 HINTENANSICHT 13 Anschluss f r den Ablau...

Page 102: ...kung Trocknung feste Ladung Trocknung por se Ladung Gem der Norm EN3060 Zyklen des Typs B durchgef hrte Type Tests Luftverlust X X X Dynamik des Druckes in der Sterilisations Kammer X X X Leere Kammer...

Page 103: ...sten Test der Dampfdurchdringung f r por se Lasten Thermometrischer Test f r undurchl ssige Lasten Trocknungstest f r undurchl ssige Lasten Test der Dampfdurchdringung f r undurchl ssige Lasten Thermo...

Page 104: ...alen 1 Zange zum Herausziehen der Schale 1 Schlauch f r die Beladung 1 Schlauch f r die Entladung 1 Trichter 4 Zapfen F r die Versionen die mit Memory Card versehen sind Memory card eingef gt in den d...

Page 105: ...r l utilizzo dell autoclave procedere nel seguente modo Aprire il portello ruotando la manopola 2 fig 1 in senso antiorario Premere l interruttore generale luminoso 1 fig 1 USO DEI MENU Il men princip...

Page 106: ...rn Verlassen Italiano Deutsch English Francais Espanol Konfiguration Wasserbeladung Drucken des Zyklus Speicher l schen Basis Fortgeschritten Speziall Ausgang Optionen Wasser Speicherung Ausgang Druck...

Page 107: ...tung Passwort Ausgang Passwort 000000000 Eingeben Austreten Erh hen Verringern Ausgang Speicherung Ausgang Konfiguration Wasserbeladung Zyklus Druck Speicher l schen Konfiguration Wasserbeladung Druck...

Page 108: ...ch ist Der Wasserablauf muss mit den f r die Abfallentsorgung geltenden Normen bereinstimmen Automatisches Leeren Abflusstank 16 Abb 3 EINF HrUNG IN DIE KAMMEr DES STErILISIErGUTES F hren Sie die Verp...

Page 109: ...uladen nutzt man das spezifische mitgelieferte Programm FUNKTIoN LETZTEr ForTGESCHrITTENEr ZYKLUS F r alle Programme wird automatisch die Funktion des LETZTEN FORTGESCHRIT TENEN ZyKLUS aktiviert Nach...

Page 110: ...gen m chte Man kann w hlen zwischen KPa Kilo Pascal Bar absolut Bar relativ DISPLAY KoNTrAST FUNKTIoN Mit dem Men Optionen Konfiguration Spezial Display Kontrast kann man die gew nschte St rke des Dis...

Page 111: ...ix 121 C 1 1 6 1 2 1 6 2 1 1 5 2 2 5 bs bar Pressione S SK07 Diagramma ciclo 134 C B Flash 0 24 1 3 0 24 1 1 1 25 1 25 0 3 3 15 0 0 5 1 1 5 2 2 5 3 3 5 Tempo P abs bar pressione B SK07 Diagramma ciclo...

Page 112: ...5 3 3 5 Tempo P abs bar pressione B ressione SK07 Diagramma ciclo Prion 134 C 1 0 15 1 6 1 6 1 2 0 15 3 15 1 0 0 5 1 1 5 2 2 5 3 3 5 Tempo P abs bar Pressione B Pressione SK07 Diagramma Test Helix e B...

Page 113: ...K07 Diagramma ciclo 121 C Porosi 0 3 1 1 1 5 0 7 2 1 0 0 5 1 1 5 2 2 5 Tempo P abs bar pressione S 7 Diagramma ciclo 134 C Imbustati 0 3 1 1 5 1 3 0 7 3 15 Tempo Pressione Diagramma ciclo 134 C Non Im...

Page 114: ...Pressione lo 134 C Non Imbustati 0 7 3 15 empo Pressione SK07 Diagramma Bowie Dick Test 134 C 0 3 1 1 5 1 3 0 7 3 15 1 0 0 5 1 1 5 2 2 5 3 3 5 4 Tempo P abs bar Pressione S SK07 Diagramma Vuoto Test 1...

Page 115: ...e Eventuelles Nachf llen bei Steigen des Druckess Sterilization xxxx xxxx x xx xx Druck Temperatur und Zeit Anfang Sterilisation xxxx xxxx x xx xx Druck Temperatur und Zeit bei Sterilisation xxxx xxxx...

Page 116: ...g Hollow A muss auf der unteren Schale positioniert sein ANWAHL oPTIoNEN Durch dieAnwahl des Untermen s Optionen finden Sie Zugang zu den Listen der Maschinen konfiguration 1 Konfiguration 2 Wasserauf...

Page 117: ...Adjustment of hatch Replacement of the batteriological filter X Replacement of the hatch gasket X PERIODICAL CONTROLS Frequency Operation Before first Use Daily Yearly 2 Years Vacuum test EN 17665 X B...

Page 118: ...st der technische Service herbeizuziehen Einstellung des T rchens des Bullauges berpr fung Wenn notwendig In der Regel nicht vor sechs Monaten ab dem Austausch der Dichtung des Bullauges Das Verriegel...

Page 119: ...Zyklen oder nach einem Jahr ab der Installation des Autoklavs Bei Erreichen des Zyklus Nr 1000 erscheint eine Erinnerungsmeldung f r die Durchf hrung der Wartung Die Wartung beinhaltet Ersatz Reinigu...

Page 120: ...Basis Datum anw hlen Taste dr cken damit die Anwahl erh ht wird Taste dr cken zur Verringerung damit die Anwahl verringert wird Taste Enter dr cken damit man sich bei der Anwahl verschieben kann Spei...

Page 121: ...s indem Sie die Taste OPEN dr cken siehe Abb A 2 Positionieren Sie die Rolle im Innern der ffnung und beachten Sie dabei die angegebene Drehrichtung siehe Abb B 3 Ziehen Sie so lange am Papier bis es...

Page 122: ...tasti A B e C PORTELLO BLOCCATO Procedura di Sblocco Macchina in caso di comparsa del messaggio Aprire il portello Nel caso di portello bloccato alla comparsa sul display del messaggio Aprire il port...

Page 123: ...eren Sie die Position der Sonde der Kammer ER010 Hochdruck Druck ber der zul ssige Grenze Kontaktieren Sie den technischen Service Faro ER011 Tiefdruck Druck unter der zul ssigen Grenze berpr fen Sie...

Page 124: ...e den technischen Service Faro AL007 Micro T rchen ffnung Kontakt Micro T rchen nicht vorgesehen Kontaktieren Sie den technischen Service Faro AL008 Micro Sicherheit ffnung Kontakt Sicherheit Micro T...

Page 125: ...Liter 19 6 Liter Nutzvolumen Kammer 8 Liter 8 Liter 11 Liter 11 Liter Volumen Beladungsbeh lter 3 65 Liter 3 65 Liter 3 65 Liter 3 65 Liter Gewicht Tr gerzone 0 17 MPa 0 17 MPa 0 26 MPa 0 26 MPa Gewic...

Page 126: ...al dispositivo al operador y en algunos casos al paciente ADVErTENCIAS Estas instrucciones avisan de que es necesario prestar mucha atenci n para evitar situaciones que podr an da ar el dispositivo P...

Page 127: ...LoG A EMBALAJE ALTO FR GIL NO MOJE NO RUEDE NO USE GANCHOS PESO M X SUPERPONIBLE TEMPERATURADE ALMACENAMIENTO CONDICIONES DE TRANSPORTE HUMEDAD RELATIVA PRESI N ATMOSF RICA CART N RECICLABLE RH 10 I 9...

Page 128: ...ositivo por primera vez efectuar la limpieza de la c mara como se describe en la p g 147 No apoyar el autoclave sobre mesas o superficies no estables No efectuar ning n intento de mantenimiento en el...

Page 129: ...aireada y espaciosa posible En el caso de batas u otros tejidos reutilizables estos deben ser lavados y secados despu s del uso y antes de la esterilizaci n en modo de eliminar el material org nico y...

Page 130: ...en las cargas huecas El autoclave est disponible en 2 variantes de capacidad de la c mara de esterilizaci n 16 21 El autoclave est disponible con los siguientes dispositivos de memorizaci n o impresi...

Page 131: ...en la c mara durante la fase de secado y en la fase de equi librio b rico PUERTO USB Puerto no alimentado destinado al uso exclusivo de los t cnicos cualificados Utilice un cable usb est ndar con con...

Page 132: ...artimento para impresora externa VER FIG 2 VISTA DELANTERA 11 Acoplamiento para descarga dep sito de descarga 12 Acoplamiento para carga dep sito de carga 18 Asas VER FIG 3 VISTA POSTERIOR 13 Acoplami...

Page 133: ...do m ltiple Secado carga s lida Secado carga porosa Test Type efectuados seg n norma EN13060 Ciclos de tipo S P rdidas de aire X X X Din mica de presi n en la c mara de esterilizaci n X X X C mara vac...

Page 134: ...as cargas Test de secado para peque as cargas Test de penetraci n vapor para cargas porosas Test termom trico para cargas s lidas Test de secado para cargas s lidas Test de penetraci n vapor para car...

Page 135: ...extracci n de bandejas 1 tubo de carga 1 tubo de descarga 1 embudo 4 tapones Para las versiones equipadas con Tarjeta Memory Card Tarjeta de memoria introducida en el alojamiento correspondiente Lect...

Page 136: ...l autoclave procedere nel seguente modo Aprire il portello ruotando la manopola 2 fig 1 in senso antiorario Premere l interruttore generale luminoso 1 fig 1 USO DEI MENU Il men principale composto da...

Page 137: ...lir Italiano Deutsch English Francais Espanol Configuraci n Carga de agua Impresi n Ciclo Borrar memoria B sico Avanzado Especial Salida Opciones carg agua Memorizaci n Impresora Opciones impresora Fo...

Page 138: ...ontrase a Salida Contrase a 00000000 Introducir Salir Aumentar Disminuir Salida Memorizaci n Salida Configuraci n Carga de agua Impresi n Ciclo Borrar memoria Configuraci n Carga de agua Impresi n Ci...

Page 139: ...permitir el vaciado del dep sito Vaciado autom tico del dep sito de descarga 16 fig 3 INTroDUCCI N EN LA C MArA DEL MATErIAL A ESTErILIZAr Efectuar el embolsado de la carga con mucha atenci n determi...

Page 140: ...espec fico suministrado FUNCI N LTIMo CICLo AVANZADo Para todos los programas est activa autom ticamente la funci n de LTIMO CICLO AVANZADO Una vez que hayan transcurrido 30 a partir del final del cic...

Page 141: ...isualizador Se puede escoger entre KPa Kilo Pascal Bar absolutos Bar relativos FUNCI N CoNTrASTE DEL VISUALIZADor Por medio del men Opciones Configuraci n Especial Contraste delVisualizador es posible...

Page 142: ...one SK07 Diagramma Test Helix 121 C 1 1 6 1 2 1 6 2 1 1 5 2 2 5 abs bar Pressione S SK07 Diagramma ciclo 134 C B Flash 0 24 1 3 0 24 1 1 1 25 1 25 0 3 3 15 0 0 5 1 1 5 2 2 5 3 3 5 Tempo P abs bar pres...

Page 143: ...134 C 1 3 15 Pressione SK07 Diagramma ciclo Prion 134 C 1 0 15 1 6 1 6 1 2 0 15 3 15 1 0 0 5 1 1 5 2 2 5 3 3 5 Tempo P abs bar Pressione B ciclo Standard 121 C 1 10 Pressione SK07 Diagramma Test Helix...

Page 144: ...1 1 1 1 1 1 SK07 Diagramma ciclo 121 C Porosi 0 3 1 1 1 5 0 7 2 1 0 0 5 1 1 5 2 2 5 Tempo P abs bar pressione S ma ciclo 134 C Imbustati 0 7 3 15 Tempo Pressione ma ciclo 134 C Non Imbustati 1 3 0 7 3...

Page 145: ...1 3 0 7 Tempo Pressione 07 Diagramma ciclo 134 C Non Imbustati 0 3 1 1 1 5 1 3 0 7 3 15 Tempo Pressione SK07 Diagramma Bowie Dick Test 134 C 0 3 1 1 5 1 3 0 7 3 15 1 0 0 5 1 1 5 2 2 5 3 3 5 4 Tempo P...

Page 146: ...ac o Eventuales rellenos en la subida de la presi n Sterilization xxxx xxxx x xx xx Presi n temperatura y tiempo inicio esterilizaci n xxxx xxxx x xx xx Presi n temperatura y tiempo en esterilizaci n...

Page 147: ...la comprobaci n de la carga Hollow A debe colocarse en la bandeja inferior SELECCI N oPCIoNES Seleccionando el submen Opciones se accede a la lista de los submen s de configuraci n de la m quina 1 Co...

Page 148: ...h gasket X PERIODICAL CONTROLS Frequency Operation Before first Use Daily Yearly 2 Years Vacuum test EN 17665 X Bowie Dick Test EN 17665 X Helix Test EN 17665 X Safety Check electrical EN 62353 Protec...

Page 149: ...la operaci n de limpieza no fuera satisfactoria llamar al Servicio de Asistencia T cnica Regulaci n de la puerta del visor Comprobaci n Cuando sea necesario Normalmente no antes de seis meses desde el...

Page 150: ...instalaci n del autoclave Cuando se alcanza el ciclo n 1000 aparece un mensaje para recordar que debe efectuarse el mantenimiento El mantenimiento comprende la sustituci n limpieza y control de los co...

Page 151: ...men configuraci n seleccionar B sico Para modificar la fecha Desde el men b sico seleccionar Fecha Pulsar la tecla para aumentar la selecci n Pulsar la tecla para disminuir la selecci n Pulsar la tec...

Page 152: ...rir la tapa de la impresora pulsando la tecla OPEN de la manera indicada ver fig A 2 Colocarelrollodepapelenelcompartimiento respetandoelsentidoderotaci nindicado ver fig B 3 Tirar del papel hasta que...

Page 153: ...il messaggio Sbloccare macchina Per ripristinare l autoclave PREMERE CONTEMPORANEAMENTE i tasti A B e C PORTELLO BLOCCATO Procedura di Sblocco Macchina in caso di comparsa del messaggio Aprire il port...

Page 154: ...atura de la c mara por debajo del l mite permitido Comprobar la posici n de la sonda de la c mara ER010 Presi n Alta presi n por encima del l mite permitido Contactar con el Servicio de Asistencia T c...

Page 155: ...e presi n Contactar con el Servicio de Asistencia T cnica Faro AL007 Micro Puerta apertura contacto micro puerta no prevista Contactar con el Servicio de Asistencia T cnica Faro AL008 Micro Seguridad...

Page 156: ...os 15 6 litros 19 6 litros 19 6 litros Volumen til de la c mara 8 litros 8 litros 11 litros 11 litros Volumen del dep sito de carga 3 65 litros 3 65 litros 3 65 litros 3 65 litros Peso rea de soporte...

Page 157: ...fig 1 fig 1 fig 2 2 1 9 8 449 4 3 5 6 7 660 390 10 11 12 18 fig 2 400 AUTOCLAVE SERIE SK07...

Page 158: ...157 AUTOCLAVE SERIE SK07 fig 3 fig 4 13 14 15 16...

Page 159: ...lid claims the guarantee covers free repair or replacement Claims for damages and or interest are excluded The guarantee is not considered valid at the sole discretion of FARO if the fault is due to t...

Page 160: ...der normale Abnutzung vorliegen D Faro concede al cliente final una garant a de 24 meses a partir de la fecha de adquisici n La reparaci n en garant a debe ser efectuada en la sede de FARO los gastos...

Page 161: ...Tel 49 2151 936921 Fax 49 2151 936933 www faro it info faro dental de FARO SpA si riserva il diritto di modificare senza preavviso le caratteristiche indicate nel presente manuale FARO SpA reserves th...

Reviews: