8
NOTE: Your Toaster will remain in the last selected CYCLE/MODE
after toasting. To change or clear Cycles or Modes, press the
Button next to the Indicator Light again and the Light will go
out. Press the new selection, a beep will sound and the
corresponding Light will illuminate. Check to make sure the
proper selections have been made.
5. Lower the Toasting Lever to lock into position; toasting
will begin.
REHEATING BREAD AND FOODS
1. Insert the toast or toaster food into the Toasting Slot(s). Do not
reheat buttered bread or pastries.
NOTE: There is NO need to adjust the Browning Control when
using the REHEAT Cycle.
2. Press the REHEAT Button. A beep will sound, the Light will
illuminate. Lower the Toasting Lever and the Toaster will begin
reheating. The Toasting Lever will rise in a very short period of
time. Watch it carefully.
REMOVING LODGED FOODS
If a piece of bread or any other toaster food becomes lodged in
either of the Toasting Slots, unplug the Toaster and allow it to cool.
Hold the Toasting Lever down. Turn the Toaster upside down and
shake the food loose.
IMPORTANT: Never use a fork or sharp-edged utensil to remove
toast, because that may damage the heating element or
cause injury.
OPERATING INSTRUCTIONS
(CONTINUED)
3
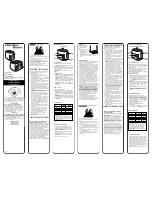
POLARIZED PLUG
This appliance has a polarized plug (one blade is wider than the
other). To reduce the risk of electric shock, this plug is intended to
fit into a polarized outlet only one way. If the plug does not fit fully
in the outlet, reverse the plug. If it still does not fit, contact a
qualified electrician. Do not attempt to modify the plug in any way.
SHORT CORD INSTRUCTIONS
A short power-supply cord is provided to reduce the risk resulting
from becoming entangled in or tripping over a longer cord.
Do not use an extension cord with this product.
PLASTICIZER WARNING
CAUTION: To prevent Plasticizers from migrating from the
finish of the counter top or table top or other furniture, place
NON-PLASTIC coasters or place mats between the appliance
and the finish of the counter top or table top.
Failure to do so may cause the finish to darken, permanent
blemishes may occur or stains can appear.
ELECTRIC POWER
If the electrical circuit is overloaded with other appliances, your
appliance may not operate properly. It should be operated on a
separate electrical circuit from other appliances.