background image

Lumina 41/42


Installing the Lumina 41/42 


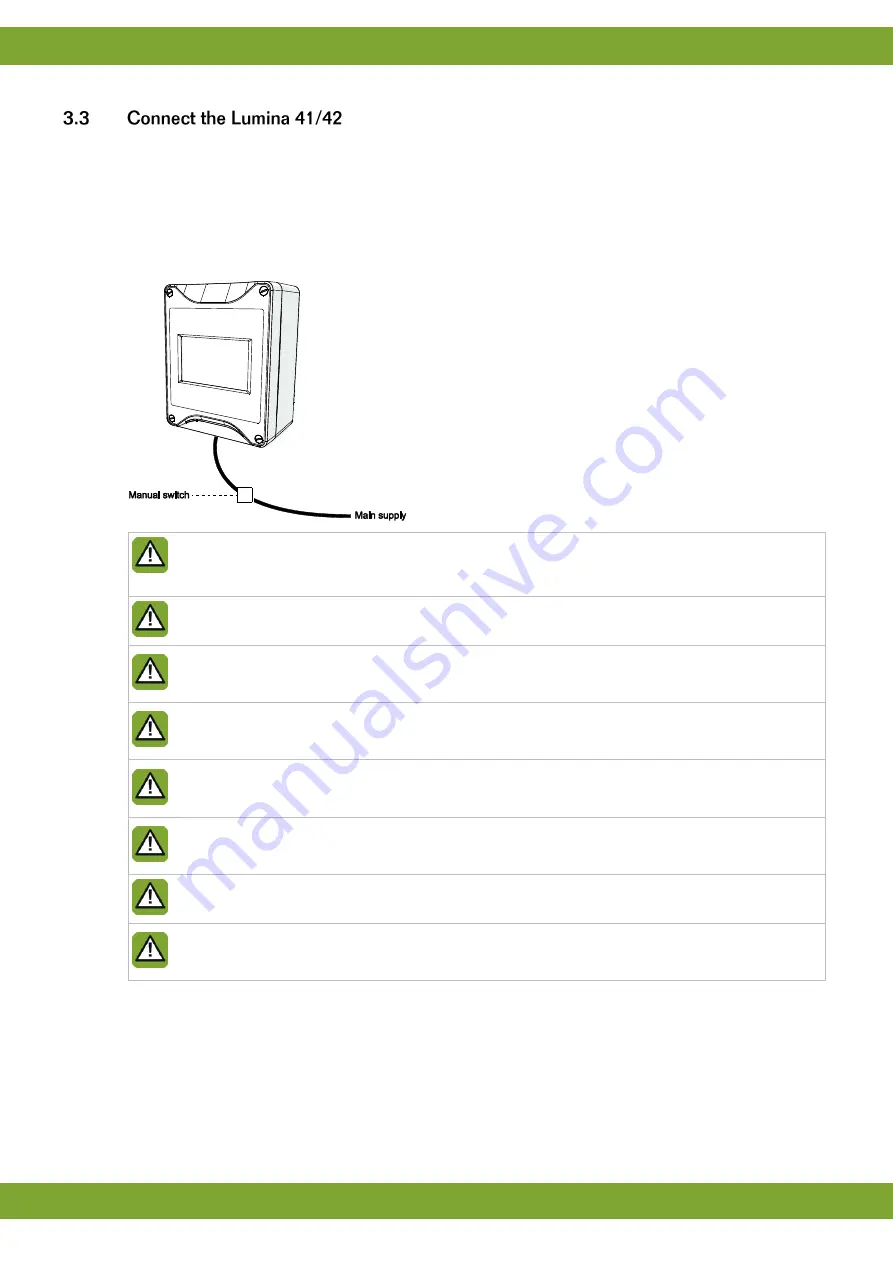
Connect the Lumina 41/42 as follows: 

1.  Open the cover. 

2.  Connect the Lumina 41/42 to the manual switch. 

3.  Connect the manual switch to the main supply (be sure power is disconnected). 

4.  Connect other (signal wires) to the Lumina 41/42, see chapter Technical specifications. 

5.  Close the cover. 


Always use the cable swivels when connecting the Lumina 41/42. Use the sealing discs supplied to seal 
off any unused swivels. Use a sealant to seal all swivels, after the computer has been connected, to 
prevent the entry of moisture, dust and/or aggressive gasses. 


Check that the mains voltage and frequency, for which this computer is suitable, correspond to the 
mains voltage and frequency on site. 


Be sure that the Lumina 41/42 is properly grounded. When using metal cable trays, grounding at one 
point of the tray is recommended. 


The Lumina 41/42 should be possible to shut down with a double pole switch.   


Connect the Lumina 41/42 to a group from the main distributor and mount in separate cable trays. 


Limit the length of the signal wires much as possible; avoid crossing high/low voltage wires. 


To protect against lightning, place an over voltage protection device in the power supply of the Lumina 
41/42. 


Condensation should never occur in the control computer. 


Summary of Contents for F41

Page 1: ...g ...

Page 2: ...oduced by Fancom For the latest information about product installation and operation please contact the customer service dept and or the technical service dept of the Fancom concerned In spite of the care taken when compiling this manual if you should discover any errors please inform Fancom B V in writing Fancom B V PO Box 7131 5980 AC Panningen the Netherlands Copyright 2018 Fancom B V Panningen...

Page 3: ... 2 SD Card Menu 13 5 3 Application 14 5 4 Communication 14 5 5 IO Test 15 6 Silos and ingredients 16 6 1 Silo 16 6 2 Ingredients 17 7 Weigher and Transport 18 7 1 Weigher 18 7 2 External registration 24 8 Feed place 25 9 Clocks external registration and alarms 26 9 1 Feed clock 26 9 2 Water clock 27 9 3 Light clocks 27 9 4 Extra clock 29 9 5 Registration 29 9 6 External alarms 31 10 Checks and tes...

Page 4: ...Lumina 41 42 Table of contents ii 12 3 Demand sensor in weigher hopper excl transport auger 45 13 Appendix EG declaration of compliance 47 ...

Page 5: ...nual also applies to other control computers in the Fancom F2000 line Always read the safety instructions and warnings carefully before using the control computer Always keep this manual close to the Lumina 41 42 The following symbols are used in this manual Tips and suggestions Note providing recommendations and additional information Warning indicating damage to the product if you do not follow ...

Page 6: ... Service Center Virtually all Fancom equipment can be controlled and managed from a central location This requires the F Central FarmManager software package and a communication module The screens in the control computers are also used in F Central FarmManager This means you can start working immediately ...

Page 7: ... value during the feed process The afterflow will not be adjusted if the actual afterflow is higher than the max dosing in difference of the ingredient The dosing capacity of the silo must be set in the control computer This setting is used in the following situations Determination of the maximum dosing time if the minimum amount decrease in 30 sec has not been set The maximum dosing time is five ...

Page 8: ...ceeded the control computer will stop the feed process then give a loud alarm If too little has been dosed in the dosing in process of the required ingredient will be re started If the permitted difference is less than the amount that can be dosed in in one second the control computer will make the permitted difference equal to the amount that can be dosed in in one second ...

Page 9: ...ge pipes etc Never mount the Lumina 41 42 in a humid and or dusty room and certainly not in the room where the animals are present Mount the Lumina 41 42 at such a height that you can control the Lumina 41 42 easily eye level and square on a solid backing The swivels should be positioned at the bottom Mount the Lumina 41 42 as follows 1 Mark the screw holes by using the drilling template taking in...

Page 10: ...entry of moisture dust and or aggressive gasses Check that the mains voltage and frequency for which this computer is suitable correspond to the mains voltage and frequency on site Be sure that the Lumina 41 42 is properly grounded When using metal cable trays grounding at one point of the tray is recommended The Lumina 41 42 should be possible to shut down with a double pole switch Connect the Lu...

Page 11: ...igher and transport Settings of the weigher used and transport settings 5 Feed place Settings of the hoppers and feed lines used 6 Clocks registration and external alarms Settings of the clocks input for external registration and external alarms The control computer has various inputs and outputs to connect external equipment The inputs and outputs consist of digital inputs DI digital outputs DO a...

Page 12: ...the Lumina 41 42 Select YES This allows a menu to be accessed where external alarms with their own report message text can be set A few examples of external equipment with alarm options are door contacts auger motors or pressure alarm of a compressor In the tab page Dose in data about feed can be set Installer HOUSE SETUP tab page Dose in Price per ingredient is per Setting of the unit for enterin...

Page 13: ...f the next feeding cycle for example after a power failure NONE The control computer does not give a message and proceeds according to the normal feed process with overlap STOP The control computer stops the feed process and gives a loud alarm LOUD The control computer gives a loud alarm and proceeds according to the normal feed process with overlap SILENT The control computer gives a silent alarm...

Page 14: ...eriod If this setting is selected the extra settings With clock overlap and Overlap message will appear With overlap clock With Extra clock and Water clock Setting indicating the action the control computer must take if the end time of a period shifts and overlaps the start time of the next time period see Clock end time END The control computer deactivates the time clock if the end time overlaps ...

Page 15: ...nd Date Setting of the current time and date Computer name Setting of the name of the control computer Computer number Setting of the sequence number of the control computer in the network Language Setting of the program language S2S MasterSlave Master Slave setting If the control computer is included in a network only one control computer in the network must be set as MASTER Set all the other con...

Page 16: ...n entered all user screens can be accessed The system will request the password again if the controller is not used for a few minutes Change password EditMode Setting of a password so that only authorised users can change the user settings The password must contain four numbers Enter code 1111 to deactivate the password protection If you have entered a password different to 1111 the control comput...

Page 17: ... in the control computer to the SD card type FBU A service engineer may require this data so the settings can be checked on a different control computer Restore data Restore data re loads saved data from the SD card back onto the control computer type FBU Data saved on one control computer can only be loaded into another control computer if both computers are of the same type In addition the set c...

Page 18: ...the control computer SYSTEM APPLICATION I2 C is a communication bus used to connect prints in the control computer e g AI 4 SYSTEM COMMUNICATION tab page I2C Reset counters Setting used to reset all data to zero simultaneously If there is no S2S communication the Receive and Transmit counters should be set to 0 The I O net is a connection for intelligent network modules For example Intelligent Rel...

Page 19: ...ters Setting used to reset all data to zero simultaneously If there is no S2S communication the Receive and Transmit counters should be set to 0 Use the Input I and Output O test menu to set the control computer to test the communication channels In the IO test menu inputs can be readout and outputs controlled at system level SYSTEM IO TEST The functions in the IO test menu stop all the control ac...

Page 20: ...h off Readout of the after flow value The after flow does not need to be set the control computer automatically calculates this The after flow can be set to zero 0 the after flow will then be recalculated during the next following dosing in session The after flow will be corrected to the new value in one go Wait time increase check Setting of the wait time after which the check on the minimum amou...

Page 21: ...he weight increase in the weigher blender determines when the control computer stops dosing in Enter the standard data of the various feed ingredients here Installer SILO INGRED INGREDIENT Description Setting of the name of the ingredient Max dosing in diff or 1 sec of capacity minute Setting of the maximum permitted dosing difference Process cons with stock Setting of an ingredient This concerns ...

Page 22: ... selected the feed computer automatically knows most of the standard settings The data belonging to OTHER can be entered manually Dosing out relay Setting of the address of the dosing out relay which controls the outlet Reverse relay Setting for the analog output address choice LINEAR or relay output choice RELAY Weigher input address Setting of the input address to which weighing is connected Thi...

Page 23: ...t If the rotor makes a half stroke the outlet opens If the rotor makes another half stroke the outlet closes again Outlet control time sec Setting of the time required to fully open the outlet During this time the relay is active to open the outlet Weigher capacity Setting of the maximum capacity of the weigher Min charge Setting of the minimum weight that can be dosed in The control computer will...

Page 24: ...weight is required Use a calibration weight that is nearly as heavy as the maximum empty weight of the weigher blender Calibrate the weigher as follows 1 Empty the weigher completely so the feed computer can determine the zero point 2 Select CALIBRATE EMPTY 3 Press Ready to enter the zero point of the weigher Tab page Weight will appear again Zero offset shows the number of counts of the zero poin...

Page 25: ...hat is deducted from the gross weight to obtain net weight If the actual tare is below the Maximum tare the tare of the weigher is ascertained Dosing in can then continue normally afterwards If the Maximum tare is exceeded no more dosing in can take place The control computer stops followed by a loud alarm The control computer automatically determines the Maximum tare when the weigher capacity is ...

Page 26: ...sor to be completely discharged During this extra time the feed computer will not place a new portion of feed in the weigher hopper In the transport menu enter per house the basic data of the transport augers used Depending on the House setup settings this tab can display the following information Setting type Weigher hopper Installer WEIGH TRANSP TRANSPORT tab page General Transport status Settin...

Page 27: ...rt system BLOCK disables the transport system Transport speed cm s Setting of the transport speed of the feed in the auger here Transport capacity g cm Setting of the feed weight in grams per cm Enter the addresses of the dosing out auger s used per house in this tab page Installer WEIGH TRANSP TRANSPORT tab page I O Circuit auger relay Setting for the analog output address choice LINEAR or relay ...

Page 28: ... animal place Sect Registration per section Amount to Do Read out of the total amount of pulses to be sent Output address Setting the address of the relais used for pulsing Quantity per pulse Setting of how many grams per pulse are measured Still to be sent Read out the amount of pulses to be sent Pulses outputted Read out of the amount of sent pulses ...

Page 29: ...ces used hoppers and the sensor installed in the final hopper Installer Feed place Feed sensor Setting of the type of sensor Make contact The sensor makes contact if it detects feed Break contact The sensor breaks contact if it detects feed Address Setting of the address of the digital input ...

Page 30: ... contacts Installer CLOCK REGIS The feed clock is used to prepare feed dosing in weighing and dosing out and to control the feed lines Installer CLOCK REGIS FEED Description Setting of the name of the function Time clock type Setting indicating how the user can use the clock ON OFF User enters on off times ON DURATION User enters time and duration of activation Time clock relay Setting for the ana...

Page 31: ... enters time and duration of activation Registration via Setting of the registration input used to measure the amount of water The volume of water can be measured by a flow meter Time clock relay Setting of the relay address controlled by the clock Relay type Setting of the passive not controlled relay status N O normally open if it makes no contact N C normally closed if it makes contact Light cl...

Page 32: ...b page Control Control on Setting of the way in which light is controlled This option is only available if light measurement YES has been selected at light clocks LUX If you want to control the light using a light sensor select LUX The light clock will adjust the light intensity to the measured light intensity PERC If the lighting is not to be controlled using the connected sensor select PERC The ...

Page 33: ... the passive not controlled relay status N O normally open if it makes no contact N C normally closed if it makes contact Per house the control computer has an input that can be used to register water consumption The amount is registered in the form of pulse values counts or contact The control computer adds up the number of counts or measures the active time and converts the time into a measured ...

Page 34: ...he contact is HIGH Depending on the selected Registration Input the following settings will appear SLOW PULSE or QUICK PULSE Amnt per pulse Setting of the unit that corresponds to one pulse Amount today Readout of the unit measured today Reset this value to start all registration from zero again CONTACT Display Setting how the unit is displayed AMOUNT number units per minute Amount per min TIME th...

Page 35: ... of the input address to which the alarm is connected The value between brackets indicates the current value of the input Input type Setting indicating when the input must give an alarm MAKE CONTACT the alarm will activate if contact is made BREAK CONTACT the alarm will activate if contact is broken Alarm type Setting of how alarms are handled NONE the alarm is deactivated STOP in an alarm situati...

Page 36: ...during a normal feed process but without using any feed This can be used to test the weigher s load cell before the installation is actually used With a weigher test ensure All the augers must be activated If using a separate weigher ensure no feed can enter the weigher If the installation also contains a hopper make sure you operate the sensor in the hopper at the right moment otherwise an alarm ...

Page 37: ...12Vdc Low level 1 0Vdc Application Counter input min pulse width 25mSec max frequency 20Hz Application Frequency input max frequency 5kHz 5 Digital outputs Relays Relays 1 2 3 make break contact and 4 voltage free max 2A 60Vdc 30Vac Relay 5 alarm relay voltage free max 2A 60Vdc 30Vac Extra digital outputs DO Connection for optional relay FRM 8 print Communication I O Net for extra inputs and outpu...

Page 38: ... contact voltage 12Vdc Low level 1 0Vdc Application Counter input min pulse width 25mSec Max frequency 20Hz Application Frequency input Max frequency 5kHz 1 Touch screen 2 HI mainboard 3 SBC 4 LED strip 5 FUNC CPU 6 IOB 4 I O 7 FPD25 Power supply 8 FRM 8 Internal relay ...

Page 39: ...Lumina 41 42 Technical specifications 35 ...

Page 40: ...echnical specifications 36 AI type Type analog input Voltage measurement U Resistance measurement R AO 4 Analog outputs AI 4 Analog inputs DI 4 Digital inputs Relay 4 Digital outputs relays DO 8 Extra digital outputs ...

Page 41: ...Lumina 41 42 Technical specifications 37 ...

Page 42: ...istor Example Setting the I O net terminal resistor 1 One control computer connected to two I 0 network modules using one I O net The control computer is located between the two I O network modules This does not require a terminal resistor Both I O network modules are at the end of the network These must be terminated Example Setting the I O net terminal resistor 2 One control computer connected t...

Page 43: ... the status EMPTY 3 A portion of feed will be dosed in into the weigher 4 When the Min Sensor in the weigher hopper is EMPTY the weigher will drop the portion in the weigher hopper 5 The feed transport to the house storage hopper runs until the Min Sensor in the weigher hopper is EMPTY An extra runtime will prevent the transport auger from switching OFF and ON between two portions When the demand ...

Page 44: ...Lumina 41 42 Appendix Concept feeding systems 40 ...

Page 45: ...w the demand sensor in the weigher hopper it will get the status EMPTY 5 A portion of feed will be dosed in into the weigher The weigher will immediately drop the portion in the weigher hopper 6 The feed transport to the house storage hopper runs mechanically until the time delayed sensor in the house storage hopper is FULL When the demand sensor in the weigher hopper is still asking for feed the ...

Page 46: ...Lumina 41 42 Appendix Concept feeding systems 42 ...

Page 47: ...Lumina 41 42 Appendix Concept feeding systems 43 ...

Page 48: ...Lumina 41 42 Appendix Concept feeding systems 44 ...

Page 49: ...per will ask for feed 3 The new feed will be dosed in into the weigher 4 When dosing in is finished the weigher will drop the feed directly into the weigher hopper Hardware wise the Min Sensor in the weigher hopper has to block the feeding system and the transport auger system depending from running when there s no feed in the weigher hopper When the demand sensor in the weigher hopper is still as...

Page 50: ...Lumina 41 42 Appendix Concept feeding systems 46 ...

Page 51: ... 34 Place Panningen the Netherlands Hereby declares that Lumina 41 42 Satisfies the conditions of 1 The Low Voltage Directive 2014 35 EU according to EN 61010 2 the EMC Guideline directive 2014 30 EU Emission and immunity according to NEN EN IEC 61326 Panningen Date 6 1 2018 Paul Smits Managing Director ...

Reviews: