


17 U109645
Australia
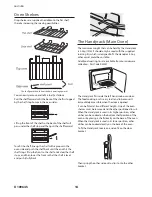
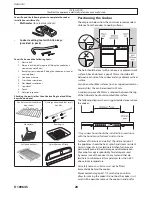
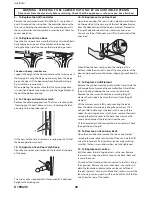
If you need to remove the side rails to facilitate the
cleaning of the grill chamber, you can unhook them from
the grill chamber sides and wipe the sides clean with a
soft cloth and mild detergent.
Do not
use any abrasive substances.
DO NOT put the side runners in a dishwasher.
Once you have finished, hook the side rails back onto the
sides of the chamber. To refit the frame, pull the side rails
forward and, for each side in turn, support the side rail
and press the frame down into the side rails. Replace the
grill pan.
When refitting the grill pan, ensure that the wide rim is at
the front:
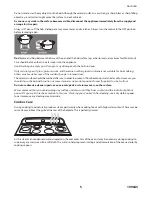
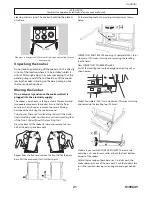
Control Panel and Doors
Avoid using any abrasive cleaners, including cream
cleaners, on brushed stainless steel surfaces. For best
results, use a liquid detergent or our Multi-purpose
Cleaner.
The same cleaner can also be used on the doors.
Alternatively, use a soft cloth wrung out in clean hot
soapy water. You can use the same method for cleaning
the control panel and knobs (although we do supply a
specialist Fascia Cleaner). After cleaning, polish with a dry
cloth.
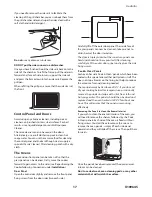
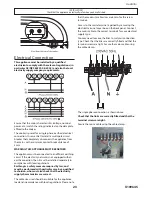
The Ovens
An oven door front panel can be taken off so that the
glass panels can be cleaned. Firstly, move the cooker
forward to gain access to the sides (see ‘Repositioning the
Cooker following Connection’ under
Installation
).
Door Panel
Open the oven door slightly and remove the front panel
fixing screws from the door sides (two each side):
Carefully lift off the outer door panel. The inside face of
the glass panels can now be cleaned - take care not to
disturb or wet the door insulation.
The door is triple glazed but the inner two panels are
fixed and should not be separated. After cleaning,
carefully refit the outer door panel and replace the side
fixing screws.
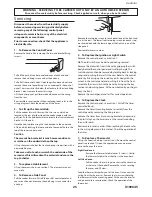
'Cook & Clean' Panels
Each oven has side 'Cook & Clean' panels which have been
coated with a special enamel that partly cleans itself. This
does not stop all marks on the lining, but helps to reduce
the amount of manual cleaning needed.
These panels work better above 200°C. If you do most
of your cooking below this temperature, occasionally
remove the panels and wipe with a lint free cloth and
hot soapy water. The panels should then be dried and
replaced and the oven heated at 200°C for about one
hour. This will ensure that the panels are working
effectively.
Removing the Panels to clean the Enamel Interior
If you wish to clean the enamel interior of the oven, you
will need to remove the shelves, followed by the 'Cook
& Clean' panels. Each side of the oven is fixed with four
fixing screws. You don’t have to remove the screws to
remove the oven panels - simply lift each side panel
upwards and they will slide off the screws. Then pull them
forwards:
Once the panels have been removed, the oven enamel
interior can be cleaned.
Don’t use steel wool, oven cleaning pads, or any other
materials that will scratch the surface.
Summary of Contents for Elan U109645 - 02
Page 28: ...U109645 28 Australia Circuit Diagram...
Page 31: ...31 109645 Australia...
Page 32: ......


