background image

19

Australia

Control Panel and Doors

Avoid using any abrasive cleaners, including cream cleaners, 
on brushed stainless steel surfaces. For best results, use a 
liquid detergent or our Multi-purpose Cleaner.

The same cleaner can also be used on the doors. Alternatively, 
use a soft cloth wrung out in clean hot soapy water. You can 
use the same method for cleaning the control panel and 
knobs (although we do supply a specialist Fascia Cleaner). 
After cleaning, polish with a dry cloth.

Ovens

The oven door front panels can be taken off so that the glass 
panels can be cleaned. Move the cooker forward to gain 
access to the sides (see the 

‘Moving the Cooker’

 section under 

‘Installation’

).

Door Panel

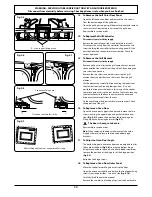
Open the oven door slightly and remove the front panel 
fixing screws from the door sides, two each side 

(Fig.6-10)

.

Carefully lift off the outer door panel. The inside face of the 
glass panels can now be cleaned – take care not to disturb or 
wet the door insulation.

Note: 

If the door is triple glazed then the inner two panels are 

fixed together and should not be separated. 

After cleaning, carefully refit the outer door panel and replace 
the side fixing screws.

 

DO NOT use harsh abrasive cleaners or sharp metal 
scrapers to clean the


oven door glass since they can 

scratch the surface, which may result in shattering of 
the glass.

'Cook & Clean' Panels

The main oven has side ‘Cook & Clean’ panels which have 
been coated with a special enamel that partly cleans itself. 
This does not stop all marks on the lining, but helps to reduce 
the amount of manual cleaning needed.

These panels work better above 200°C. If you do most of your 
cooking below this temperature, occasionally remove the 
panels and wipe with a lint free cloth and hot soapy water. 
The panels should then be dried and replaced and the oven 
heated at 200°C for about one hour. This will ensure that the 
panels are working effectively.

Removing the Panels to clean the Enamel 
Interior

If you wish to clean the enamel interior of the oven, you will 
need to remove the shelves, followed by the ‘Cook & Clean’ 
panels. Each side of the oven is fixed with four fixing screws. 
You do not have to remove the screws to remove the oven 
panels. Simply lift each side panel upwards, slide them off the 
screws and then pull them forwards 

(Fig.6-11)

.

Once the panels have been removed, the oven enamel 
interior can be cleaned.

DO NOT use steel wool, oven cleaning pads, or any other 
materials that will scratch the surface.

ArtNo.320-0002c

- Oven door side screws (Elan)

Fig.6-10

ArtNo.320-0008 Removing the oven lining

Fig.6-11

Summary of Contents for Classic 110 Dual Fuel

Page 1: ...Elite 110 Dual Fuel ArtNo 000 0008 Falcon logo shaded User Guide Installation Service Instructions U109740 04 Australia...

Page 2: ...u Start 1 2 Cooker Overview 3 3 Cooking Tips 13 4 Cooking Table 14 5 Troubleshooting 15 6 Cleaning Your Cooker 17 7 Installation 21 8 Conversion to Propane Gas 30 9 Servicing 32 10 Circuit Diagram 38...

Page 3: ...meter or cylinder DO open doors and windows to get rid of the gas DO keep people away from the area affected Call your gas supplier Ventilation The use of a gas cooking appliance results in the produ...

Page 4: ...d be as dry as possible Frost on frozen foods or moisture on fresh foods can cause hot fat to bubble up and over the sides of the pan Carefully watch for spills or overheating of foods when frying at...

Page 5: ...that prevents the ow of gas if the ame goes out When the igniter button is pressed in sparks will be made at every burner this is normal Do not attempt to disassemble or clean around any burner while...

Page 6: ...so avoid using unstable and misshapen pans that may tilt easily and pans with a very small base diameter e g milk pans single egg poachers Fig 2 7 The minimum recommended pan diameter is 120mm The max...

Page 7: ...nd metal cooking utensils e g spatulas will damage the surface Use heat resistant plastic or wooden utensils DO NOT put it crossways it will not t properly and will be unstable DO NOT put it on any ot...

Page 8: ...ctions on setting the time of day References to left hand and right hand ovens apply as viewed from the front of the appliance The left hand oven is a programmable multi function oven while the right...

Page 9: ...fore cooking ArtNo 030 0028 Elan MF symbols ArtNo 030 0028 Elan MF symbols ArtNo 030 0028 Elan MF symbols ArtNo 030 0028 Elan MF symbols Fan assisted oven This function operates the fan circulating ai...

Page 10: ...ht will glow until the oven has reached the temperature you selected It will then cycle on and o during cooking as the oven maintains the selected temperature Fig 2 21 Operating the right hand fan ove...

Page 11: ...beeper when it sounds turn the Adjusting knob anti clockwise The cook period which is the length of time you want the oven to cook for The stop time which is the time of day you want the oven to stop...

Page 12: ...ck Make sure that the clock is in manual mode and cancel any active programs Turn and hold the Timer knob to the clock symbol for about 8 seconds On appears on the display Fig 2 30 Keep holding the Ti...

Page 13: ...maximum weight that can be held by the Handyrack is 5 5kg 12lb It should only be used with the supplied roasting tin which is designed to t the Handyrack Any other vessel could be unstable Additional...

Page 14: ...e the catches holding the drawer to the side runners and at the same time pull the drawer forward and away from the side runners Fig 2 46 For safety s sake push the drawer runners back out of the way...

Page 15: ...the front edge of the oven s wire shelves Other containers should be placed centrally Keep all trays and containers away from the back of the oven as overbrowning of the food may occur For even brown...

Page 16: ...teaks according to thickness 45 50 minutes per 500g of mixture 2 2 hours Up to 3 hours 80 90 minutes 15 25 minutes 10 15 minutes 20 30 minutes 30 40 minutes 20 30 minutes on a preheated tray 35 45 min...

Page 17: ...king times are intended to be used only as a guide Individual tastes may require the temperature to be altered either way to get the results you want Try cooking at a higher temperature setting 5 Trou...

Page 18: ...e burner for few seconds The igniter should spark and light the gas If when you let go of the control knob the burner goes out the safety device has not held in Turn the control to the o position and...

Page 19: ...pills For spills and boil overs that occur while cooking turn o the burner as soon as possible and allow it to cool Do not clean until the area is completely cooled down Wipe up spills as soon as poss...

Page 20: ...minutes immediately after use Stubborn particles may be removed from the grid using a nylon brush Alternatively the grill pan can be washed in a dishwasher Before you remove any of the grill parts for...

Page 21: ...cleaners or sharp metal scrapers to clean the oven door glass since they can scratch the surface which may result in shattering of the glass Cook Clean Panels The main oven has side Cook Clean panels...

Page 22: ...torage Drawer exterior Enamel or paint Hot soapy water soft cloth Any stubborn stains remove gently with a liquid detergent Stainless steel Microfibre plus all purpose cloth supermarket Sides and plin...

Page 23: ...e If your appliance is outside the 12 month warranty period our service provider may charge for this visit If you request an engineer to visit and the fault is not the responsibility of the manufactur...

Page 24: ...electrical wiring regulations and any other relevant statutory regulations WARNING Where this appliance is installed in marine craft or in caravans it shall NOT be used as a space heater Provision of...

Page 25: ...gs only required if fitting the cooker on a stone or concrete floor 4 Steel tape measure 5 Cross head screwdriver 6 Flat head screwdriver 7 4mm 3mm Allen keys 8 Spirit level 9 Pencil 10 Adjustable spa...

Page 26: ...attaching re resistant material to the surface and covering with sheet metal with a minimum thickness of 0 4mm to a height C of not less than 150mm above the hotplate should satisfy this requirement 3...

Page 27: ...justing nuts one for each roller at both the front bottom corners of the cooker Completing the Move Unfold the rear edge of the pack base tray Grip the fascia panel and lift the front of the cooker sl...

Page 28: ...ooker 2 Draw a pencil line 100mm from the front edge of the levelling feet 3 Mark the centre line for the bracket by measuring 550mm from the left hand side of the cooker 4 Lower the front roller and...

Page 29: ...rn on and light two of the hotplate burners For Natural Gas cookers the pressure should be 1kPa For Propane X cookers the pressure should be 2 54kPa Electrical Connection This appliance must be instal...

Page 30: ...ect terminals for your electrical supply type Fig 7 17 and Fig 7 18 Check that the links are correctly tted and that the terminal screws are tight Replace the electric terminal cover box make sure tha...

Page 31: ...er back on the side runners and keeping it level push it right back The clips should click into position holding the drawer to the side runners Fig 7 20 Refitting the Oven Door To re t the door slide...

Page 32: ...nnection check that the appliance is electrically safe Injectors Remove the burner caps and heads Remove the old jets Fit the new jets see Technical Data section for correct jets Reassemble in the rev...

Page 33: ...the top and re t it the other way round The snap in converter device is marked to show the gas for which it is set Fig 8 5 Make sure the device is secure in the top cap and re t the cap to the govern...

Page 34: ...the operation of the timer ignition and oven light switches 3 To Remove the Hotplate Top Disconnect from electricity supply Remove the pan supports cooktop burner caps and tops Remove the screws holdi...

Page 35: ...t hand oven Remove the screws securing the cover and lift clear Pull o all the leads to the generator noting their positions Slacken the two screws holding the generator to the cooker and remove the g...

Page 36: ...uring the electric cover to the back sheet remove the cover and disconnect the terminals from the rear Fit the new element and reassemble in reverse order Check the operation of the grill 16 To Replac...

Page 37: ...oven and oven front face on tall oven At the corner pull the seal diagonally away from the door centre until the hook is released Fig 9 14 Proceed to the next hook and release it in a similar way and...

Page 38: ...Hold the fan blade and remove the centre nut left hand thread two brass washers fan blade and circlip Unscrew the fan retaining nuts and washers three o each and lift the fan away from the rear of the...

Page 39: ...ure the oven is cool Open the oven door and remove the oven shelves Remove the grill pan and support from the grill chamber Unscrew the bulb cover by turning anticlockwise It may be very sti Fig 9 19...

Page 40: ...l element A3 Right hand grill element B1 Left hand MF oven control B2 Left hand MF oven control switch B3 Left hand MF oven base element B4 Left hand MF oven top element outer pair B5 Left hand MF ove...

Page 41: ...ic Rp at rear right 240V 50Hz Ratings Natural Gas 1 0kPa Propane 2 54kPa Hotplate Input Injector Bypass Input Injector Bypass Marking Size Marking Marking Size Marking Wok burner 15MJh 1 internal 112...

Page 42: ...40...

Page 43: ...41...

Page 44: ...ArtNo 000 0003 CE logo...

Reviews: