4-Channel Digital Video Recorder
63
⑭
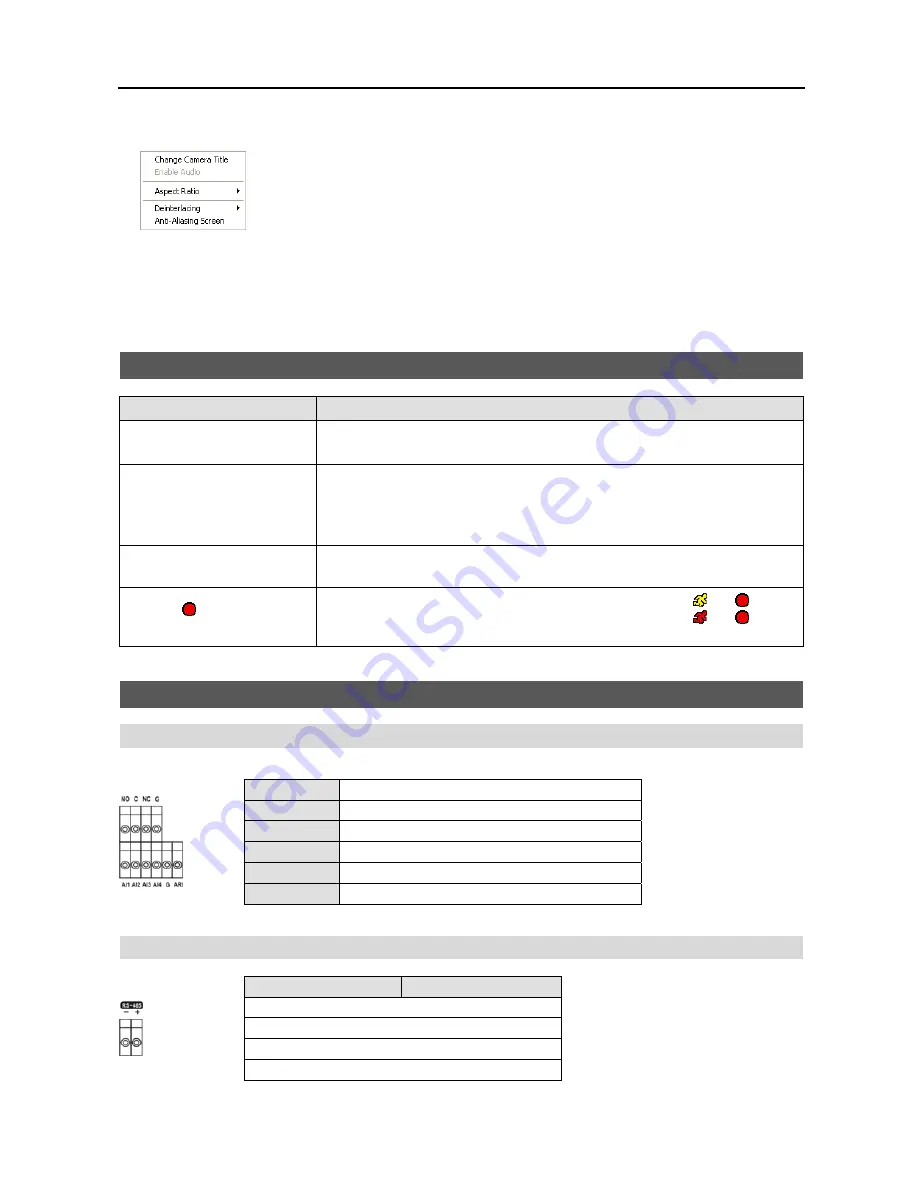
Selecting a camera on the screen and clicking the right mouse button displays the text menu screen.
Change Camera Title
: Changes the camera name.
Enable Audio
: Plays audio while playing back recorded video that has recorded audio.
(Single-Screen Layout Only)
Aspect Ratio
: Changes the image aspect ratio.
Deinterlacing
: Using a deinterlace filter for interlaced video enhances image display quality
by eliminating horizontal scan lines and noise in areas with motion.
Anti-Aliasing Screen
: Enhances image display quality by eliminating stair stepping (aliasing)
effects in the enlarged image.
NOTE: A camera name change in the Web Search mode does not affect the camera name set up on the remote
site. Leaving the Camera Title blank causes the camera name set up on the remote site to display.
Troubleshooting
Problem
Possible Solution
No Power
Check power cord connections.
Confirm that there is power at the outlet.
No Live Video
Check camera video cable and connections.
Check monitor video cable and connections.
Confirm that the camera has power.
Check camera lens settings.
DVR has stopped recording
If hard disk drive is full, you will either need to delete video or set the DVR to
the Overwrite Mode.
The icon displays, however,
the DVR is not recording.
When the DVR is in the Pre-Event recording mode, the yellow and display
when there is no event, and the DVR is not recording. The red and display
when any event occurs and the DVR starts recording.
Connector Pin Outs
I/O Connector Pin Outs
Outputs
Inputs
AI (1 to 4)
Alarm Inputs 1 to 4
G
Chassis Ground (2 connectors)
ARI
Alarm Reset In
NC
Relay Alarm Outputs (Normally Closed)
C
Relay Common
NO
Relay Alarm Outputs (Normally Open)
RS485 Connector Pin Outs
Master Unit
Slave Unit
–
→
To
→
TX
–
+
→
To
→
TX+
–
→
To
→
RX
–
+
→
To
→
RX+
Summary of Contents for 4-Channel
Page 1: ......
Page 2: ......
Page 10: ...User s Manual 2 Figure 1 Typical DVR installation...
Page 14: ...User s Manual 6...
Page 50: ...User s Manual 42...


