3
Recommendations
and suggestions
• The Instructions for Use apply to
several versions of this appliance.
Accordingly, you may find descriptions
of individual features that do not apply
to your specific appliance.
• The manufacturer will not be
held liable for any damages
resulting from incorrect or improper
installation.
• The minimum safety distance
between the cooker top and the
extractor hood is 650 mm (some
models can be installed at a
lower height, please refer to the
paragraphs on working dimensions
and installation).
• Check that the mains voltage
corresponds to that indicated on
the rating plate fixed to the inside
of the hood.
• For Class I appliances, check
that the domestic power supply
guarantees adequate earthing.
Connect the extractor to the
exhaust flue through a pipe of
minimum diameter 120 mm. The
route of the flue must be as short
as possible.
• Do not connect the extractor
hood to exhaust ducts carrying
combustion fumes (boilers,
fireplaces, etc.).
• If the extractor is used in conjunction
with non-electrical appliances
(e.g. gas burning appliances),
a sufficient degree of aeration
must be guaranteed in the room
in order to prevent the backflow
of exhaust gas. The kitchen must
have an opening communicating
directly with the open air in order
to guarantee the entry of clean air.
When the cooker hood is used
in conjunction with appliances
supplied with energy other than
electric, the negative pressure in
the room must not exceed 0,04
mbar to prevent fumes being
drawn back into the room by the
cooker hood.
• In the event of damage to the
power cable, it must be replaced
by the manufacturer or by the
technical service department, in
order to prevent any risks.
• If the instructions for installation
for the gas hob specify a greater
distance specified above, this
has to be taken into account.
Regulations concerning the
discharge of air have to be fulfilled.
• Use only screws and small parts
in support of the hood.
Warning:
Failure to install
the screws or fixing device in
accordance with these instructions
may result in electrical hazards.
• Connect the hood to the mains
through a two-pole switch having
a contact gap of at least 3 mm.
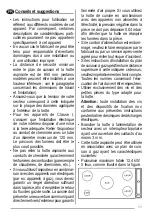
• This suction Hood can be used in
combination with a Gas hob with
the following characteristics:
• Total maximum power 12.4kW.
•
5 burners as shown in the figure.
3
• Se le istruzioni di installazione del piano cottura a gas specificano una
distanza maggiore di quella sopra indicata, è necessario tenerne conto.
Devono essere rispettate tutte le normative riguardanti lo scarico dell'aria.
• Usare solo viti e minuteria di tipo idoneo per la cappa.
Avvertenza
: la mancata installazione delle viti o dei dispositivi di fissaggio
in conformità alle presenti istruzioni può comportare rischi di scosse
elettriche.
• Collegare la cappa all'alimentazione di rete mediante un interruttore
bipolare con distanza tra i contatti di almeno 3 mm.
• Questa cappa aspirante può essere utilizzata in combinazione con un
piano cottura a gas dotato delle seguenti caratteristiche:
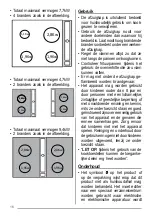
• Potenza massima totale 12,4 kW
• 5 fuochi come illustrato nella figura
• Potenza massima totale 7,7 kW
• 4 fuochi come illustrato nella figura
• Potenza massima totale 4,7 kW
• 2 fuochi come illustrato nella figura
• Potenza massima totale 9,4 kW
• 4 fuochi come illustrato nella figura
2,8Kw
2,8Kw
1,9Kw
2,8Kw
1,9Kw
2,8Kw
1,9Kw
2,8Kw
1,9Kw
2,8Kw
1,9Kw
1,9Kw
1,1Kw
Oppure
EN
Summary of Contents for 110.0456.212
Page 47: ...47 650 I 120 0 04 3 12 4 5 RU...
Page 49: ...49 Z 2 Z...
Page 63: ...63 650 I 120 0 04 3 12 4 5 UK...
Page 65: ...65 Z 2 Z...
Page 66: ...66 A 1 1 B 4 b 3 2 1 b 6 1 2 3 b 3 8 C 4 1 2 3 b b 6 1 2 3 b 2 C C D 15 E 100 F 200 G b c a...
Page 95: ...95 650 mm 120 mm 0 04 mbar 3 mm GR...
Page 97: ...97 Z 2 Z...
Page 103: ...103 650 I 120 0 04 mbar 3 BG...
Page 105: ...105 Z 2 Z...
Page 106: ...106 1 B 4 b 3 2 1 b 6 1 2 3 b 3 8 C 4 1 2 3 b b 6 1 2 3 b 2 C C D 15 E 100 F 200 G b c a...
Page 109: ...109 a Z 2 Z...
Page 110: ...110 A 1 B 4 b 3 2 1 b 6 1 2 3 b 3 8 C 4 1 2 3 b b 6 1 2 3 b 2 C C D 15 E 100 F 200 G b c a...
Page 113: ...113 Z 2 Z...
Page 114: ...114 1 B 4 b 3 2 1 b 6 1 2 3 b 3 8 C 4 1 2 3 b b 6 1 2 3 b 2 C C D 15 E 100 F 200 G b c a...
Page 121: ...121 Z 2 Z...
Page 122: ...122 A 1 B 4 b 3 2 1 b 6 1 2 3 b 3 8 C 4 1 2 3 b b 6 1 2 3 b 2 C C D 15 E 100 F 200 G b c a...
Page 125: ...125 2 4 2 4 2 4 2 4 Z Z...
Page 126: ...126 L ON OFF M ON OFF V 1 2 3 b c a...
Page 127: ......

