4
IPL EXP I/O Series • Setup Guide (Continued)
Mounting
Securely mount the control system expansion interface and other devices, and attach cables using the wiring section (see
on page 7) as a wiring guide. Optional 1U rack shelves are available for use with all IPL EXP models.
Read the instructions and UL guidelines that come with the rack shelf or mounting kit for installation procedures.
•
Optional furniture mounting bracket kits are available for use with the IPL EXP RIO8 expansion interface.
•
All other models come with a ZipClip 200 mounting bracket, which can be mounted to the following items:
•
tabletop
•
equipment rack rails
•
optional equipment rack shelf
•
furniture)
See the product-specific page at
for a list of compatible accessories for mounting your expansion interface.
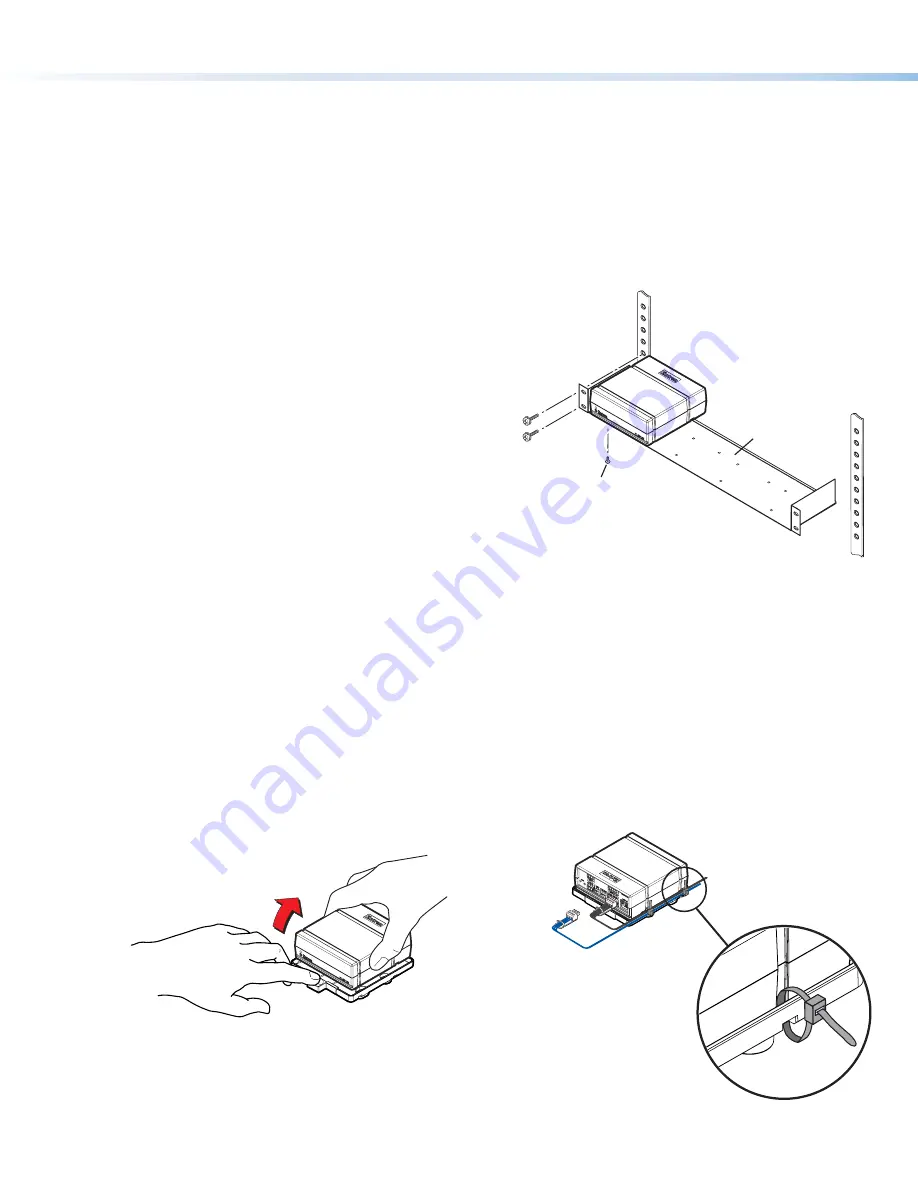
Rack Mounting
The IPL EXP units are one quarter rack wide. Up to four units
can be mounted side by side directly onto a rack shelf.
1. Align the threaded holes in the bottom of the IPL EXP with the
holes in an Extron rack shelf and fasten the unit to the shelf
with two 4-40 x 3/16 inch screws (see
1
at right).
2. Bolt the rack shelf to the rack (see
2
).
Mounting an IPL EXP Expansion Interface With a ZipClip 200
These instructions apply to the IPL EXP 200, S5, and S2 models.
(2) 4-40 x 3/16"
Screws
RSB 123
Rack Shelf
On a Rack Shelf
2
1
Using the ZipClip 200
Attaching and removing the clip and IPL EXP
To attach the unit to the ZipClip 200 mounting clip:
1. Insert the bottom of the EXP down into the clip, starting
with one end.
2. Pivot the other end down and press until the clip snaps
into place.
To remove the EXP from the ZipClip:
1. Press the tab on the
ZipClip (see
1
at
right).
2. Pivot the EXP and lift it out of the ZipClip (
2
).
2
1
Using tie wraps for cable strain relief
1. Attach the EXP to the ZipClip 200 mounting clip as
described previously.
2. Fasten the cables to the ZipClip base.
a. Insert tie wraps (also called “zip ties”) along the
notches on the side of the EXP and through the tie
wrap anchor points on the ZipClip, then around the
cables.
b. Connect
and pull the tie
wraps until they
are secure. Do not
over tighten.
Tie Wrap


