


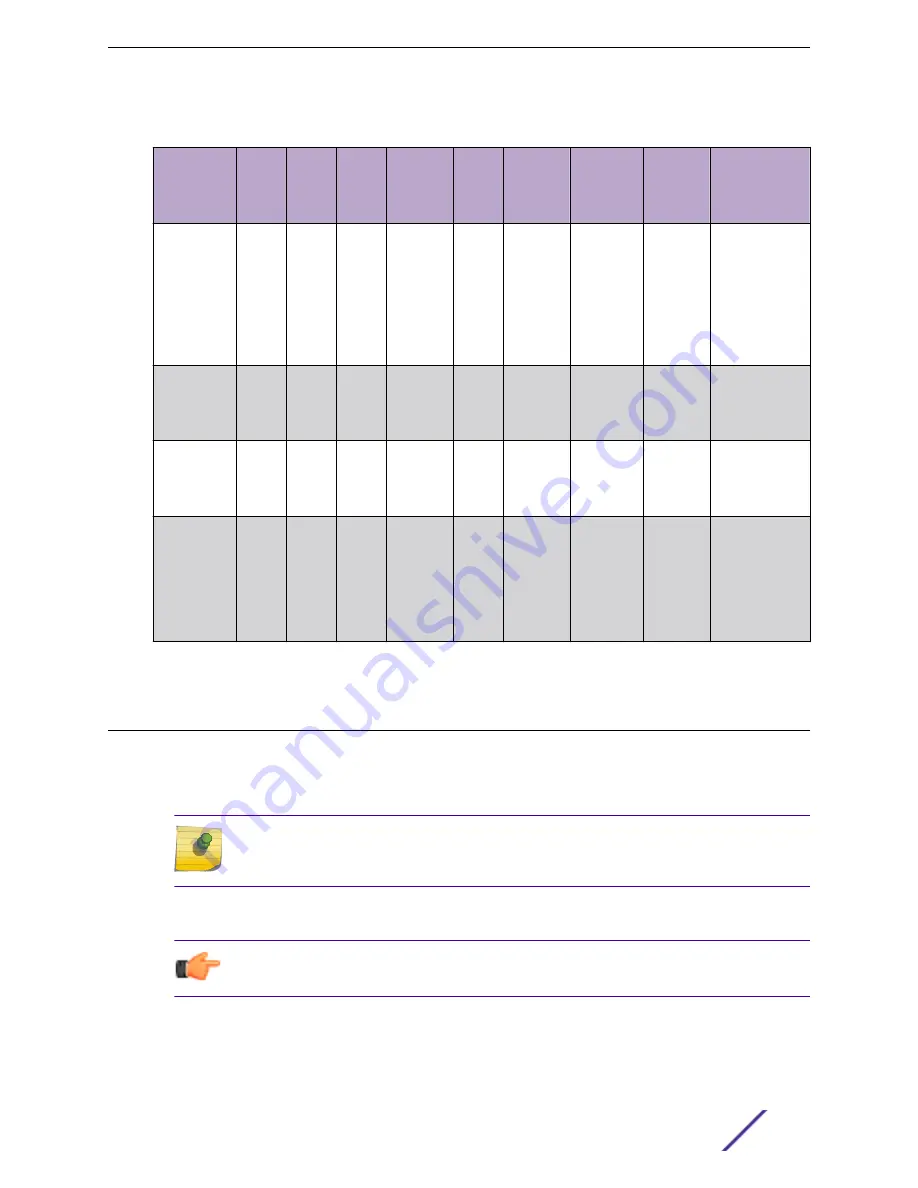
Table 7: Brackets and accessories usage for various installation options (continued)
Mounting
bracket or
accessory
Wall
install
Solid
flat
ceiling
install
Ceiling
install
(T-bar)
Ceiling
install
(protrude
d T-bar)
Juncti
on box
install
Beam
install
Ceiling tile
protrusion
T-bar
widths
Notes
37210 flat
metal easy-
attach
adapter;
used with
main
mounting
bracket
Yes
Yes
No
No
No
No
No
N/A
Wall mount,
ceiling mount,
or install on any
solid surface.
37211 WS-
MBI-
DCFLUSH
bracket
No
No
Yes
Yes
No
No
Yes
9/16 in.,
3/2 in.,
15/16 in.
Protruded
ceiling mount
with varying
widths.
BRKT-00014
7A-01; beam
clip
accessory
No
No
No
No
No
Yes
No
N/A
The beam clip is
attached to the
main mounting
bracket.
30525 WS-
CAB-RJ45-
FLT01
accessory;
used with
any ceiling
bracket
No
Yes
Yes
No
No
No
No
N/A
This accessory
can be used
only with
ceiling mount
brackets listed
in this table.
Install the Access Point on a Drywall or Wood Wall or to a Solid
Flat Ceiling
The access point is installed on a drywall or wood wall or to a solid flat ceiling using:
•
#37201, stainless-steel main mounting bracket that ships with the unit
•
#30516, WS-MBI-WALL04 bracket, two Phillips pan-head screws, and screw-in anchors
Note
The WALL04 bracket and screw-in anchors are used only for drywall or wood wall
mounting.
•
#37201, stainless-steel main mounting bracket with #37210, flat metal easy-attach adapter
•
Phillips pan head screws
Tip
The best practice is to install the access point using the mounting brackets.
Install the Access Point
ExtremeMobility™ Access Points AP410i/e
12


