Experimental Aircraft Models
- 14 -
WWW.RCHomebuilts.com
pitch, no roll. We say ‘almost’ because they are in front of the aerodynamic center of lift, and
therefore ‘down’ elevator acts to raise the nose, and ‘up’ acts to lower the nose. (If confusing, the
good news here is that the worst that can happen if you get it wrong on your initial flight is that the
nose will stay on the runway when you try and take off!)
Hinging the Elevators & Installing the Elevator Servos
1) Retrieve the canard & mark the locations of the elevator hinges, remove the elevators and
prep the slots for bonding, similar to the ailerons and rudders.
2)
Retrieve the remaining two Nylon Rod Pivot Ends (#28)
and drill out the hole in the barrel to 3/32”. Thread them
on to the threaded ends of the elevator actuating arms.
(Holding the actuator arms flat on the workbench will
keep them from moving around as you thread on the
Ends.)
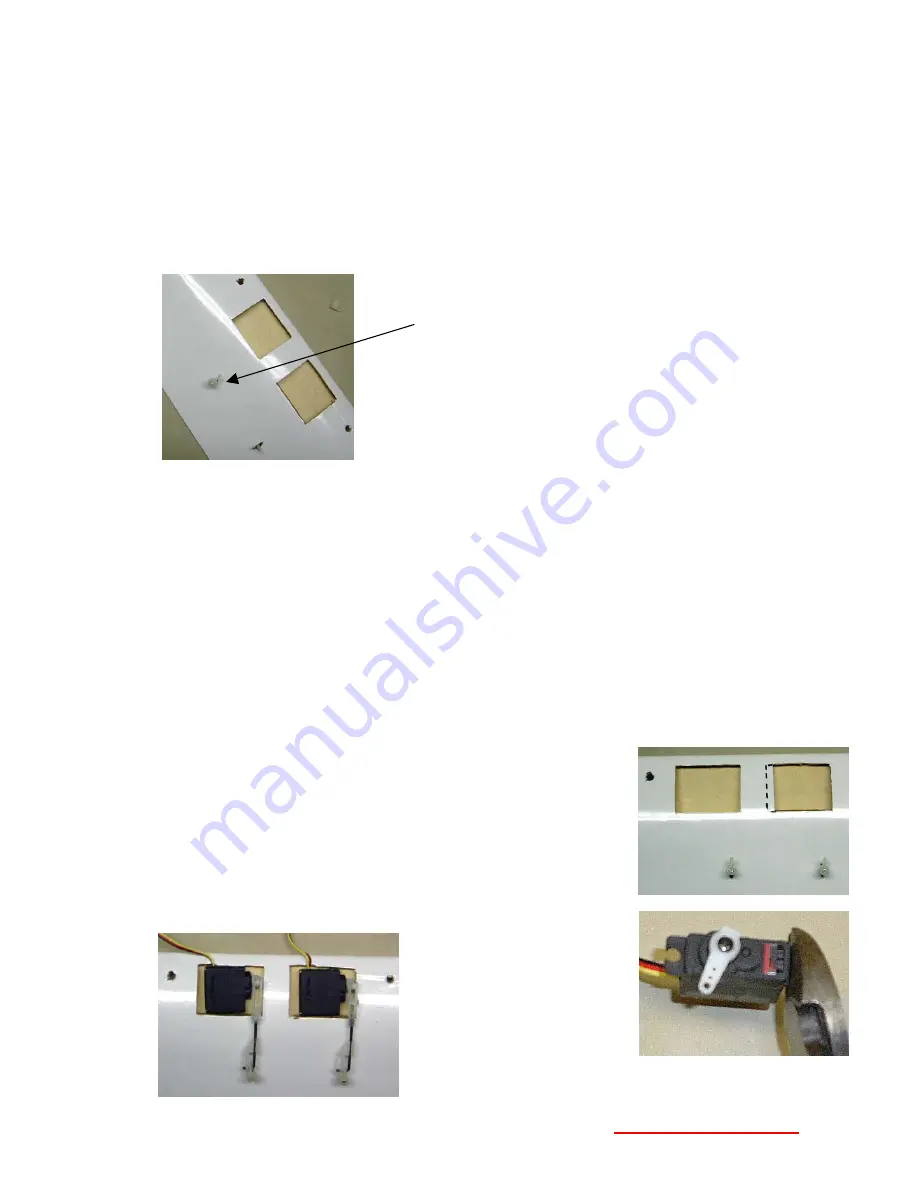
Picture shows step 4 below completed with the
covering removed from the servo bays.
3) Using the same technique that you used to hinge the
ailerons and rudders, CA hinge and epoxy bond the
actuating arms into the elevators.
Double check that the elevators are centered in their openings.
Make sure you can get at least 3/8” upward deflection and 7/8” downward deflection
when operating each elevator using the actuating arms. Lengthen the notch in the top
skin of the canard (in which the actuating arm exiting the canard moves) if necessary.
The elevators are intentionally hinged closer to the bottom edge of the elevator to
increase their effectiveness, so be careful not to install them upside down!
Some builders like to reinforce the bonding of the hinge with a pin that is run through the
wood and into and through the CA hinge, mechanically tying the hinge into the
components. You can cut a pin shorter than the thickness of the trailing edge of the
canard or elevator and insert from the bottom so that it is flush or just below the surface
and does not protrude through the top.
4) Using a razor knife open/remove the Oracover that covers the
servo bays. Increase the width of the opening on both servo
bays to the port side by ¼” - to allow the servo arms to align
with the elevator actuator arms. (Our apologies, we missed
this in manufacture.)
5)
Prepare two Hitec HS-85MG or equivalent micro servos for
mounting to the canard by cutting the mounting lugs off the
sides of the servos, so that they fit in the space provided.
(Note: The HS-
85MG’s put out 46
oz/in of torque @4.7
V. Since the arm
length you’ll be using
is approximately ½”,
the effective power of
the servo is doubled,
yielding almost 6 lbs of thrust, on each elevator –
more than enough power for reliable control.)


