EVGA Z390 DARK (131-CS-E399)
- 35 -
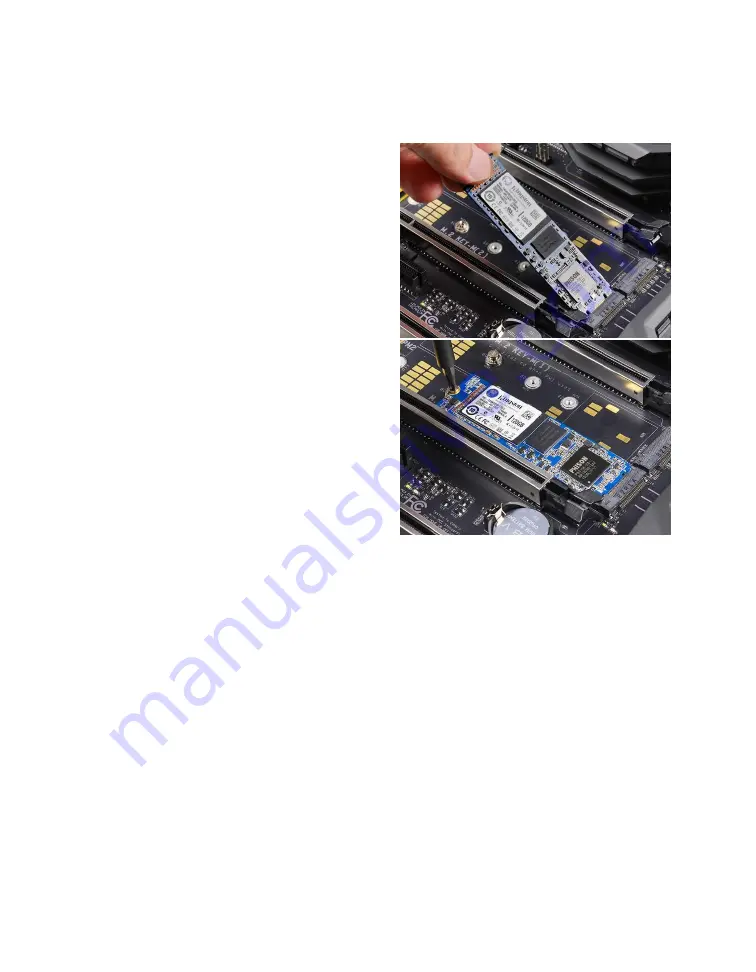
3. Insert the M.2 device at a slight angle of
approximately 45 degrees to the board.
This will allow the contacts (colloquially
called “Gold Fingers”) to seat completely
into the slot. If the device is fully seated,
you should be able to release it and the
device will rest at an angle of about 30
degrees on its own, as shown in the picture
to the right.
4. Gently push the M.2 device down on
the raised end. There will be some tension
- this is normal - then use the screw you
removed in Step 1 to secure the device.
At right, you can see that the contacts will
be nearly invisible when the device is
properly seated and the copper mounting
semi-circle is partially visible around the
screw.
Incorrect installation Example:
*NOTE* This is one of the most common examples of an incorrect installation
of an M.2 device. Do not intentionally attempt this, or complete your installation
with this example. Doing so could cause damage to the device or the M.2 port.
Using the image below, notice how the gold fingers fail to fully seat in the M.2 slot. This
often occurs if the drive was pushed into the slot from a nearly parallel starting position,
rather than an angle, causing the M.2 device to not seat fully. As a result, this may cause
a drive detection failure by the BIOS, the drive will be detected with the description in
gibberish (e.g. characters in the name, such as @, #, $, %, *, etc.) and/or notifications
that the drive has corrupt data stored on it.
Moreover, if the device’s connection looks like this, then screwing down the device may
be impossible (a VERY tight fit, at best), which is another sign that the device is not
seated properly.
In conclusion, if the install device looks similar to the image below, please remove and
reseat it using the instructions above.
DO NOT POWER THE SYSTEM ON IF
THE CONNECTOR RESEMBLES THIS PICTURE
.


