background image


5

System Set-Up:


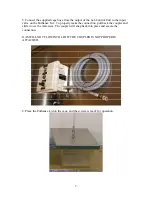
1.  Four mounting brackets are utilized to secure the controller unit to the wall.  These are 
on the controller when shipped. 


2. Using a Phillips head screwdriver, loosen the screws and move the mount tabs outward 
as pictured below. Tighten the screws once appropriate position is achieved. 


Summary of Contents for SMARTBOX EA-32000

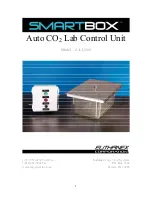
Page 1: ...1 Auto CO2 Lab Control Unit Model EA 32000 1 877 559 0159 Toll Free Euthanex Corp E Z Systems 1 610 882 3801 Fax P O Box 3544 www ezsystemsinc com Palmer PA 18043...

Page 2: ...e Preset Times 11 EMC EMI This equipment has been tested and found to comply with the limits for a Class A Equipment pursuant to part 15 of the FCC rules IEC 61326 1 2005 EZ 61326 1 2006 For the custo...

Page 3: ...d repair personnel Parts that have failed in whole or in part exhibit excessive wear are contaminated or are otherwise at the end of their useful life should not be used and should be replaced with pa...

Page 4: ...e 12 Refer all servicing to qualified service personnel Servicing is required when the unit has been damaged in any way such as power supply cord or plug is damaged liquid has been spilled or objects...

Page 5: ...ized to secure the controller unit to the wall These are on the controller when shipped 2 Using a Phillips head screwdriver loosen the screws and move the mount tabs outward as pictured below Tighten...

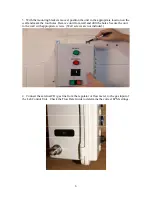
Page 6: ...four holes Remove unit from wall and drill the holes Secure the unit to the wall with appropriate screws Wall screws are not included 4 Connect the external CO2 gas line from the regulator or flow met...

Page 7: ...thanex Lid To properly make the connection pull back the coupler and slide it over the male stem The coupler will snap back into place and secure the connection GAS WILL NOT FLOW INTO LID IF THE COUPL...

Page 8: ...s two distinct timing choices Select the desired timing cycle by moving the toggle switch either up or down 4 To begin the euthanasia cycle press the toggle toward the desired species The red Run ligh...

Page 9: ...ex Corp and designed to comply with the latest guidelines of the AVMA Panel on Euthanasia Refer to the Flow Rate to determine AVMA compliant flow rates and the timing presets The following is the proc...

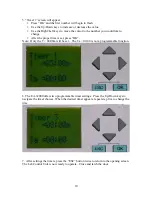
Page 10: ...er time is set press OK Note Only the T 00 00m will be set The Ta 00 00 is not a programmable function 6 The EA 32000 offers two programmable timer settings Press the Up Down keys to navigate the time...

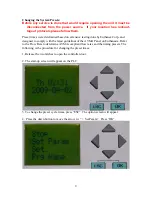
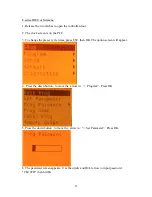
Page 11: ...LC 3 To change the preset cycle times press ESC then OK The option screen will appear 4 Press the down button to move the arrow to Program Press OK 5 Press the down button to move the arrow to Set Par...

Page 12: ...timer Press OK and the box will become small and over the first value of the timer Use the right left keys to move the cursor to the number you would like to change Use the up down keys to increase o...

Page 13: ...and through extensive testing performed by Euthanex Corp Times are customizable to facility needs The programmable times may be changed by a designated administrator Preset Times The units are pre pro...

Reviews: