10 English
English
11
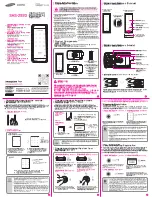
Step 3: Install the Exterior Assembly
To install the exterior assembly into the doorframe:
1. Measure your cross bore dimension and determine the installation steps accordingly.
• If the diameter of your cross bore is 2 '' / 54 mm, use the provided spacer to
assist in installing the exterior assembly.
• If you have a 1½'' / 38 mm crossbore, remove the spacer.
1
2. Route the cable connected on the exterior assembly under the deadbolt.
3. Align the tailpiece with the center hole of the deadbolt, and insert it into the center
hole.
What is required: Exterior Assembly
2
3
1
4
7
9
5 6
2
3
8
0
1
4
7
9
5 6
2 3
8
0
Step 4: Install the Mounting Plate
1. Route the cable through the mounting plate.
2. Fix the mounting plate onto the interior doorframe using the mounting plate screws.
Make sure the screws go through the holes of the deadbolt and the mounting plate,
and lock into place.
• Option A: If the mounting plate fits perfectly with the door, go to Step 5.
• Option B: If the mounting plate is not fastened tightly to the door, use an
additional screw.
What is required: Mounting Plate, Mounting Plate Screws, Deadbolt Screw / Strike
Screw, Screwdriver (not provided)
Deadbolt Screw /
Strike Screw
Mounting Plate
Screwdriver
Mounting Plate
Screws
1
2
Option B


