


E T C I n s t a l l a t i o n G u i d e
Paradigm P-LCD Series
Unison Paradigm Touchscreen Rack Panel
Page 4 of 4
Electronic Theatre Controls, Inc.
Installing the Touchscreen
Step 1:
Install the RJ11 control cable provided in the installation kit to the RJ11 jack on the
termination PCB. Also attach the RJ45 control cable
if PoE will be used for communication
and power
.
Step 2:
Plug the other end of the cable(s) into the receptacles on the Touchscreen.
Step 3:
Hold the Touchscreen at a slight angle and insert the top first and hook the bracket onto
the double pins on each side of the collar.
Step 4:
To move the Touchscreen from the service position to the operation position, lift up at the
bottom and rotate the bottom inward.
Step 5:
Push firmly in and down on the bottom corners of the bezel until it audibly snaps onto the
collar. When properly installed, the Touchscreen should not easily unsnap from the collar.
Step 6:
To open or remove the Touchscreen, insert a flat bladed screwdriver into the pry slots and
unsnap the Touchscreen from the collar. Then lift the bottom upward slightly and rotate
outward.
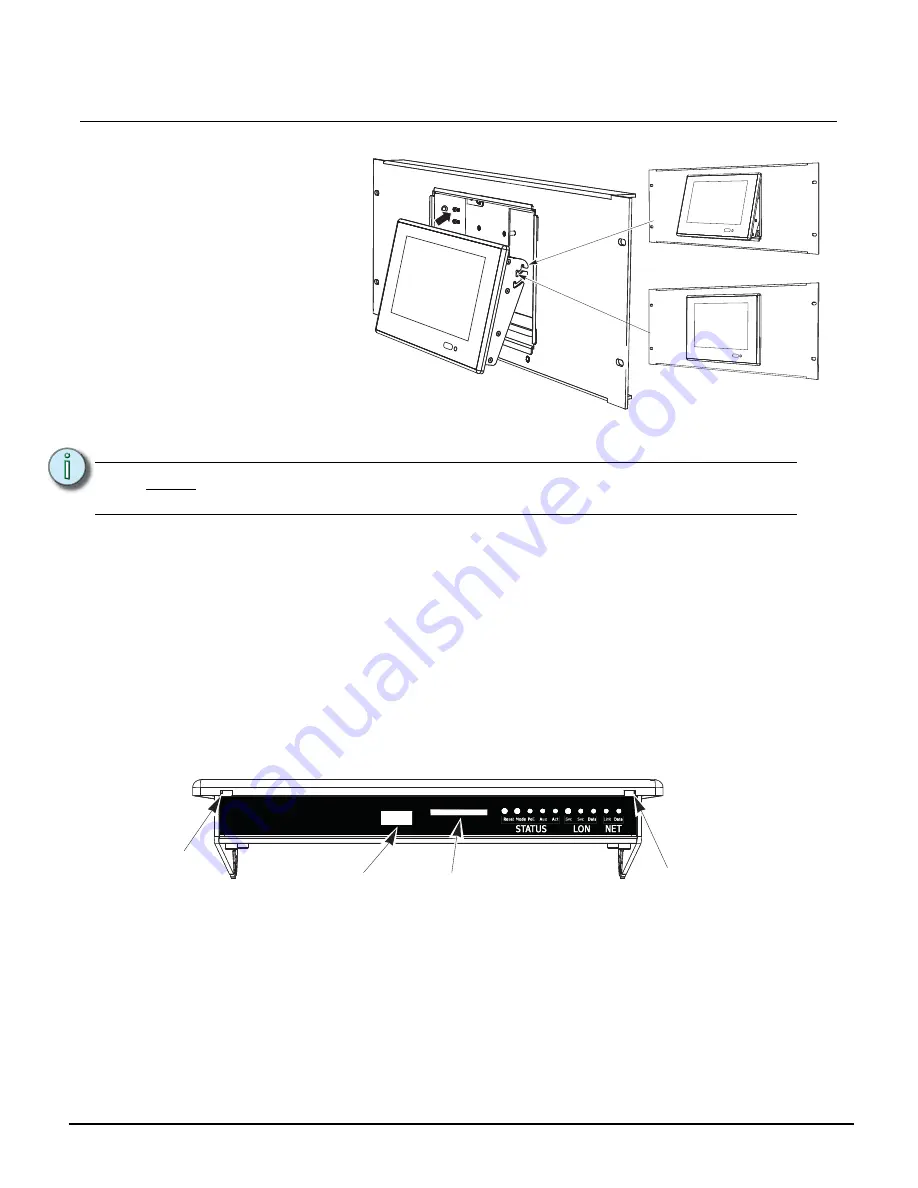
Indicators
After the Touchscreen has been powered up, the appropriate LEDs on the service panel on the bottom
of the Touchscreen illuminate. The LCD displays a startup screen a few seconds after booting.
I/O Indicators
•
Reset
- when pressed, resets the Portable LCD software
•
Mode
- press once for Setup menu. Press and hold for 4 seconds to calibrate the Touchscreen
•
PoE
- indicates when the Touchscreen is powered by Power over Ethernet 802.3af
•
Aux
- indicates the Touchscreen is powered (Aux 24 Vdc)
•
Act
- application activity is detected
•
Svc
- when pressed, sends the stations Neuron ID to the connected processor
•
Svc
- service pin indicator
•
Data
(LON) - indicates LON network activity
•
Link
- indicates when the Ethernet interface has a valid link to the network
•
Data
(NET) - indicates Ethernet network activity
N o t e :
The RJ11 cable provides the ground connection to the rack panel and must
always be installed.
Service position
Operating position
The Touchscreen bracket is
designed for two positions,
service and operation. When
installed so that the pins are
in the first slots on the
bracket, the Touchscreen is
angled at the bottom for
service.
SD card slot
USB Port
Pry slot
Pry slot


