Escient Vision VX-600 Installation Guide
Version: M51003-06A1
7
Getting Started
Use the information in this chapter to set up and configure your Vision system.
To get started you need to:
1. Properly configure one or more Vision VS or VC clients on your Ethernet net
-
work.
2. Connect Vision to your Ethernet network
Important:
Read all of the following installation instructions and the safety
information in the included carefully before you plug Vision into a power outlet.
Setting up VX
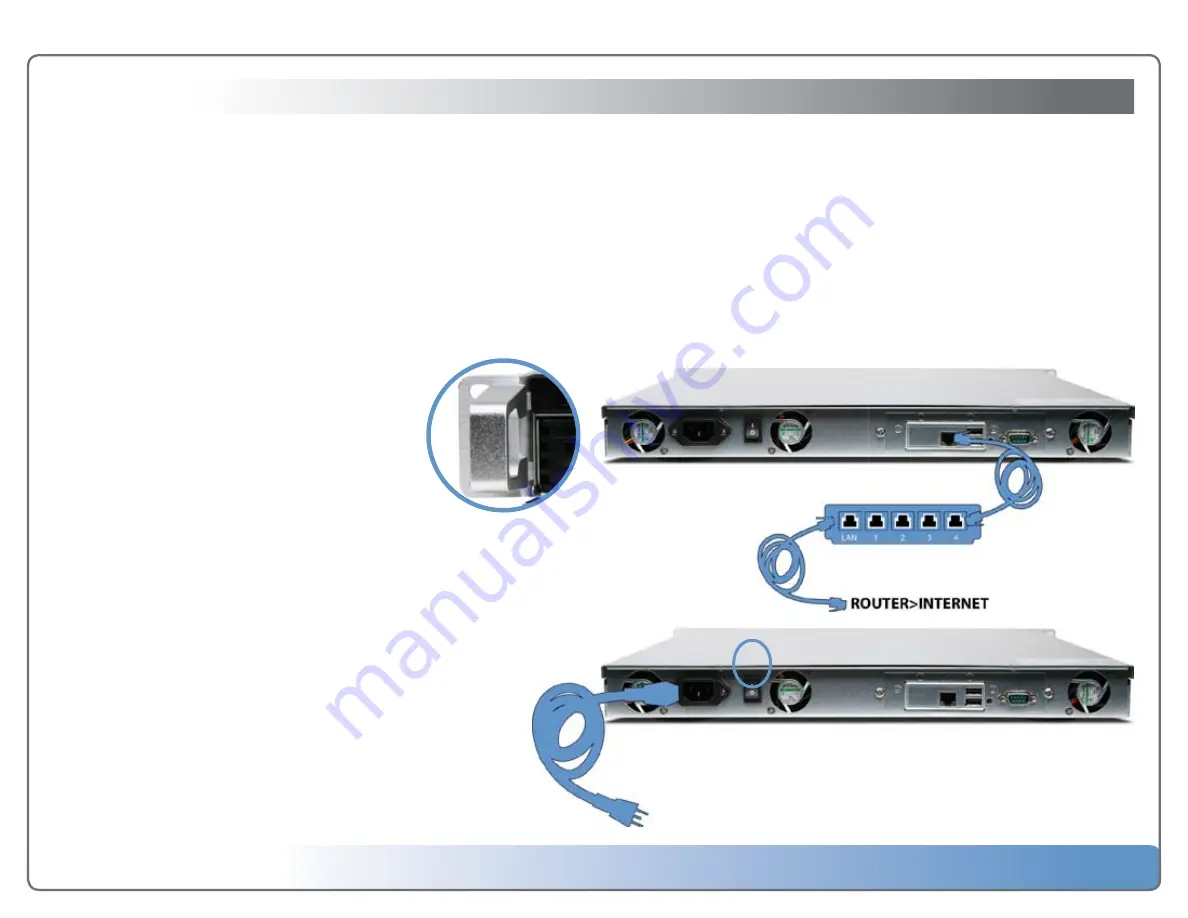
Rackmounting the Server
The Vision VX ships with two rackmount brackets and four
nuts. If you wish to mount your VX server in a rack, attach
the two rackmount brackets to the front sides of the VX
chassis. Make sure that your rack has plenty of airflow on
all sides of the VX chassis to prevent overheating.
Step 1: Connect the Ethernet cable
Connect a CAT6 rated Ethernet cable from your gigabit Ethernet switch to the Ether
-
net port on the back of Vision VX Server.
Step 2: Connect the power cord
Plug one end of the power cord into the back of Vision VX Server and the other end
into a power outlet.
Note:
Escient recommends the use of a UPS (uninterruptable power supply)
with surge suppression for all Vision products.
Step 3: Inspect the 4 drive trays
Make sure that all 4 1TB drives are fully inserted and the silver eject tabs are secured.
Step 4: Turn on your Vision
Set the power switch on the back panel of the VX to the ON position then press and
release the power button on the front panel. The LEDs on the front panel will light
and the Vision will begin to start up. The VX is fully setup when:
•
The Green Power LED is solid
•
The Green LAN indicator is flashing
•
All 4 Disc Status LEDs are solid green
•
The System Status LED is solid green. You will hear a short beep from the VX
when the boot sequence is complete.


