


25
Network configurations
Using IP sharing device (supports switching of 100M or more,support DHCP function)
24
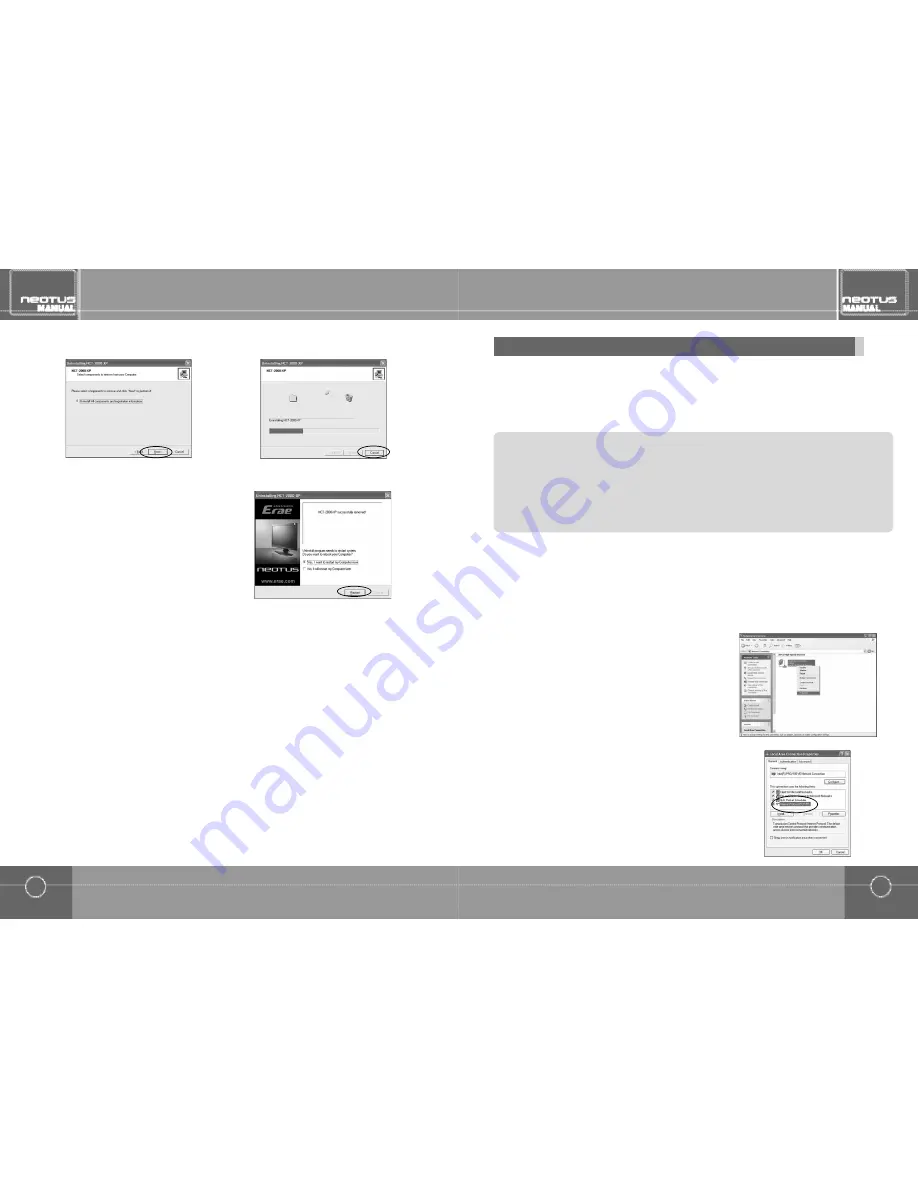
Installing and uninstalling application program
Installing and uninstalling application program
When the uninstallation is complete,the following screen
appears.Select, "Yes,restart the
computer now" and click the <Restart>button.
4.
Select "Remove all componenst and registration information" and click <Next>.
3.
>
Precautions during installation
1. Click <Start>from Windows and select "Control Panel".
2. From the "Control Panel", double click on the "Network connections" icon.Select "Local Area connections". right click with
the mouse and select "Properties".
3. Click the "Advanced" tab,and if "Internet connection firewall" is checked, click the "Settings" b utton on the bottom and
uncheck 'Remote desktop". If this is checked, the desktop may not allow the monitor to connect.
When IP sharing device is used,fixed IP as well as dynamic IP can be used.Except,dynamic IP can only be used if the IP sharing
device has DHCP server function and the DHCP function has been enabled.If you wish to IP sharing device but also use fixed
IP,refer to section on "Connecting to Hub". Here,we explain using Windows XP.If the PC has Windows XP or Windows 2000 and
the network card is installed,the configurations and settings will depend on the type of environment the user wishes to use the sys-
tem.Refer to the following to check the PC's network settings and configure the NEOTUS settings.
Select "Internet Protocol (TCP/IP)" and click
<Properties>.Select "Internet Protocol (TCP/IP)" and click
< P r o p e r t i e s > .
4.
Select "Local Area connections", right click with the mouse and
s e l e c t " P r o p e r t i e s " .
(For Windows 2000,select the LAN card ,right click with the
mouse and select "Properties".)
3.
Double click on the "Network connections" icon.(For Windows 2000,double click on the "Network and dial-
up connections" icon.
2.
To configure the PC,click <Start>from Windows and select "Control Panel".
(For Windows 200,click <Start>from Windows and select <Setting
▶
Control Panel >.)
1.


