


7.
Select the type of paper you loaded as the
Paper Type
setting.
Note:
Check the paper type settings list for details.
8.
Select the
Quality
setting that matches the print quality you want to use.
9.
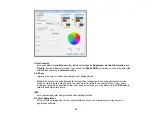
Select a Color option:
• To print a color document or photo, select the
Color
setting.
• To print text and graphics in black or shades of gray, select the
Black/Grayscale
setting.
10. To print on both sides of the paper, select the
2-Sided Printing
checkbox and select the options you
want.
11. To print multiple pages on one sheet of paper, or print one image on multiple sheets of paper, select
one of the settings in the
Multi-Page
menu and select the printing options you want.
12. To print multiple copies and arrange their print order, select the
Copies
options.
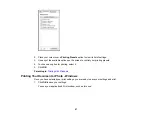
13. To preview your job before printing, select
Print Preview
.
14. To save your print job as a project that can be modified and combined with other print jobs, select
Job Arranger Lite
.
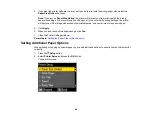
15. To reduce noise during printing when you select
Plain Paper/Bright White Paper
, select
Quiet
Mode
.
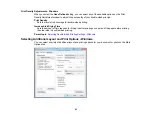
Paper Source Options - Windows
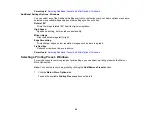
Print Quality Options - Windows
Multi-Page Printing Options - Windows
Parent topic:
Related references
Related tasks
Selecting Double-sided Printing Settings - Windows
Printing Your Document or Photo - Windows
Paper Source Options - Windows
You can select any of the available options in the Paper Source menu to print from paper loaded in that
source.
Auto Select
Automatically selects the paper source based on the selected paper size.
58
Summary of Contents for WorkForce Pro WP-4530
Page 1: ...WorkForce Pro WP 4530 User s Guide ...
Page 2: ......
Page 12: ......
Page 13: ...WorkForce Pro WP 4530 User s Guide Welcome to the WorkForce Pro WP 4530 User s Guide 13 ...
Page 28: ...4 Load a stack of paper printable side down in the cassette as shown 28 ...
Page 50: ...Parent topic Placing Originals on the Product 50 ...
Page 51: ...Related topics Copying Scanning Faxing 51 ...
Page 115: ...3 Adjust the scan area as necessary 115 ...
Page 122: ...122 ...
Page 130: ...3 Adjust the scan area as necessary 130 ...
Page 176: ...5 Select Fax Settings for Printer You see this window 176 ...
Page 177: ...6 Select your product 7 Select Speed Dial Group Dial List You see this window 177 ...
Page 215: ...215 ...
Page 220: ...220 ...
Page 246: ...6 Lower the document cover 7 Raise the ADF input tray 8 Carefully remove the jammed pages 246 ...


