


16
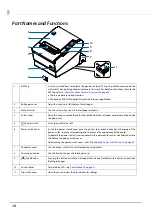
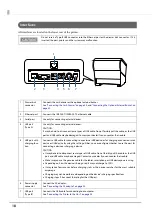
Part Names and Functions
.
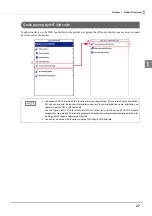
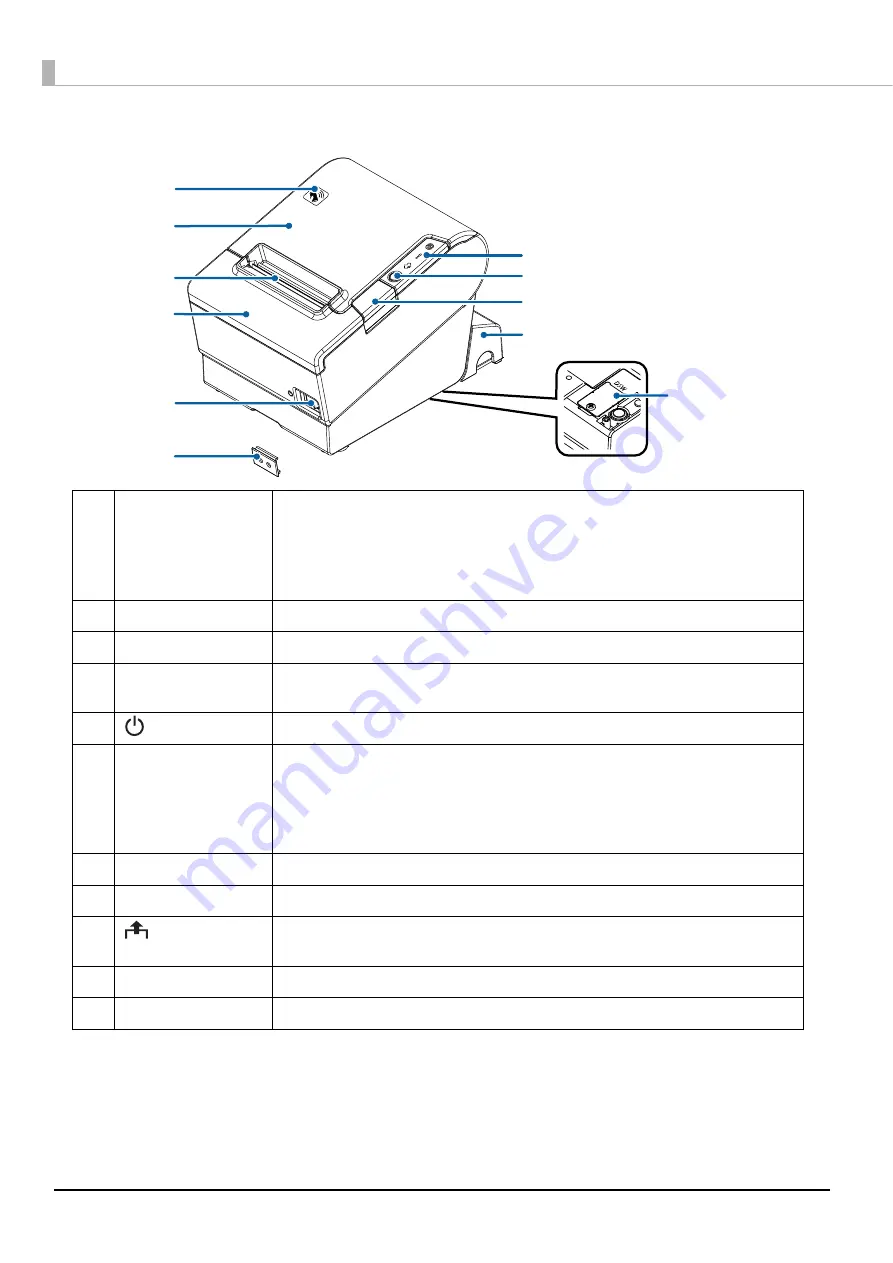
1
NFC Tag
A mark is printed here to indicate the position of the NFC tag. To establish communication
with an NFC device, bring the device close to this mark. For details on functions that use the
NFC tag, refer to
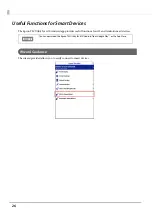
"Useful Functions for Smart Devices" on page 26
There is no data rewriting function.
Use Epson ePOS SDK to build this function into your application.
2
Roll paper cover
Open this cover to install/replace the roll paper.
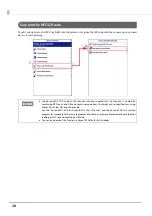
3
Manual cutter
Use this cutter when you cut the roll paper manually.
4
Cutter cover
Open this cover to unlock the autocutter blade when the roll paper cover does not open due
to a paper jam.
5
Power switch
Turns the printer on or off.
6
Power switch cover
Install the power switch cover onto the printer to prevent inadvertent changing of the
power switch, to prevent tampering, and to improve the appearance of the printer.
To operate the power switch, insert an object with a pointed tip such as a ballpoint pen into
the hole on the power switch cover.
For attaching the power switch cover, refer
"Attaching the Power Switch Cover" on page 50
7
Connector cover
Use the printer with this cover attached to protect cables.
8
Cover open button
Use this button to open the roll paper cover.
9
Feed button
Pressing this button once feeds roll paper for one line. Hold down this button to continue
feeding roll paper.
10
Control Panel
For details on LED, see
11
Dip switch cover
Open the cover to view the dip switches for settings.
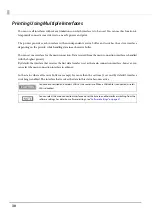
11
2
4
5
6
7
1
3
8
9
10
Summary of Contents for TM-T88VI-iHUB
Page 12: ...12 ...
Page 54: ...54 ...
Page 113: ...113 Chapter 5 Handling 5 5 Tear off the paper ...
Page 115: ...115 Chapter 5 Handling 5 3 Remove the jammed paper 4 Close the covers ...
Page 122: ...122 ...
Page 133: ...133 Appendix Units mm ...
Page 136: ...136 Italian Spanish English UK Keyboard type Key layout ...
Page 156: ...156 ...


