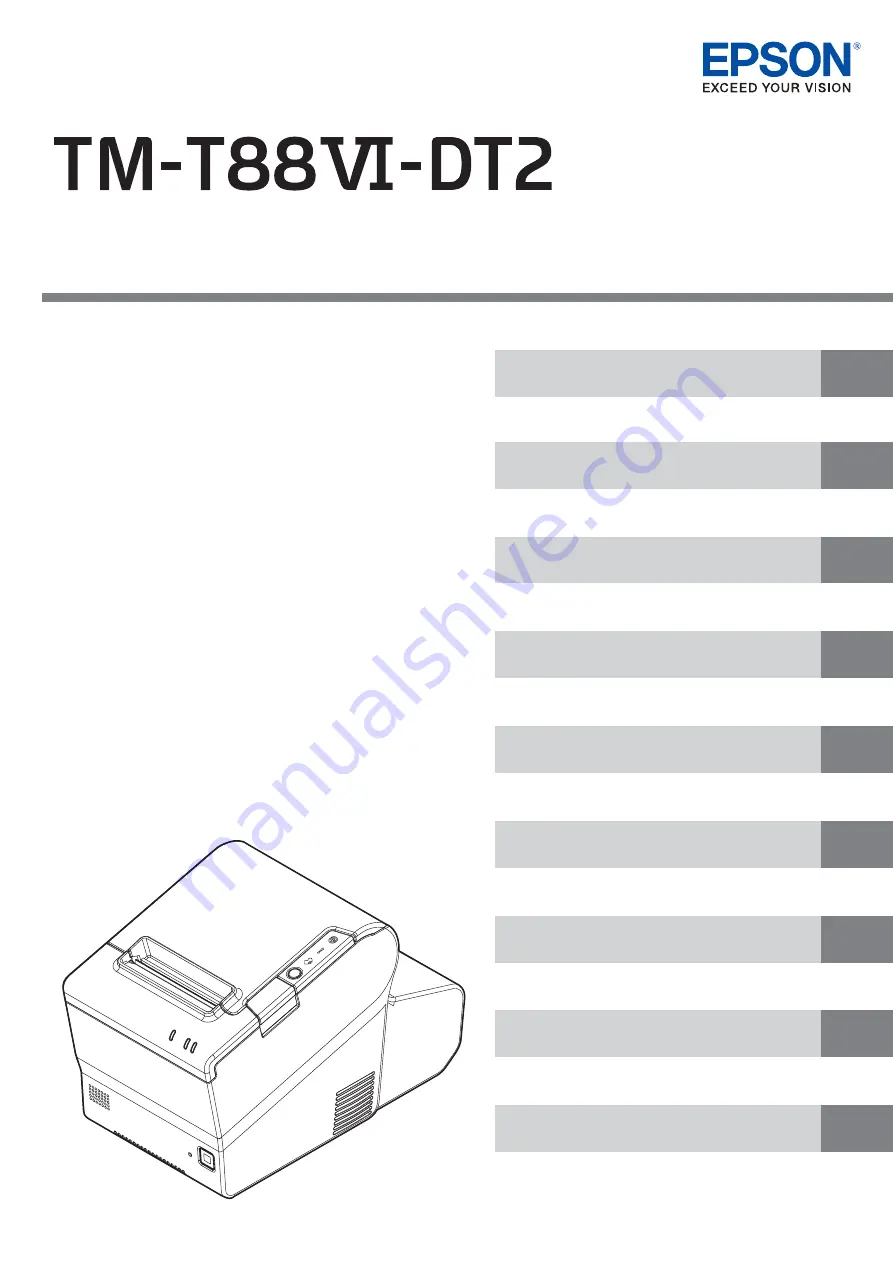
background image

Technical Reference Guide

Describes features of the product. 

Describes setup for the product and peripheral devices 
necessary before using this product.

Describes the printer functions and setting items.

Describes the pre-installed Widows settings and 
specifications.

Describes the requirements for system development using 
TM-DT software.

Describes information necessary for developing a PC-POS 
system.

Describes how to handle the product.

Describes how to replace the TM-T88V-DT.

Describes this product's specifications.

M00112401

Rev. B

Product Overview

Setup

TM-DT Software System Development

Printer Functions and Settings

PC-POS System Development

Handling

Windows Settings

Replacement of the TM-T88V-DT

Product Specifications

Summary of Contents for TM-T88VI-DT2

Page 1: ...ons Describes the requirements for system development using TM DT software Describes information necessary for developing a PC POS system Describes how to handle the product Describes how to replace the TM T88V DT Describes this product s specifications M00112401 Rev B Product Overview Setup TM DT Software System Development Printer Functions and Settings PC POS System Development Handling Windows...

Page 2: ...lterations to this product or excluding the U S failure to strictly comply with Seiko Epson Corporation s operating and maintenance instructions Seiko Epson Corporation shall not be liable against any damages or problems arising from the use of any options or any consumable products other than those designated as Original Epson Products or Epson Approved Products by Seiko Epson Corporation Tradema...

Page 3: ... carefully to avoid serious bodily injury CAUTION Provides information that must be observed to prevent damage to the equipment or loss of data Possibility of sustaining physical injuries Possibility of causing physical damage Possibility of causing information loss Provides information that must be observed to avoid damage to your equipment or a malfunction Provides important information and usef...

Page 4: ...helf Do not place the product on carpet Do not cover the product with any fabric Do not use this product where inflammable fumes of gasoline benzine thinner or other inflam mable liquids may be in the air Doing so may cause an explosion or fire Do not use aerosol sprayers containing flammable gas inside or around this product Doing so may cause fire If water or other liquid spills into this produc...

Page 5: ... from this product do not exceed the power supplying capability of the product Otherwise the devices may be dam aged Connecting an outdoor overhead LAN cable directly to this product may lead to lightning dam age If you need to connect such a cable to the product the cable must be protected against an electrical surge between the cable and the product You should avoid connecting the product to a n...

Page 6: ...Because this product was not intended for use in applications requiring extremely high reliability safety such as aerospace equipment main communication equipment nuclear power control equipment or medical equipment related to direct medical care etc please make your own judgment on this product s suitability after a full evaluation Open Source Software License This product uses open source softwa...

Page 7: ...n and development of a printer application Manual Content The manual is made up of the following sections Chapter 1 Product Overview Chapter 2 Setup Chapter 3 Printer Functions and Settings Chapter 4 Windows Settings Chapter 5 TM DT Software System Development Chapter 6 PC POS System Development Chapter 7 Handling Chapter 8 Replacement of the TM T88V DT Appendix Product Specifications ...

Page 8: ...of Use 6 Open Source Software License 6 About this Manual 7 Aim of the Manual 7 Manual Content 7 Contents 8 Product Overview 14 Features 14 Features of the POS Terminal Controller 14 Printer Features 14 Product Configurations 15 Models 15 Accessories 15 Part Names and Functions 16 Interface 19 ...

Page 9: ... 30 Removing the connector cover 32 Attaching the Power Button Cover 33 Securing the Product 34 Operating Test 35 Printer Functions and Settings 36 Printer Online and Offline Statuses 36 Online 36 Offline 36 Status and Errors 37 Automatically Recoverable Errors 37 Recoverable Errors 37 Unrecoverable Errors 38 Status Display 39 NV Memory 40 NV Graphics Memory 40 Customized Values 40 R E Receipt Enh...

Page 10: ...s 74 Controlling POS Peripherals from Web Applications 75 Controlling POS Peripherals from Socket Communication Compatible Applications 76 Web Server 77 TM DT Software Settings 79 Starting EPSON TMNet WebConfig 79 Help Screen Display 79 Version Screen Display 79 Updating TM DT Software 79 Information Current status 80 Information System settings Network 81 Information System settings Date and Time...

Page 11: ...s 95 Settings Admin settings Maintenance Store restore settings 96 Settings Admin settings Maintenance Initialization 101 Settings Admin settings Maintenance Log 101 Settings Admin settings Maintenance Update Web service function 102 Settings Admin settings Admin information Admin information 102 Settings Admin settings Admin information Password 103 TM DT Software Specification 104 Controllable p...

Page 12: ...ifications 122 Compatibility 124 Printing 124 Print Density 124 Number of Head Energizing Parts 124 Printable Area for 80 mm Width Paper 124 Cutting Method 124 Manual Paper Feed 124 Memory Capacity 125 Printer Status 125 If Connecting as a Peripheral Device of the TM i DT Printer 125 Overall Dimensions 126 Additional Functions and Functional Improvements 127 Print Speed 127 Top margin 127 Product ...

Page 13: ...ort Type A 144 USB 2 0 port Type C 145 Ethernet port 145 Line out port 146 Serial port 147 VGA port 148 HDMI port 149 Drawer kick connector 150 DC in connector 150 BIOS 151 Starting and Ending BIOS Setup 151 Settings for the USB 2 0 Charging Port 151 Disabling the USB Port 152 BIOS setting 153 Character Code Tables 158 Open Source Software License 159 MICROSOFT SOFTWARE LICENSE TERMS 160 ...

Page 14: ...faces Ethernet x1 VGA x1 HDMI x1 USB3 0 x6 USB2 0 x2 Type A Type C Serial x1 Drawer kick x1 Dedicated charging port for tablets etc USB2 0 Type C Software Windows 10 IoT Enterprise 2016 LTSB A model without an OS is also available Can control POS peripheral devices using TM DT software Printer Features The printer has the following features Thermal receipt printer High speed printing 350 mm s maxi...

Page 15: ...er AC adapter T1 AC power cable differs depending on the destination Connector cover Connector cover Bottom Power button cover Roll paper Roll paper guide Screws Roll paper guide x1 Connector cover x2 Manual CD Product warranty differs depending on the destination Options Windows10 Recovery DVD OT RD01 Windows model SSD module OT SS032 32 GB OT SS064 64 GB OT SS128 128 GB OT SS256 256 GB Dedicated...

Page 16: ...ower for this product and it does not affect the controller functions 6 Power button Pressing this button turns the power on or off shutdown Pressing and holding 4 seconds or longer forcibly turns the power off See Functions of the Power button on page 113 Note If the power button is disabled by OS settings pressing the power button will not perform a shutdown 7 Cover open button Pressing this but...

Page 17: ...atus LED Blue Product status Flashing Approx 1 second intervals On Starting up Updating software Off On Power on Normal Off Flashing Approx 1 second intervals Sleep Off Off Power off Flashing Approx 600 millisecond intervals On CPU at high temperature 95 C or higher USB overcurrent detected Back up battery error On Accessing storage ...

Page 18: ... Errors on page 37 LED LED status Description 1 Power LED Blue On Power on Off Power off 2 Error LED Orange On Offline Flashing Error has occurred Off Normal 3 Paper LED Orange On Roll paper near end Flashing Waiting to continue self test printing Off There is a sufficient amount of roll paper remaining ...

Page 19: ...erface here Supports USB 3 0 and can connect up to 6 devices 5 USB2 0 port Type A Connect external devices with USB interface here Supports USB 2 0 6 USB2 0 port Type C Dedicated for charging tablets etc If setting this port to perform communication see the Product Specifications on page 128 Supports USB 2 0 7 Ethernet port Connect the LAN 8 VGA port Connects an VGA supported device such as a disp...

Page 20: ...e network communication status of this product LED Status of LED Description 1 Active Link ON Green Link is established correctly Flashing Green Data transmission reception 2 Speed ON Green Link at 1000 Mbps communication speed ON Orange Link at 100 Mbps communication speed OFF Link at 10 Mbps communication speed 1 2 ...

Page 21: ... chapter consists of the following sections along with the setup flow of the product and peripherals 2 Connecting the AC Adapter page 23 5 Connecting the LAN page 26 4 Adjusting the Paper Roll Near End Sensor page 25 1 Installing the Printer page 22 7 Connecting the Cash Drawer page 27 8 Connecting External Devices page 29 9 Key Input Device page 29 10 Serial Communication Device page 29 3 Changin...

Page 22: ...lly available antitheft wire Important Notes on The printer must be installed horizontally on a flat surface not tilted Do not place the printer in dusty locations Do not catch cables or place foreign matter under the printer If you use the optional affixing tape model DF 10 you can affix this product to the installation sur face See Securing the Product on page 34 Security hook ...

Page 23: ...tration 2 Firmly insert the connector of the AC cable all the way into the AC inlet on the AC adapter in the illustration 3 Firmly insert the plug all the way into the grounded wall outlet in the illustration 4 Set the AC adapter so that its label side is facing down WARNING Be sure to use the specified AC adapter AC Adapter T1 Model M284B only Be sure to leave a space between the AC adapter and t...

Page 24: ... the hole on the printer 4 Install the roll paper correctly 5 Close the roll paper cover You can use the enclosed screw to fix the roll paper guide Do not return the product to 80 mm after using it at 58 mm The section of the print head that did not touch paper may have rubbed against the platen roller and become damaged or the autocut ter blade may be worn down You need to set with the memory swi...

Page 25: ...upper edge of the positioning plate with the adjustment position 3 Tighten the adjustment screw 4 After adjustment make sure that the detection lever operates smoothly Since roll paper cores vary slightly in shape depending on paper roll design and manufacturing tolerances it is impossible to detect the remaining paper exactly Use roll paper with a core inner diameter of 12 mm 0 47 and outer diame...

Page 26: ... to use dedicated customer display DM D110 for TM T88V DT TM T88VI DT2 see the DM D110 DM D210 Technical Reference Guide For the method to attach a DM D30 see the DM D30 Technical Reference Guide The USB port of the DM D30 cannot be used Systems that use TM DT software This is enabled using EPSON TMNet WebConfig PC POS System The customer display is directly controlled from the application using A...

Page 27: ...therwise devices may be damaged The load such as a drawer kick solenoid must be connected between pins 4 and 2 or pins 4 and 5 of the drawer kick connector When the drawer open close signal is used a switch must be provided between drawer kick connector pins 3 and 6 The resistance of the load such as a drawer solenoid must be 24 Ω or more or the input cur rent must be 1A or less Be sure to use the...

Page 28: ... Chapter 2 Setup 2 Drawer kick Connector Circuitry F G 24 V Shielded drawer kick connector Printer side User side Drawer kick side Drawer open close switch Drawer kick solenoid Control device 1 2 3 4 5 6 ...

Page 29: ...t WebConfig For details see Settings Web service settings Key input device on page 84 PC POS System Since it is recognized as a HID device setting is not required Serial Communication Device Connect the serial communication device to a serial port For how to set the device install the driver and so on see the respective product manuals Systems that use TM DT software Align communication conditions...

Page 30: ...over to protect cables 1 Align the hooks on the connector cover with the dents on the main body Be sure to hold both sides of the connector cover when attaching it or it may become damaged If you use the product with the dedicated customer display Model DM D110 for TM T88V DT TM T88VI DT2 remove the U shaped part from the connector cover ...

Page 31: ...31 Chapter 2 Setup 2 2 Push the connector cover to click onto the main body 3 Make sure the cables are not pinched You can also attach bottom cover to hide connectors ...

Page 32: ... the connector cover Push the connector cover down while pushing the lower part of the both sides of it inward to detach the hooks from the main body If the connector cover bottom is attached first remove the connector cover bottom ...

Page 33: ... the backing paper 3 Attach the power button cover as shown in the illustration It is recommended to clean any dirt around the power button before you attach the cover You can also disable the power button using OS settings See Functions of the Power button on page 113 Align the left edge of the power button cover with the right edge of the printer reset button Align the inside edge of the power b...

Page 34: ...th two pieces of the affixing tape combined peel off the backing paper of a pair on one side and paste it to one of the specified positions on the bottom of the product 3 In the same way paste other three pairs of tape in the specified positions 4 Peel off the backing paper of each pair on the other side of the affixing tape turn over the product back on its bottom and place and secure it firmly t...

Page 35: ...e test display Key input device TMNetWebConfig In the operation test the Operation Test screen is displayed Operate the key input device to display the input text Windows text editor Confirm the characters input from the device Serial communication device TMNetWebConfig In the operation test the Operation Test screen is displayed To confirm operation input and transmit a device command to operate ...

Page 36: ... to go offline Offline The printer automatically goes offline under the following conditions While the printer power is turning on off Shut down While a self test is running While roll paper is fed using the Feed button When the printer stops printing due to a paper end when the paper out detector detected the paper out While waiting for printer operation When an error has occurred See Status and ...

Page 37: ...ery measure Roll paper cover open error The roll paper cover was opened during printing Recovers automatically when the roll paper cover is closed Print head temperature error A high temperature outside the head drive operating range was detected Recovers automatically when the print head cools Error Error description Error LED flash code Recovery measure Autocutter error Autocutter does not work ...

Page 38: ...rror LED flash code Memory R W error The product does not operate properly after performing a memory read write check of the printer memory High voltage error The power supply voltage is extremely high Low voltage error The power supply voltage is extremely low CPU execution error The printer CPU is executing an invalid address Internal circuit connection error Internal circuits are not connected ...

Page 39: ...ED Error LED Paper LED Online ON OFF OFF Running a self test ON OFF Waiting to continue self test ON OFF Flashing Feeding using the Feed button ON OFF Roll paper cover open during error printing ON ON No paper ON ON ON Paper near end ON OFF ON While updating firmware Flashing OFF OFF Power off standing by Flashing OFF OFF ...

Page 40: ...omized values see Software Settings on page 41 R E Receipt Enhancement Graphics such as shop logos to be printed on top or bottom of receipts can be registered Use the TM T88VI DT2 Utility to register Logo Maintenance Counter With this function printer information such as the number of lines printed the number of autocuts and printer operation time after the printer starts working is automatically...

Page 41: ...Item Method Software Setting Mode TM T88VI DT2 Utility TMNet WebConfig Customized Values Automatic paper reduction Amount of top margin by backfeed Auto paper feed cut at cover close Character code table defaults International character defaults Font A auto replacement Font B auto replacement Print density Print speed Paper width Column Emulation mode Cut Error Release Method Logo IP address Other...

Page 42: ...efault setting Enabled Line space reduction rate Not reduced default setting Reduce 25 Reduce 50 Reduce 75 Line feed reduction rate Not reduced default setting Reduce 25 Reduce 50 Reduce 75 Amount of reduction in character height Not reduced default setting Reduce 25 Reduce 50 Reduce 75 Amount of reduction in barcode height Not reduced default setting Reduce 25 Reduce 50 Reduce 75 ...

Page 43: ... auto replacement Does not replace default setting Font A Remove all ejected paper before printing with backfeed Disable the automatic top logo setting when enabling backfeed You cannot use backfeed in the following cases even if you have enabled backfeed Immediately after auto cutting while the cover is closed While the self test is in progress If setting a top margin of 5 mm 0 2 or less confirm ...

Page 44: ...hen setting the print speed to level 14 use software settings to set the print density Print speed is restricted by the settings for the number of head electrification divisions The maximum printing speed of 350 mm s is only possible when 1 electrification division is selected The maximum printing speed when using 58 mm is 300 mm s Depending on print conditions such as print duty print head temper...

Page 45: ... operation performed during a self test In 1 and 2 the following guidances are printed the Paper LED flashes and instructs the user s operations Time for holding 1 second or longer Close the roll paper cover and turn on the printer while pressing the Feed button Self test Briefly press the Feed button Hold down the Feed button Press the Feed button once briefly and then hold it down Open the roll ...

Page 46: ...it and Reboot Printer 1 NV Graphics Information 2 Receipt Enhancement Information 3 Customize Value Settings 4 Restore Default Values 5 or more None Select Modes by executing following procedure step 1 Press the Feed button less than 1 second as many times as the selected mode number step 2 Press Feed button for 1 second or more ...

Page 47: ...w 1 Close the roll paper cover 2 While pressing the Feed button turn on the printer Hold down the Feed button until printing starts After printing the current print status a Continuing self test guidance is printed and the Power LED flashes 3 Briefly press the Feed button less than one second to continue the self test The printer prints a rolling pattern on the roll paper using the built in charac...

Page 48: ... NV graphics information After information printing the Mode selection guidance is printed again 3 To finish turn off the power or select Exit and Reboot Printer Receipt Enhancement Information Print Mode You can check the following items using the R E information mode Automatic top logo setting Automatic bottom logo setting Extended settings for automatic top bottom logo Follow the steps below 1 ...

Page 49: ...on three times less than one second hold it down for at least one second to enter the Software settings mode Customize Value Settings The Software setting mode guidance is printed and the Paper LED flashes For details on the memory switches and customized values see Software Settings on page 41 Customize Value Settings Modes 0 Exit 1 Print Current Settings 2 Print Density 3 Print Speed 4 Automatic...

Page 50: ...ng the Feed button less than one second for the number of times applicable to the setting and then hold down the button for more than one second to confirm your selection After saving the settings the Software setting mode guidance is printed and the Paper LED flashes 5 To close Software setting mode turn off the printer or select Exit to return to Mode selection guidance and then select Exit and ...

Page 51: ... Default Values The guidance is printed 3 When only restoring the default settings Briefly press the Feed button once less than one second hold it down for at least one second Hold down the Feed button until the message of restore completion is printed When restoring default settings and deleting user defined data Briefly press the Feed button twice less than one second and then hold it down for a...

Page 52: ...roll paper cover From this point all data received by the printer is printed in the corresponding hexadecimal numbers and ASCII characters Example of printing in hexadecimal dumping mode 4 To close hexadecimal dumping mode turn off the printer after printing is complete or press the Feed button for three times When there are no characters that correspond to the print data is printed If you press t...

Page 53: ...the product after recovering the OS using the recovery DVD 3 When the log on screen appears enter the password For the initial settings the user name is EPSON USER and the password is T88VI DT2 4 The Windows desktop is displayed Select Start then Control Panel and Date and Time The Date and Time Properties window is displayed Set the date time and the time zone Starting Up and Shutting Down Window...

Page 54: ...he shortcut on the desktop Disabling ePOS Device Service Run ePOS Device Disabled from the shortcut on the desktop Speaker Volume Setting Volume of the speakers equipped in this product can be adjusted using the speaker volume adjustment function in Windows ePOS Device Service is set to Enabled in the default settings Following functions will be stopped when ePOS Device Service is disabled TM DT s...

Page 55: ...t automatically restarts and the Windows setup screen is displayed Perform Windows setup 8 When the log on screen is displayed enter the password The initial user name is EPSON USER and the initial password is T88VI DT2 9 Select Start Settings Time language and the Date and Time is displayed Set the Date and time and Time zone 10Turn off the product Then remove the DVD drive This brings the recove...

Page 56: ...Visual C 2010 redistributable package X86 Driver Mobile Intel Processor Family I O PCI Express Intel HD Graphics Intel Management Engine Interface Intel Serial IO Driver GPIO Driver Realtek PCIe GBE Family Controller Realtek High Definition Audio intel rapid_storage_technology EPSON Advanced Printer Driver Ver 5 09 VCPdriver_Ver 2 01 Advanced Printer Driver for DM D Ver 5 09 TM DT Software ePOS De...

Page 57: ... Systems that Use TM DT software This section describes the functions of TM DT software Software Configuration TM T88VI DT2 TM T88VI Printer Control program Software TM DT Software Utility EPSON TMNet WebConfig Deployment Server Direct Print ePOS Print Service ePOS Device Service Device Data Notification Windows OS Printer driver for Windows Apache HTTP Server Easy Setup ...

Page 58: ...e range of terminals and applications compatible with SOAP HTTP com munications Since a network printer can be controlled simply by designating the device ID from the customer s application application development becomes easy For controllable network printers see TM DT Software Specification on page 104 Setting Items Setting Items Enabling Disabling for ePOS Device Service page 54 Enabling ePOS D...

Page 59: ...not impeded General printing applications finish transactions upon confirming the printing Due to such waiting response times deteriorate in systems where multiple print jobs are concentrated The spooler application stores print data and immediately returns the printing results to the application This allows the application to proceed to the next operation without waiting for the current printing ...

Page 60: ... to C 5 The TM DT software saves the printing results JobID printing result true in the log If the printer cannot print because it is offline or there is an error print data cannot be printed even if spooled Since printing results are logged they can be confirmed from the application For the confirmation method see Checking the print results on page 62 When power to this product is turned off the ...

Page 61: ... Flow using the Spooler Function 1 The device application sends the print data to the TM DT software 2 The TM DT software tries to conduct printing process on printer A but cannot because the printer is offline The TM DT software retries the number of times that is set in the spooler function 3 If printing cannot be performed on Printer A even after the retry the TM DT software performs printing o...

Page 62: ...plication If inquired of print result from the application the product returns the following information Printing succeeded JobID Print results true Printing succeeded JobID Print result false Error code Printer status Printing or print forwarding JobID Print result false Error code Printing Setting Items Spooler and forward printing are configured on the same page When this product is turned off ...

Page 63: ...ed Print forwarding location settings available Printing failed Printing failed exceeding the number of reprint times Printing failed exceeding the number of reprint times Printing succeeded 1 Printing succeeded Tertiary Printer print processing No print forwarding location settings Remaining spooler capacity 3 Printing failed 2 Clear print data 4 Reprint 6 Printing failed Reprint 6 Spooling avail...

Page 64: ...print data can be spooled JobID Print result true is stored in the spooler JobID Print result true is also returned to the application 6 Make the reprint settings number of times and interval in EPSON TMNet WebConfig For detail see Set tings Web service settings Print Settings Spooler on page 88 7 When printing is successful the spooler s print data and JobID Print result true are deleted JobID Pr...

Page 65: ...S Device XML User s Manuals and the TM DT Series Peripheral Device Control Guide Device control script file The following device control script files are registered to this product Device control script files can be developed according to the devices that are used by the customer Device control program file The following device control program files are registered to this product Device control pr...

Page 66: ...84 Device ID Select the device control script Serial communication device page 85 Device ID Select the device control script Communication settings Other device page 86 Device ID Select the device control script Device control script Add delete page 86 Registering the device control script Device control program Device registration page 87 Device ID Select the device control script Device control ...

Page 67: ...ly configure a system for exchanging data between applications The communication box can be set and used from applications compatible with Epson ePOS SDK and ePOS Device XML This can be used in TM DT software Ver 2 5 or later Communication Box Mechanism The TM DT software manages the communication box with a box ID BoxID in the figure above Data can be exchanged between applications that belong to...

Page 68: ...code data scanned from scanner 2 TM DT Software notify the barcode data to App2 3 App2 acquire the barcode data then convert to POS data 4 App2 sends display data to communication box of TM DT Software 5 TM DT Software notify the data is stored into communication box to App1 6 App1 acquire the stored display data from communication box ...

Page 69: ...T Software System Configuration Systems that implemented application in the smart device Using Epson ePOS SDK Web application system Using Epson ePOS SDK Server Direct Print system Application Application Browser Database Application Notice of printing results Acquisition of print data ...

Page 70: ... address is not specified from the application printing can be performed via the Inter net even in environments where printing is difficult because the IP address cannot be acquired on the Web server side or the device cannot be controlled via the Internet due to security policy settings Because the Web server application only includes print data in the response printing can be performed without d...

Page 71: ...tting Items Enabling Disabling ePOS Device Service page 54 Enabling ePOS Device Service Web service page 82 Enabling device control Enabling server direct print Enabling status notification Server direct print page 90 Application server settings Status notification page 91 Application server settings Network printer page 83 Printer model Device ID IP address Proxy settings page 94 Proxy server set...

Page 72: ...eral printing system applications commence printing from the application side A function for including print data in responses to printing requests cab be implemented in the applications mounted on Web servers through device data notification This function can be used to perform printing by using an ID number scanned by a barcode scanner as a trigger Processing Flow Using the Device Data Notificat...

Page 73: ...e data notification Device data notification page 92 Application server settings Error settings Network printer page 83 Printer model Device ID IP address Customer display page 83 Use Do not use Key input device page 84 Device ID Select the device control script Serial communication device page 85 Device ID Select the device control script Communication settings Other device page 86 Device ID Sele...

Page 74: ...ling POS peripherals and printers Setting Items Setting Items Enabling Disabling ePOS Device Service page 54 Enabling ePOS Device Service Web service page 82 Enabling the device control Printer page 83 Printer model Device ID IP address Customer display page 83 Use Do not use Key input device page 84 Device ID Select the device control script Serial communication device page 85 Device ID Select th...

Page 75: ...m HTML5 compatible browser mounted terminals Setting Items Setting Items Enabling Disabling ePOS Device Service page 54 Enabling ePOS Device Service Web service page 82 Enabling the device control Network printer page 83 Printer model Device ID IP address Customer display page 83 Use Do not use Key input device page 84 Device ID Select the device control script Serial communication device page 85 ...

Page 76: ... of POS peripherals from a wide range of devices and systems compatible with Web services Setting Items Setting Items Enabling Disabling ePOS Device Service page 54 Enabling ePOS Device Service Web service page 82 Enabling the device control Network printer page 83 Printer model Device ID IP address Customer display page 83 Use Do not use Key input device page 84 Device ID Select the device contro...

Page 77: ... versions see TM DT Software Specification on page 104 Preparation of Web content File format HTML file CSS file JavaScript Image data Perl script cgi php script php Package file zip Zip the files to be registered all together The zip file name is arbitrary Use one byte alphanumeric characters ASCII characters for a zip file name and sub folder name The maximum size of the files before zipping is ...

Page 78: ...l Register the prepared Web content file to TM DT Software Setting Items Setting Items Enabling Disabling ePOS Device Service page 54 Enabling ePOS Device Service Web content update page 89 Register the web content Web server settings for automatically updating Web service page 82 Enabling automatic web content update epsonsample zip webpage A folder added index html css css img bmp jpg png js js ...

Page 79: ...dows Security screen appears input the user name and password then click OK For details see Settings Admin settings Admin information Password on page 103 EPSON TMNet WebConfig starts Help Screen Display Click Help to display the help screen for EPSON TMNet WebConfig Version Screen Display Click About to display the version screen for EPSON TMNet WebConfig Updating TM DT Software When you update t...

Page 80: ...nd time of the last automatic update performed Result of automatic update Displays the result of the automatic update Server direct print Run state Displays the run state of the server direct print ID Displays the web server ID acquiring print data of the server direct print Server 1 Server 2 Server 3 Interval sec Displays the interval for acquiring print data Date and time last run Displays the d...

Page 81: ...plays whether the SSL is enable or disable Domain of the certificate Displays the domain of the certificate Validity period of the certificate Displays the validity period of the certificate Proxy settings Web content update Web contents automatic update displaying whether or not proxy is used Server Direct Print Server direct print displaying whether or not proxy is used Status notification Statu...

Page 82: ...ecuting device control program Every time The device control program starts up every time the device is opened from the application First time The device control program opened upon the first com munication is used Using this setting results in a faster response time when using the device from multiple tab lets or the like However if the connection between this product and the device is broken the...

Page 83: ...s local_printer Type Select the type for the controlled printer Model no Select the model number for the controlled printer IP address Set the printer IP address for each device ID Retry interval Set the timeout retry interval Add Adds the printer on this product Registered printers Displays a list of registered printers Test printing Performs a test printing TEST_PRINT is printed Delete Deletes a...

Page 84: ...vice name Set the device name for the key input device Control script Set the device control script to control the key input device Register device control scripts as necessary For details refer to Settings Web service settings Control script Add delete on page 86 Add Registers the key input device Registered key input devices Displays a list of registered key input devices Operating test Performs...

Page 85: ...ce Register device control scripts as necessary For details refer to Settings Web service settings Control script Add delete on page 86 Communication speed bps Set the device communication speed Data bit Set the data bit Parity Set the parity Stop bit Set the stop bit Flow control Set the flow control Add Registers the serial communication device on this product Registered serial communication dev...

Page 86: ... Register device control scripts as necessary For details refer to Settings Web service settings Control script Add delete on page 86 Add Registers the device on this product Other registered devices Displays other devices registered on this product Item Description Control script to be registered Set the control script to be registered Control script Specifies the control script file of the devic...

Page 87: ... Add Registers the device control program on this product Registered devices Displays a list of device registered on this product based on the device type Delete Deletes the corresponding device control program from this product Item Description Control program to be registered Set the control program to be registered Adds a file selection box for control program files Control program file Specifi...

Page 88: ...g of the notice message that is printed when for ward processing takes place Text Attributes Sets the character decoration of the notice message Position Sets the printing position of the notice message Cut Sets whether or not to cut the paper after printing the notice message Apply Saves the notice message settings to this product Print forward ing route to be registered Primary Printer Sets the ...

Page 89: ...or Digest authentication This set value will also be passed as an ID parameter value for the form data posted to the server Password Sets password used for Digest authentication File URL Specify a URL for the file to automatically update After designating it click Access test and check if the URL is properly specified Server Authentication Sets whether or not to conduct server authentication based...

Page 90: ...sed for Digest authentication The set value is also passed as the ID parameter value of the form data to be posted to the server Password Specify the password to be used for Digest authentication for the server Server 1 Server 2 Server 3 URL Set the web server URL for acquiring print data After designating it click Access test and check if the URL is properly specified Interval sec Set the request...

Page 91: ...user ID used for Digest authentication The set value is also passed as the ID parameter value of the form data to be posted to the server Password Specify the password to be used for Digest authentication for the server URL Set the web server URL for sending status notifications After designating it click Access test and check if the URL is properly specified Interval sec Set the interval for send...

Page 92: ...uthentication for the server URL Set the web server URL and path to applications Ex After specifying http Web server IP address Test_device php click Access Test and confirm whether or not access is possible Server Authen tication Sets whether or not to conduct server authentication based on the regis tered certificate when conducting access by https Box ID Specifies the BoxID of the communication...

Page 93: ... IP address is acquired or changed Apply Registers the settings to this product Item Description Disable Disables SSL authentication Remove the certificate Select this checkbox to delete the SSL certificate It can only be selected when the SSL setting is Disabled Enable Enables SSL authentication Create the self signed certificate Create a self signed certificate to be registered to this product I...

Page 94: ...tification Sets whether or not to use proxy for status notification Store restore settings Sets whether or not to use proxy for store restore settings Update Web service function Sets whether or not to use proxy for the update Web service function Deployment Sets whether or not to use proxy for deployment Device Data Notification Sets whether or not to use proxy for device data notification Apply ...

Page 95: ...is pressed Set the operation when you press the power button Select from Shutdown and Do nothing ePOS Device Shutdown permission Specify the permission settings for shutdown from Epson ePOS SDK for JavaScript or ePOS Device XML Password protection Specifies whether to perform password authentication for shutdown from an application compatible with ePOS Device XML or Epson ePOS SDK for JavaScript I...

Page 96: ...re settings When this setting is enabled if a USB memory with TM DT software settings stored on it is connected to the computer before Windows starts up the TM DT software settings are automatically restored when Windows starts up Apply Registers the settings to this product Storing settings Acquire Acquires this product s setting files Register user specified folder Folder path Specifies the fold...

Page 97: ... a Web server ID Sets the ID for identifying the setting file for restoring the TM DT soft ware settings on the Web server side This ID becomes the user ID used for Digest authentication The set value is also passed as the ID parameter value of the form data to be posted to the server Password Specify the password to be used for Digest authentication for the server Setting file URL Set the web ser...

Page 98: ...ble Registered device Printer Device ID Type Model no IP address Retry interval Available Customer display Do not use use Communication settings Communication speed Data bit Parity Brightness setting Available Kay input device Device ID Device name VID PID Control script Available Serial communication device Device ID Device name VID PID Control script Communication settings Communication speed Da...

Page 99: ...atus notification ID Password URL Interval Server authentication Available Device Data Notification Server access ID Password URL Server authentication BoxID POST Error Message Enable Disable Message Text attribute Cut Enable Disable Captured device Available Wired LAN TCP IP settings Get IP address IP address Subnet Mask Default gateway Acquire DNS server address automatically DNS server address ...

Page 100: ...le USB Type C port charging mode Charging mode Available Maintenance Store restore settings Store restore settings with automatically Specify the local file to use Specify the file URL to use Setting file setting file URL ID Password Server authentication Available Update web service func tion Specify the local file to use Specify the file URL to use Update file Update file URL ID Password Server ...

Page 101: ...ngs Admin settings Maintenance Log Acquires TM DT Software s log file Item Description Initialize Initializes the Web service settings If you initialize the Web service the password for EPSON TMNet WebConfig will also be initialized The initial values are below User name epson Password epson Item Description Acquire a log file Acquires TM DT Software s log file ...

Page 102: ... file on the Web server side This ID becomes the user ID used for Digest authentication The set value is also passed as the ID parameter value of the form data to be posted to the server Password Sets the password used in Digest authentication Update file URL Specify the Web server URL and path to the application Ex Specify http Web server s IP address For updating file name then click Access test...

Page 103: ...m Description Old password Input the current password New password Input the new password New password Reenter to confirm For confirmation input the new password again Apply Registers the set password on this product The initial setting of user name and password for EPSON TMNet Webconfig are following User name epson Password epson Cannot change the user name ...

Page 104: ...istories that one communication box can hold 10 240 Byte Size of data that can be transmitted at once 1 024 Byte Spooler capacity 8 MB Maximum storage number of JobID 2 000 Item Description Model Following TM printers connected to the network TM m10 TM m30 TM T20 TM T82II TM T88VI TM U220 Following TM printers with the UB E02 UB E03 UB E04 UB R03 or UB R04 TM L90 TM T20II TM T70 TM T70II TM T88V T...

Page 105: ...T series printers It explains device control programs and scripts This manual is included in the Epson ePOS SDK package ePOS Device XML User s Manual Manual describing the method for transmitting XML data from applications via socket communication to control printing and peripherals ePOS Print XML User s Manual Manual describing the method for using Web services from applications to conduct printi...

Page 106: ... and TM DT software settings for this product It is already installed in this product Manual Descriptions DM D110 DM D210 Technical Reference Guide Provides the information necessary to develop a system using the dedicated customer display DM D110 for TM T88V DT TM T88VI DT2 DM D30 Technical Reference Guide Provides the information necessary to develop a system using the customer display DM D30 ...

Page 107: ...mation necessary to develop a PC POS system System Configuration You can install a POS application and drivers on this product and connect peripheral devices to create a simple POS system You can also construct a system using an existing Windows POS application System Configuration Figure Application ...

Page 108: ...M T88VI with a local con nection TM printer USB USB port USB TM printer with a local connection TM printer Ethernet Ethernet Network printer Cash drawer Drawer kick connector USB same as the product s printer Controlled via the product s printer Dedicated customer display DM D110 for TM T88V DT TM T88VI DT2 USB port COM3 Connects to a USB port but is recog nized as a virtual COM port by the COM US...

Page 109: ... function Customer display Control can be performed using the following development kits or drivers EPSON OPOS ADK EPSON OPOS ADK for NET EPSON Advanced Printer Driver for DM D Other devices HID Standard Device This Windows standard driver is recognized as a keyboard device Serial Communication Device This is recognized as a Windows serial communication device When dedicated drivers are prepared f...

Page 110: ...commands is not required on the application side efficient system development is possible EPSON OPOS ADK for NET OPOS ADK for NET allows you to develop applications that are compatible with Microsoft POS for NET When develop ing applications use a separate development environment such as Microsoft Visual Studio NET EPSON JavaPOS ADK JavaPOS is the standard specification which defines an architectu...

Page 111: ...talled in this product If using another printer down load the driver dedicated for that model EPSON Advanced Printer Driver for DM D This is the Windows printer driver for control and display of the customer display An Epson customer display common driver is available This driver is installed in this product Software Overview TM T88VI DT2 Utility This is a Windows compatible application for perfor...

Page 112: ...nter Turning Power On Off Press the power button to turn on off the product CAUTION If you turn the product off wait more than 10 seconds before you turn it on again When the product is turned off or when it is in the sleep mode do not hold down the power button longer than 4 seconds ...

Page 113: ...Time the power button is pressed Operation of this product after the power button is pressed On Less than 4 seconds If the power button is set to Do nothing in OS settings the power remains on Power off 1 Moves to sleep mode 2 4 seconds or longer Forced hardware shutdown 3 Sleep mode Less than 4 seconds Recovers from sleep mode and moves to powered on state CAUTION Do not use the forcible shutdown...

Page 114: ...ter may be damaged Do not touch the manual cutter with your hands when installing or replacing the roll paper Otherwise you may be injured because the manual cutter blade is sharp Use roll paper that meets the printer specification For details about paper specification see Paper Specifications on page 135 Paper must not be pasted to the roll paper spool When the roll paper cover cannot be opened s...

Page 115: ...115 Chapter 7 Handling 7 3 Insert the roll paper in the correct direction 4 Pull out some paper and close the roll paper cover ...

Page 116: ...116 Chapter 7 Handling 7 5 Tear off the paper ...

Page 117: ...1 Press the cover open button to open the roll paper cover 2 Remove the jammed paper 3 Close the roll paper cover CAUTION Do not touch the thermal head and its surroundings After printing the thermal head and its surroundings can be very hot When a paper jam occurs never pull out the paper forcibly ...

Page 118: ... roll paper cover does not open even if you pull the cover open lever Follow the steps below to return the autocutter blade to its normal position 1 Slide the cutter cover toward the front to open it 2 Turn the knob until you see a triangle in the opening This returns the cutter blade to the normal position There is a label near the cutter to assist you 3 Close the cutter cover 4 Open the roll pap...

Page 119: ...d and move the display or arm to change the direction or angle The mobile range of the display is as follows Display tilt Maximum angle of 48 5 levels Display rotation Maximum angle of 300 Arm rotation Maximum angle of 270 Do not rotate the display with excessive force Doing so may break it 48 300 270 ...

Page 120: ...o remove the paper dust clean the platen roller with a cotton swab moistened with water Turn on the printer power only after the water has completely dried Turn off the printer open the roll paper cover and clean the thermal elements of the thermal head with a cotton swab moistened with an alcohol solvent ethanol or IPA CAUTION Never clean the product with alcohol benzine thinner or other such sol...

Page 121: ...port Follow the steps below to transport the printer 1 Operate the power button to turn the power off 2 Remove the DC connector of the AC adapter display keyboard mouse and any peripheral devices 3 Remove the roll paper 4 Pack the printer upright ...

Page 122: ... DDR3 800 2 GB 1 86GHz model DDR3 1066 4 GB USB Port USB 3 0 Type A x 6 port USB 2 0 Type A x 1 USB 2 0 Type C x 1 USB 2 0 Type A x 6 port Ethernet port 10Base T 100Base TX 1000Base T x1 10Base T 100Base TX 1000Base T x1 Display VGA x 1 HDMI x 1 VGA x 1 Display Port x 1 Serial port 1 Port 1 Port Drawer kick connector RJ 12 6 pin x 1 RJ 12 6 pin x 1 Sound Internal monaural speaker External x 1 Line...

Page 123: ... D110 for TM T88V DT TM T88VI DT2 Customer display DM D30 Wireless LAN cable set OT WL01 Powered USB Hub OT PH10 Affixing tape DF 10 Product power consumption 8 9 W when standby 88 3 W when printing N2600 N2800 12 2W when standby 54W when printing D2550 14 9W when standby 61 8W when printing OS Windows 10 IoT Enterprise 2016 LTSB 64bit Windows Embedded POSReady 2009 Windows Embedded POSReady 7 TM ...

Page 124: ...ad energizing parts is One part energizing It does not usually need to be changed Printable Area for 80 mm Width Paper The printable area left right margins print start position from the autocutting position print start position from the manual cutting position of the TM T88VI DT2 is the same as that of the TM T88V DT Cutting Method The TM T88VI DT2 uses the partial cutting method cutting with one...

Page 125: ...M T88VI DT2 goes to the same status under the same conditions as the TM T88V DT You can replace the TM T88V DT with the TM T88VI DT2 without modifying applications If Connecting as a Peripheral Device of the TM i DT Printer If using this product as a network printer from a TM i DT printer register it as TM T88VI For the registration method see the Technical Reference Guide of the TM i DT printer ...

Page 126: ...ons You can place the TM T88VI DT2 in the same location as the TM T88V DT since its overall dimensions and weight are the same as those of the TM T88V DT TM T88VI DT2 W 145 x D 279 x H 183 Approximately 2 8 kg TM T88V DT W 145 x D 279 x H 183 Approximately 2 8 kg ...

Page 127: ...s 300 mm s 11 8 s Top margin This function backfeeds the paper when starting printing to make the top margin smaller thus saving paper See Amount of top margin by backfeed on page 43 TM T88VI DT2 TM T88V DT Default Up to 300 or 350 mm s Up to 300 mm s Maximum print speed 350 mm s 300 mm s Print speed setting Customized value Level 1 to 14 Level 1 to 13 Depending on print conditions such as print d...

Page 128: ...lt into CPU Intel HD Graphics 620 Built into CPU Intel HD Graphics 610 Built into CPU Auxiliary storage SATAIII SSD M 2 type 2242 32 GB or more Interface Ethernet port 10Base T 100Base TX 1000Base T 1port RJ 45 Supports the Wake On LAN and network boot functions USB port USB 3 0 6 ports Type A USB 2 0 2 ports Type A x1 Type C x1 Serial port D sub 9 pin male 1 port VGA port D sub 15 pin female 1 po...

Page 129: ...software ePOS Device Roll paper Paper width 80 mm 79 5 0 5 mm 3 13 0 02 58 mm 57 5 0 5 mm 2 26 0 02 Roll paper diameter 83 mm 3 27 maximum Roll paper core Inside 12 mm 0 47 Outside 18 mm 0 71 Power specifications Dedicated AC adapter AC 100 AC 240 V 50 60 Hz Product power consumption 8 9 W when not printing 88 3 W when printing Overall dimensions W D H 145 mm 5 71 279 mm 10 98 183 mm 7 20 inclusiv...

Page 130: ...od Thermal line printing Dot density 180 180 dpi Printing direction Unidirectional with friction feed Reverse feed is not supported Printing width Standard column mode 50 8 mm 2 0 360 dots 72 0 mm 2 83 512 dots 48 column mode 50 8 mm 2 0 360 dots 67 7 mm 2 67 480 dots Character s per line Standard column mode ANK font A 30 42 ANK font B 40 56 48 column mode ANK font A 36 48 ANK font B 40 53 Maximu...

Page 131: ... font A 12 24 dots Right side dot space 2 ANK font B 9 17 dots Right side dot space 2 48 column mode ANK font A 10 24 dots Right side dot space 1 ANK font B 9 17 dots Right side dot space 2 Character size W x H Standard column mode ANK font A 1 41 3 39 mm 0 06 0 13 ANK font B 0 99 2 40 mm 0 04 0 09 48 column mode ANK font A 1 27 3 39 mm 0 05 0 13 ANK font B 0 99 2 40 mm 0 04 0 09 Barcode two dimen...

Page 132: ...elements for dots 1 to 256 and 257 to 360 is shifted approximately 0 07 mm 0 0028 in the paper feed direction as shown in the figure below In 4 divided energizing the print position within the printable area of the thermal elements for dots 1 to 128 129 to 256 and 257 to 360 is shifted approximately 0 04 mm 0 0016 in the paper feed direction as shown in the figure below 0 141 0 05 mm 0 0056 0 002 ...

Page 133: ...2 is shifted approximately 0 07 mm 0 0028 in the paper feed direction as shown in the figure below In 4 divided energizing the print position within the printable area of the thermal elements for dots 1 to 128 129 to 256 257 to 384 and 385 to 512 is shifted approximately 0 04 mm 0 0016 in the paper feed direction as shown in the figure below 0 141 0 05 mm 0 0056 0 002 79 5 0 5 mm 3 13 0 02 72 2 0 ...

Page 134: ...xt print may be reduced When printing after cutting paper for prints with no pitch reduction feed the paper about 1 mm 16 406 inches before printing When leaving paper loaded for an extended period of time make sure you feed about 30 mm of paper This can prevent paper from wrinkling and causing prints to be too light Autocutter blade position Approx 29 Approx 15 Manual cutter position Center of th...

Page 135: ...r width 57 5 0 5 mm 79 5 0 5 mm Specified original roll paper type Epson Certified Media List for Thermal Receipt Printers www epson biz com content sht_tm_media Specified original paper type P30521 P30523 P31523 P35524 Kanzaki Specialty Papers AF50KS E Jujo Thermal Oy F5041 Mitsubishi HiTec Paper Flensburg GmbH KT55FA KT48FA Koehler Paper Group Paper must not be pasted to the roll paper spool The...

Page 136: ...l devices The current capacity that can be supplied by USB port is a total of 4 2 A for all USB ports Port Power supply Supply capacity USB 3 0 Type A DC 5 V 900 mA each USB 2 0 Type A DC 5 V 500 mA USB 2 0 Type C DC 5 V 3 A Drawer DC 24 V 1 A HDMI DC 5 V 100 mA ...

Page 137: ... m or less Acoustic noise When printing 55 dB When standby 42 dB Note The values above are measured in the Epson evaluation condition Acoustic noise differs depending on the paper used printing contents and the setting values such as print speed or print density 90 10 5 34 40 Relative humidity Operating environment range Ambient temperature RH 34 C 90 40 C 65 C 31 C 90 34 C 75 40 C 43 Specified or...

Page 138: ...m failures up to the life of 20 million lines Parts with limited lifespan Controller CPU cooling fan till the time when speed of rotation is reduced by 30 Approximately 45 000 hours ambient temperature of 40 C Lithium primary battery for RTC Around 5 years Printer Printer mechanism 20 million lines printing Thermal head 200 km When recommended density and print speed are set Autocutter 3 million N...

Page 139: ...139 Product Specifications External Dimensions Width 145 mm 5 71 Depth 279 mm 10 98 including connector cover Height 183 mm 7 20 ...

Page 140: ...ct Specifications When the dedicated customer display DM D110 for TM T88V DT TM T88VI DT2 with a crank pole is installed Width 177 mm 6 97 Depth 365 mm 14 37 Height 202 mm 7 95 Mass Approximately 3 2 kg 7 06 lb ...

Page 141: ...ations When the dedicated customer display DM D110 for TM T88V DT TM T88VI DT2 with a straight pole is installed Width 177 mm 6 97 Depth 289 mm 11 38 Height 358 mm 14 09 Height 202 mm 7 95 Mass Approximately 3 2 kg 7 06 lb ...

Page 142: ...tions Item Specification Input conditions Input voltage AC 100 V to 240 V Frequency 50 60 Hz Input current rating 2 4 A Output conditions Output voltage rating DC 24 V 5 Output current rating 4 2A Units mm 35 200 1500 210 33 5 6 5 24 3 55 145 60 85 ...

Page 143: ...Number of ports 6 ports Connector Type A Bus power Bus power is output even at Sleep 5V 900mA each Pin No Signal I O Description 1 VBUS Bus power output 2 D I O USB2 0 data 3 D I O USB2 0 data 4 GND GND 5 SSRX I USB 3 0 reception data 6 SSRX I USB 3 0 reception data 7 GND GND 8 SSTX O USB 3 0 transmission data 9 SSTX O USB 3 0 transmission data ...

Page 144: ...nector pin Item Specifications Compliant standards USB 2 0 Specification Number of ports 1 ports Connector Type A Bus power Bus power is output even at Sleep 5V 500mA Pin No Signal I O Description 1 VBUS Bus power output 2 D I O USB2 0 data 3 D I O USB2 0 data 4 GND GND ...

Page 145: ...TXp1 Not used NC B11 SSRXp1 Not used NC A3 SSTXn1 Not used NC B10 SSRXn1 Not used NC A4 VBUS Bus power B9 VBUS Bus power A5 CC1 For connection configuration B8 SBU2 Not used NC A6 Dp1 I O USB2 0 D B7 Dn2 I O USB2 0 D A7 Dn1 I O USB2 0 D B6 Dp2 I O USB2 0 D A8 SBU1 Not used NC B5 CC2 For connection configuration A9 VBUS Bus power B4 VBUS Bus power A10 SSRXn2 O Not used NC B3 SSTXn2 O Not used NC A1...

Page 146: ...connector pin Item Initial settings Get IP Address Auto 1 IP Address 192 168 192 168 2 Subnet Mask 255 255 255 0 2 Default Gateway Not set 2 Acquire DNS Server Address Automatically Enable DNS Server Address Not set 3 Print IP Address Enable Item Specifications Connector φ3 5mm stereo mini jack Number of ports 1 ports Pin No Signal I O Description 1 GND GND 2 LINE_L O Line out left channel 3 GND G...

Page 147: ...er of ports 1 port Connector DSUB 9 pin male Female screw Unified inch screw No 4 40 UNC Maximum Communication speed 115200 bps Pin No Signal I O Description 1 N C Not used 2 RXD I RXD Receive data 3 TXD O TXD Transmit data 4 DTR O DTR 5 GND GND 6 DSR I DSR 7 RTS O RTS 8 CTS I CTS 9 N C Not used ...

Page 148: ... x 1200 dots 60Hz Number of ports 1 port Connector DSUB 15 pin female Pin No Signal I O Description Note 1 RED O Red data 2 GREEN O Green data 3 BLUE O Blue data 4 N C No connection 5 8 GND Ground 9 5 V 5 V output Output 5 V through PTC 10 GND Ground 11 N C No connection 12 DDCDATA I O DDC data 5 V level signal 13 HSYNC O Horizontal Sync 5 V level signal 14 VSYNC O Vertical Sync 5 V level signal 1...

Page 149: ...I0_TXN2 4 TMDS Data1 O TMDS data channel 1 DDI0_TXP1 5 GND GND TMDS data 1 shield 6 TMDS Data1 O TMDS data channel 1 DDI0_TXN1 7 TMDS Data0 O TMDS data channel 0 DDI0_TXP0 8 GND GND TMDS data 0 shield 9 TMDS Data0 O TMDS data channel 0 DDI0_TXN2 10 TMDS Clock O TMDS clock DDI0_AUXP 11 GND GND TMDS clock shield 12 TMDS Clock O TMDS clock DDI0_AUXN 13 CEC NC Not supported 14 Reserved NC Not supporte...

Page 150: ...or for supplying power from the AC adapter Functions of each connector pin Item Specifications Compliant standards RJ12 6pin Number of ports 1 port Drawer side connector RJ12 telephone jack 6 position 6 contact Pin No Signal Direction 1 Frame GND 2 Drawer kick drive signal 1 Output 3 Drawer open close signal Input 4 24 V 5 Drawer kick drive signal 2 Output 6 Signal GND Pin No Signal 1 24 V 2 GND 3...

Page 151: ...ed select Discard Changes and Reset if you do not want to save settings or select Save Changes and Reset if you do want to save the settings 2 Follow the on screen instructions and select Yes 3 BIOS Setup ends and this product starts up Settings for the USB 2 0 Charging Port By default settings the USB 2 0 port Type C is a charging dedicated port If enabling communication per form BIOS Setup setti...

Page 152: ... a USB memory or the like that is connected 1 Once BIOS starts up select Security USB Port Configuration 2 Select USB Port Disable Override 3 Select Select Per Pin 4 Select the number of the USB port and set it to Disable 5 Press F4 to save the settings As USB port 6 is the printer for this product do not set that to Disable 1 2 3 4 5 0 7 8 ...

Page 153: ...BIOS Information BIOS Vendor Core Version Project Version Model Access Level System Date System Time Advanced CPU Configuration Type ID Speed L1 Data Cache L1 Instruction Cache L2 Cache L3 Cache L4 Cache VMX SMT TXT Microcode Revision Intel ICC DMI BCLK PEG SATA USB3 PCIe Clock Settings Default Clock Settings Frequency Range Limits Maximum Spread ...

Page 154: ...onfiguration Enable ACPI Auto Configuration Enable Hibernation ACPI Sleep State CSM Configuration CSM Support CSM16 Module Version GateA20 Active Option ROM Messages INT19 Trap Response Boot option filter Option ROM execution Launch PXE OpROM Storage Video SMBIOS Configuration SMBIOS Configuration Product Name Serial Number UUID SMBIOS Auto Fill Auto Fill Now Auto Fill On Boot Target USB Port Prod...

Page 155: ...ation USB Module Version USB Controllers USB Devices Type C Port Charge Legacy USB Support XHCI Hand off USB Mass Storage Driver Support USB hardware delays and time outs USB transfer time out Device reset timu out Device power up delay Network Configuration Ethernet Controller Wake On LAN Network Stack Ipv4 PXE Support Ipv4 HTTP Support Ipv6 PXE Support Ipv6 HTTP Support IP6 Configuration Policy ...

Page 156: ... NVMe Configuration NVMe Configuration Serial Port Configuration Serial Port 1 Configuration GPIO Configuration SIO GP20 GP20 Output setting SIO GP21 GP21 Output setting ISH GP2 GP2 Output setting HD Audio Controller Status LED Security Administrator Password Maintainer Password User Password P2 SM619GXE DES USB port Configuration USB Port Disable Override USB Controller 0 1 2 3 4 5 6 7 8 Menu Ite...

Page 157: ... TPM 20 InterfaceType Device Select Boot Quiet Boot Hide Specified Log Fast Boot SATA Support VGA Support USB Support NetWork Stack Driver Support Setup Prompt Timeout Bootup NumLock State AC Power Recovery Notify Battery Error FIXED BOOT ORDER Priorities Boot Option 1 Boot Option 2 Boot Option 3 Boot Option 4 Boot Option 5 Boot Option 6 Boot Option 7 Boot Option 8 Save Exit Save Options Save Chan...

Page 158: ...158 Product Specifications Character Code Tables Refer to the following URL regarding the character code table www epson biz com pos reference charcode ...

Page 159: ...gram 3 The open source software programs are WITHOUT ANY WARRANTY without even the implied warranty of MERCHANTABILITY AND FITNESS FOR A PARTICULAR PURPOSE See the license agreements of each open source software program for more details 4 OpenSSL toolkit This printer product includes software developed by the OpenSSL project for use in the OpenSSL Toolkit http www openssl org This product includes...

Page 160: ...mail calendar contacts music and news that are included with and are a part of Windows If this agreement contains terms regarding a feature or service not available on your device then those terms do not apply b Additional terms Depending on your device s capabilities how it is configured and how you use it additional Microsoft and third party terms may apply to your use of certain features servic...

Page 161: ...or the software Remote assistance allows one user to connect directly to another user s computer usually to correct problems vi POS application If the software is installed on a retail point of service device you may use the software with a point of service application POS Application A POS Application is a software application which provides only the following functions i process sales and servic...

Page 162: ...egion You must also comply with all domestic and international export laws and regulations that apply to the software which include restrictions on destinations end users and end use For further information on geographic and export restrictions visit aka ms georestrict and aka ms exporting 8 Support and Refund Procedures For the software generally contact the device manufacturer or installer for s...

Page 163: ... it s permanently barred g Severability If the class action waiver is found to be illegal or unenforceable as to all or some parts of a dispute those parts won t be arbitrated but will proceed in court with the rest proceeding in arbitration If any other provision of Section 9 is found to be illegal or unenforceable that provision will be severed but the rest of Section 9 still applies h Conflict ...

Page 164: ...ECODE AVC VC 1 AND MPEG 4 PART 2 VIDEO THAT WAS ENCODED BY A CONSUMER ENGAGED IN A PERSONAL AND NON COMMERCIAL ACTIVITY AND OR WAS OBTAINED FROM A VIDEO PROVIDER LICENSED TO PROVIDE SUCH VIDEO NO LICENSE IS GRANTED OR SHALL BE IMPLIED FOR ANY OTHER USE ADDITIONAL INFORMATION MAY BE OBTAINED FROM MPEG LA L L C SEE WWW MPEGLA COM c Malware protection Microsoft cares about protecting your device from...

Page 165: ... REMEDIES FOR BREACH OF A WARRANTY GUARANTEE OR CONDITION YOUR LOCAL LAWS IMPOSE TO THE EXTENT NOT PROHIBITED BY YOUR LOCAL LAWS IF YOU HAVE ANY BASIS FOR RECOVERING DAMAGES YOU CAN RECOVER FROM THE MANUFACTURER OR MICROSOFT ONLY DIRECT DAMAGES UP TO THE AMOUNT YOU PAID FOR THE SOFTWARE OR UP TO 50 USD IF YOU ACQUIRED THE SOFTWARE FOR NO CHARGE YOU WILL NOT AND WAIVE ANY RIGHT TO SEEK TO RECOVER A...

Reviews: