c
Caution:
❏
You must remove the yellow tape seals from the cartridges before
installing them; otherwise, the cartridges will become unusable
and you will be unable to print.
❏
If you have installed an ink cartridge without removing the yellow
tape seal, you must remove the cartridge and install a new one.
Prepare the new cartridge by removing the yellow tape seal, then
install it in the printer.
❏
Do not remove the blue portion of the tape seal from the cartridges;
otherwise, the cartridges may become unusable.
❏
Do not remove the tape seals from the bottom of the cartridges;
otherwise, ink will leak.
❏
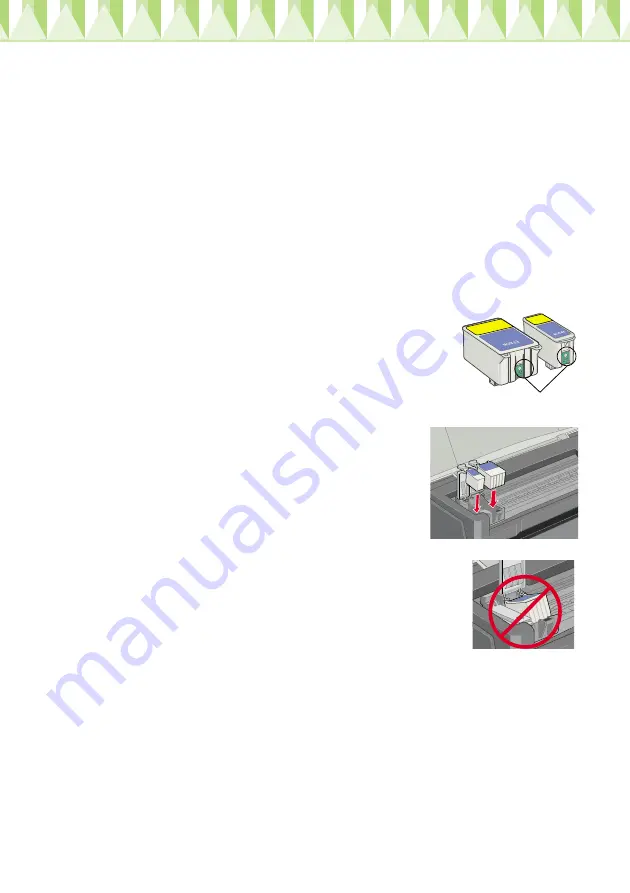
Do not touch the green IC chip on the side
of the cartridge. Doing so may prevent
normal operation and printing.
5.
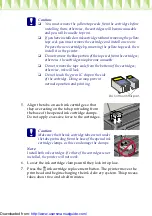
Align the tabs on each ink cartridge so that
they are resting on the tabs protruding from
the base of the opened ink cartridge clamps.
Do not apply excessive force to the cartridges.
c
Caution:
Make sure that the ink cartridge tabs are not under
the tabs protruding from the base of the opened ink
cartridge clamps, as this can damage the clamps.
Note:
Install both ink cartridges. If either of the cartridges is not
installed, the printer will not work.
6.
Lower the ink cartridge clamps until they lock into place.
7.
Press the
e
ink cartridge replacement button. The printer moves the
print head and begins charging the ink delivery system. This process
takes about two and a half minutes.
Do not touch this part.
http://www.usersmanualguide.com/

