EPSON Stylus
&RORU
800
Rev. A
4-14
7. Press
“ENTER” key, and the menu below appears.
8. Enter
“3”
for
“Select menu : ?” to select “Head angular adjustment” in the menu, then press
“ENTER” key.
9. Enter a dummy number in 3 digits such as “000” or “111” for “MC No.”, and the head angular
adjustment pattern is printed out.
;
When the MC number is entered, the head angular adjustment pattern is printed and the following
message appears on the screen;
“Space“ key to print again (“Return” to the MENU) (“0” key to cleaning/ “E” key to
escape to the error)
If you identify missing dots on the pattern, you can enter “0” to reprint the adjustment pattern after
performing the head cleaning. The black and color head cleaning is executed either individually or
together, which you can select. This cleaning is same as CL2 cleaning.
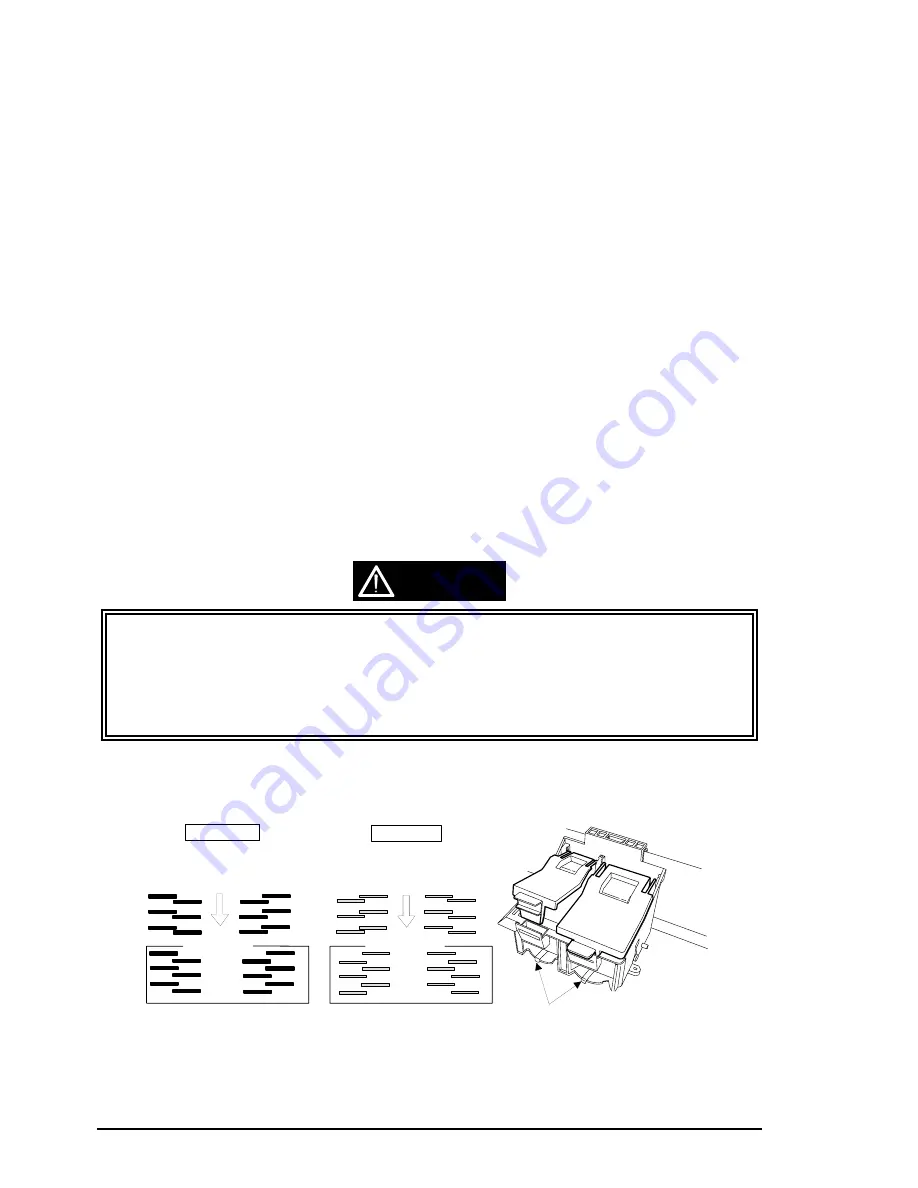
10. Look at the output to check if the lines are printed at the regular interval. Figure below shows how to
move the head angular adjust lever to adjust different misalignment patterns for each head.
...........
........................
......................
.....................
.......
.............
Ink charge
All adjustment
Select Menu ?_
BI-D (center value 0,0)
Gap Timming (center value 0,0)
.............
0
1
2
3
4
5
6
7
8
9
Stylus COLOR 800 J70C00E
Customer : Standard Customer Data <****> 12-03-1996
..........................
.......
..............................
Write to the Head voltage value
Head angular adjustment
BK.-M Linear adjustment
Head GAP timming adjustment
Bi-d adjustment
Print inspection
Ink discharge
Customer data change/End
Figure 4-18. “Adjustment/Inspection” Sub Menu
CAUTION
Black Printing
Color Printing
Move the lever
right.
Move the lever
left.
Move the lever
right.
Move the lever
left.
Correct pattern
Correct pattern
Head Angular Adjustment Lever
Figure 4-19. Use of the Head Angular Adjust Lever


