19
2.
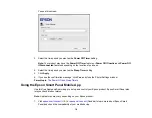
Download Epson Smart Panel from the Apple App Store or Google Play.
3.
Do one of the following:
• If your Epson product is already connected to a wireless network, connect your mobile device to
the same network. Then open Epson Smart Panel and select your Epson product, if necessary.
• If your Epson product is not connected to a wireless network, connect your mobile device to the
network you want to use, then open Epson Smart Panel and follow the instructions to set up your
Epson product.
Now you are ready to control your Epson product with your mobile device.
Parent topic:
Related topics
Voice-activated Printing
Take advantage of voice-activated, hands-free printing from your Epson product with Alexa, Siri, and
Google Assistant. Depending on which voice assistant you use, you can ask your product to print
photos, calendars, recipes, photo props, and more.
for more information.
1.
Connect your product to your network. See the link below.
2.
Set up your product's email address for use with Epson Connect. See the link below to activate it
from the product control panel.
3.
for instructions on how to set up your product and voice assistant to use the voice-
activated printing feature.
Now you are ready to print with your voice and your Epson product.
Parent topic:
Epson Connect Solutions for Smartphones, Tablets, and More
Use your smartphone, tablet, or computer to print and scan documents, photos, emails, and web pages
from your home, office, or even across the globe.
Note:
If you are using your Epson product with the Windows 10 S operating system, you cannot use the
software described in this section. You also cannot download and install any Epson product software
from the Epson website for use with Windows 10 S; you must obtain software only from the Windows
Store.
Summary of Contents for ET-2400
Page 1: ...ET 2400 User s Guide ...
Page 2: ......
Page 10: ......
Page 94: ...94 You see an Epson Scan 2 window like this ...
Page 96: ...96 You see an Epson Scan 2 window like this ...
Page 110: ...110 You see a screen like this 2 Click the Save Settings tab ...
Page 113: ...113 You see a screen like this 2 Click the Customize Actions tab ...
Page 115: ...115 You see this window ...
Page 137: ...137 You see a window like this 4 Click Print ...

