


43
6
Press the
SEL
(Select) button to apply the setting.
Adjusting the Aspect Ratio
Some picture sources, such as standard-definition TV broadcasts, are not
formatted for high-definition video. To fit such images optimally onto the
screen, you can change their shape (or aspect ratio) by pressing the
ASP
(Aspect) button on the remote control. Press the
ASP
button repeatedly to
move through the settings. The setting you choose depends on how the
original picture source is formatted.
Note
No matter which aspect ratio setting you choose, the original image is
automatically “upscaled” (resized) to fit on your Ensemble HD screen.
•
Normal 1
(default setting) for widescreen content, such as HD television broadcasts, presented in the 16:9
HDTV aspect ratio.
Note
Movies released in a theatrical widescreen format (such as 1.85:1 or 2.35:1) will display with black bars at the top and
bottom. That’s because high-definition TVs and home entertainment systems use the slightly narrower 16:9 (1.78:1)
aspect ratio.
•
Normal 2
for use with DVDs that present movies in their original 1.85:1 aspect ratio. Eliminates narrow
black bars at the top and bottom so the image fills the whole screen. Can also be used to improve the
appearance of widescreen TV broadcasts that contain “noise” in the overscanned area.
Theatre Black 1
For images close to those produced by professionally used broadcast monitors
Theatre Black 2
For black-and-white movies or those with dark scenes
sRGB
For projecting computer images that conform to the sRGB color standard
(PowerLite Home Cinema 720 only)
Color Mode
Description
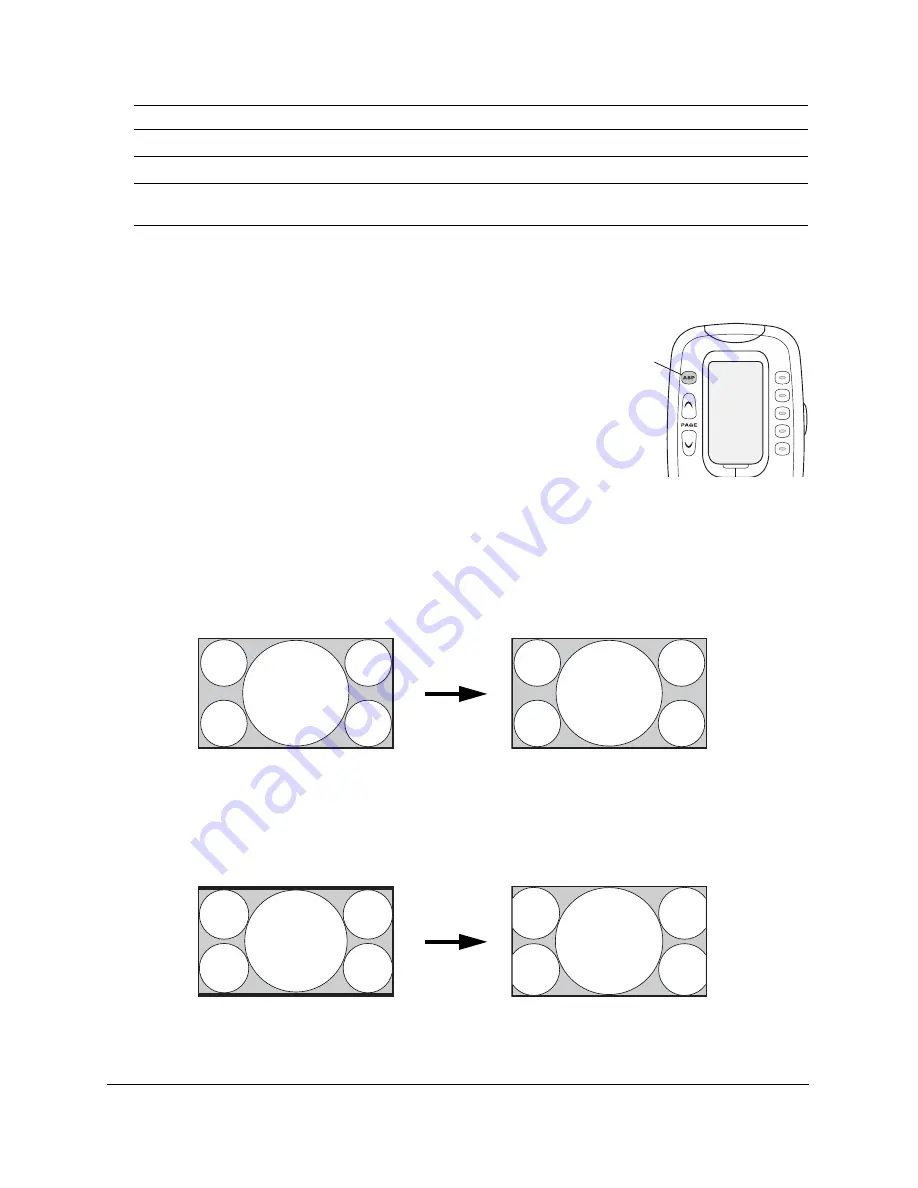
ASP
(Aspect)
button
Original 16:9 image
Normal 1
maintains the original
aspect ratio
1.85:1 theatrical aspect ratio shown
using
Normal 1
setting
Normal 2
enlarges the image to eliminate the
black bars, but cuts off some side content
Summary of Contents for Ensemble HD
Page 1: ...User s Guide ...
Page 8: ...8 ...
Page 10: ...10 ...
Page 18: ...18 ...
Page 52: ...52 ...
Page 60: ...60 ...
Page 70: ...70 ...
Page 84: ...84 ...
Page 118: ...118 ...
Page 126: ...126 ...
Page 131: ......
Page 132: ......


