88
Presenting Through a Wireless Network
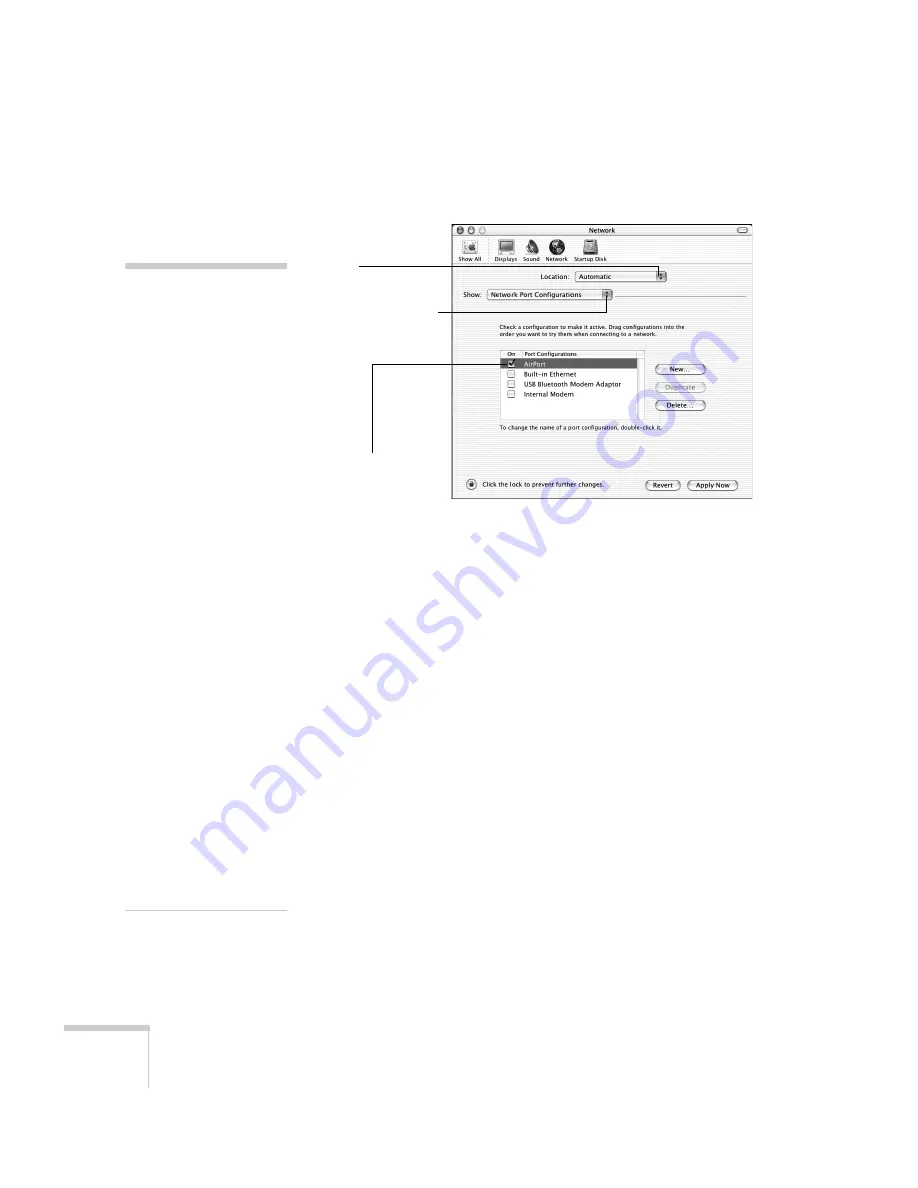
2. Make sure Location is set to
Automatic
.
3. Select
Network Port Configurations
in the Show pull-down
menu.
4. Under Port Configurations, select
AirPort
.
5. Click
Apply Now
. Then close the window.
6. Start the AirPort Admin utility. Select your base station, then
click
Configure
.
7. On the AirPort tab, make sure your AirPort network name
matches your projector’s ESSID. If not, enter the projector’s
ESSID in the AirPort Network text box and click
Update
.
8. If you turned DHCP on in your projector’s advanced menu, click
the Network tab and make sure the
Distribute IP addresses
check box is selected. If you need to select it, click
Update
.
Select
Automatic
Select
Network Port
Configurations
then select
AirPort
note:
If you don’t need the other
network ports, disable them
by deselecting their check
boxes. If more than one
network port is enabled, the
projector software warns you
to turn off AirPort when you
first connect the projector.
Disregard this message.
Your AirPort network and
base station names may be
different. To check or change
your AirPort network name,
start the AirPort Admin
utility, select your base
station, and click
Configure
. Click
Show
All
Settings
, then make any
changes you want on the
AirPort tab.
If you’re connecting to your
projector in static IP mode,
deselect the
Distribute IP
addresses
check box. Make
sure your projector’s gateway
address is identical to the base
station’s IP address, and the
first three segments of the
projector’s IP address are
identical to the first three
segments of the base station’s
IP address.
Summary of Contents for 7850p - PowerLite XGA LCD Projector
Page 1: ...EPSON PowerLite 7850p Multimedia Projector User sGuide ...
Page 30: ...30 Displaying and Adjusting the Image ...
Page 48: ...48 Using the Remote Control ...
Page 100: ...100 Presenting Through a Wireless Network ...
Page 122: ...122 Presenting from a Memory Card or Digital Camera ...
Page 140: ...140 Using the Projector s Menus ...
Page 192: ...192 Solving Problems ...
Page 198: ...198 Software Installation ...
Page 206: ...206 Technical Specifications ...
Page 214: ...214 Notices ...
Page 222: ...222 Index ...


