background image

17


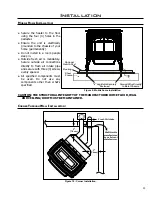
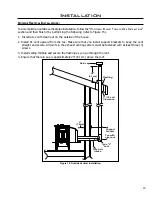
Existing Fireplace

Clean Out Tee

Fireplace Damper 

Location

Rain Cap

Seal Plate

Vent Pipe (single wall 

stainless flex pipe or 

PL vent)

Existing Masonary 

Flue

Flexible Vent Connector

(Use this 5 ft section of 

pipe to vent past fireplace 

damper or smoke shelf)

Floor

Protection

Combustible Floor

Masonry Fireplace

Min (6")

150mm

Mantel

Minimum (8") 200mm  

from top of stove

Damper Removed

or Fastened Open

Clean-out tee

Fresh-air intake should com 

from chimney. If holes 

already exist fresh-air intake 

can be taken through back 

of the fireplace or through 

the ash dump.

Installation

h

earth

 m

ount

 i

nStallation

:

Figure 17: Hearth Mount - Side View. 

Figure 18: Hearth Mount - Over View. 

1. Lock  fireplace  damper  in  the  open 

position.

2. Install flexible stainless steel liner or listed 

pellet  vent  to  the  top  of  the  chimney. 

All  joints  in  the  exhaust  venting  system 

must  be  fastened  with  at  least  three  (3) 

screws.

3. Install  a  sealing  plate  at  the  top  of  the 

chimney.

4. Connect a rain cap and flex adapter to the 

chimney liner/pipe.

5. Connect a clean-out tee or a 90° elbow to 

the liner/pipe.

6. Install tee onto stove.

Summary of Contents for M-55C-FS

Page 1: ...E TECHNICAL MANUAL PELLET STOVE M 55C FS PLEASE READ THIS ENTIRE MANUAL BEFORE INSTALLATION AND USE OF THIS PELLET BURNING ROOM HEATER FAILURE TO FOLLOW THESE INSTRUCTIONS COULD RESULT IN PROPERTY DAM...

Page 2: ...haust And Fresh Air Intake Locations 10 Mobile Home Installation 11 Corner Through Wall Installation 11 Horizontal Exhaust Through Wall Installation 12 RECOMMENDED Through Wall With Vertical Rise and...

Page 3: ...ce shows how often you need to clean to be safe OPERATION The door and ash drawer must be kept closed when the unit is in operation to prevent fume spillage and for proper and safe operation of the pe...

Page 4: ...bearing capacity if existing construction doesn t meet load capacity suitable measures e g load distributing plate must be taken to achieve it DO NOT INSTALL A FLUE DAMPER IN THE EXHAUST VENTING SYST...

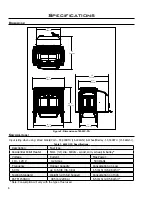
Page 5: ...de d gagement requis pour le mod le FS qu il soit encastr sur pied ou dans une maison mobile Sidewall to Unit Du mur de c t l appareil A 9 in 230 mm Backwall to Unit Du mur de derri re l appareil B 3...

Page 6: ...ble 1 M 55C FS Specifications Description Fuel type Residential Pellet Heater 6mm dia Pellets wood corn wheat barley Voltage Current Max Power 110 120 V 4 2 Amps 504 Watts Frequency Hopper Capacity Co...

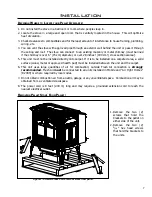
Page 7: ...to carpet If it is to be installed on a carpeted area a solid surface wood metal or approved hearth pad must be installed between the unit and the carpet 6 This unit uses large quantities of air for c...

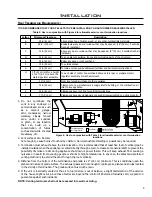
Page 8: ...hermostat Installation 1 Install the wall thermostat millivolt rated thermostat recommended or a 12 24 Volt rated thermostat set to millivolts in a location that is not to close too the unit but will...

Page 9: ...rmination locations Table 2 Use in conjunction with Figure 6 for allowable exterior vent termination locations Letter Minimum Clearance Description A 24 in 61 cm Above grass top of plants wood or any...

Page 10: ...ight homes and mobile homes When connecting to an outside fresh air source do not use plastic or combustible pipe A 3 minimum 76 mm ID inside diameter steel aluminum or copper pipe or ducting should b...

Page 11: ...estal Ensure the unit is electrically grounded to the chassis of your home permanently Do not install in a room people sleep in Outside fresh air is mandatory Secure outside air connections directly t...

Page 12: ...fastened with at least three 3 screws 1 Place the appliance 15 37 5 cm away from the wall If the stove will be installed a hearth pad set the unit on it 2 Locate the center of the exhaust pipe on the...

Page 13: ...installations have 3 to 5 feet 91 to 152 cm of vertical pipe in the system to help naturally draft the unit in the event of extreme weather or a power outage Some horizontal through wall installations...

Page 14: ...Vertical section of vent pipe Horizontal frame for thimble 90o elbow Concrete Wall Clean out tee Installation to use if there is a concrete or retaining wall in line with exhaust vent on pellet stove...

Page 15: ...Installations section and then finish it by performing the following refer to Figure 15 1 Install a tee with clean out on the outside of the house 2 Install PL vent upward from the tee Make sure that...

Page 16: ...o when the pellet vent is installed vertically it will meet the minimum clearance from a combustible wall stated by the vent manufacturer 2 Install the tee with clean out 3 Install the pellet vent upw...

Page 17: ...chimney If holes already exist fresh air intake can be taken through back of the fireplace or through the ash dump Installation Hearth Mount Installation Figure 17 Hearth Mount Side View Figure 18 He...

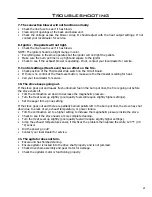
Page 18: ...Feed Trim and Fuel Type Functions can be used to compensate for varying fuel qualities Refer to the Owners Manual for circuit board operation If after long periods of burning the fire builds up or th...

Page 19: ...or If the 3 light is flashing unit may be out of fuel Check the Door and Ash Pan door THEY MUST BE CLOSED TIGHT See section 8 The Fuel will not light Check the fuse on the circuit board If the unit st...

Page 20: ...vertical section to move termination into a low pressure zone To reset Circuit Board after a trouble code push the ON OFF button 5 Unit is on but auger motor does not turn at all Check the line fuse...

Page 21: ...s going out If the stove goes out and leaves fresh unburned fuel in the burn pot liner the fire is going out before the stove shuts off Trim the combustion air down to decrease the magnahelic pressure...

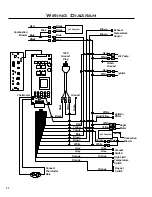
Page 22: ...or Grey Grey Orange Orange White Grey Grey White Blue Yellow Auger Motor White Yellow Vacuum Switch Connect Thermostat Here Brown Brown Blue Purple Yellow Red Thermostat Combustion Blower Black Black...

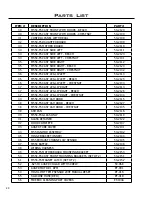
Page 23: ...5 AGITATOR DRIVE BRACKET 50 2038 16 SS BURN POT LINER 50 2042 17 EXHAUST STARTER TUBE CW GASKET 50 2043 18 CAST FLUTED FIREBOX LINER 50 2048 19 HOPPER SWITCH 50 2052 20 EXHAUST MOTOR CAPACITOR C W STR...

Page 24: ...50 2114 37 M55C FS CAST LEG LIP RIGHT BEACH 50 2126 37 M55C FS CAST LEG LIP RIGHT CHESTNUT 50 2134 40 M55C FS CAST ASH DOOR 50 2115 38 M55C FS CAST ASH DOOR BEACH 50 2127 38 M55C FS CAST ASH DOOR CHES...

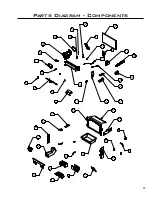
Page 25: ...25 Parts Diagram Components 26 22 48 19 54 1 52 55 2 53 23 25 10 44 32 33 11 24 4 9 6 3 12 21 20 40 50 31 39 42 47 15 8 7 49 56 43 51 5 14 16 27 46 17 45...

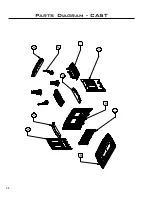
Page 26: ...Parts Diagram CAST 26 30 18 28 35 37 13 29 38 36 34...

Page 27: ...epair or replacement for the first two 2 years and limited labour for the first two 2 years to the original purchaser Please see the exclusions and limitation section below as certain restrictions and...

Page 28: ...ify the Limited Warranty on this stove If unsure as to the extent of this Limited Warranty contact your authorized Enviro dealer before installation 10 Sherwood Industries Ltd will not be responsible...

Page 29: ...nt schedule Labour rates are set per component and as such total labour costs may not be covered 26 Sherwood Industries Ltd is not liable for freight or labour on any stove replaced in field and is no...

Page 30: ...AL NUMBER ___________________________ DATE OF PURCHASE _____________ dd mm yyyy DATE OF INSTALLATION ___________ dd mm yyyy MAGNEHELIC AT INSTALL ___________________ INSTALLER S SIGNATURE ____________...

Reviews: