16
Removing the Cover Glass on DisplayVue™ A15
The cover glass on DisplayVue™ A15 is secured to the system with four clips that make it
difficult for average users to remove with their fingers. The added force required to remove
the glass is necessary in order to deter the public from tampering with DisplayVue™ A15.
Included with DisplayVue™ A15 is a pry tool that can be used to remove the cover glass from
the chassis. Do not use any other device to remove the glass from DisplayVue™ A15, as this
may cause damage to the chassis and glass. Such damage is not covered under the warranty.
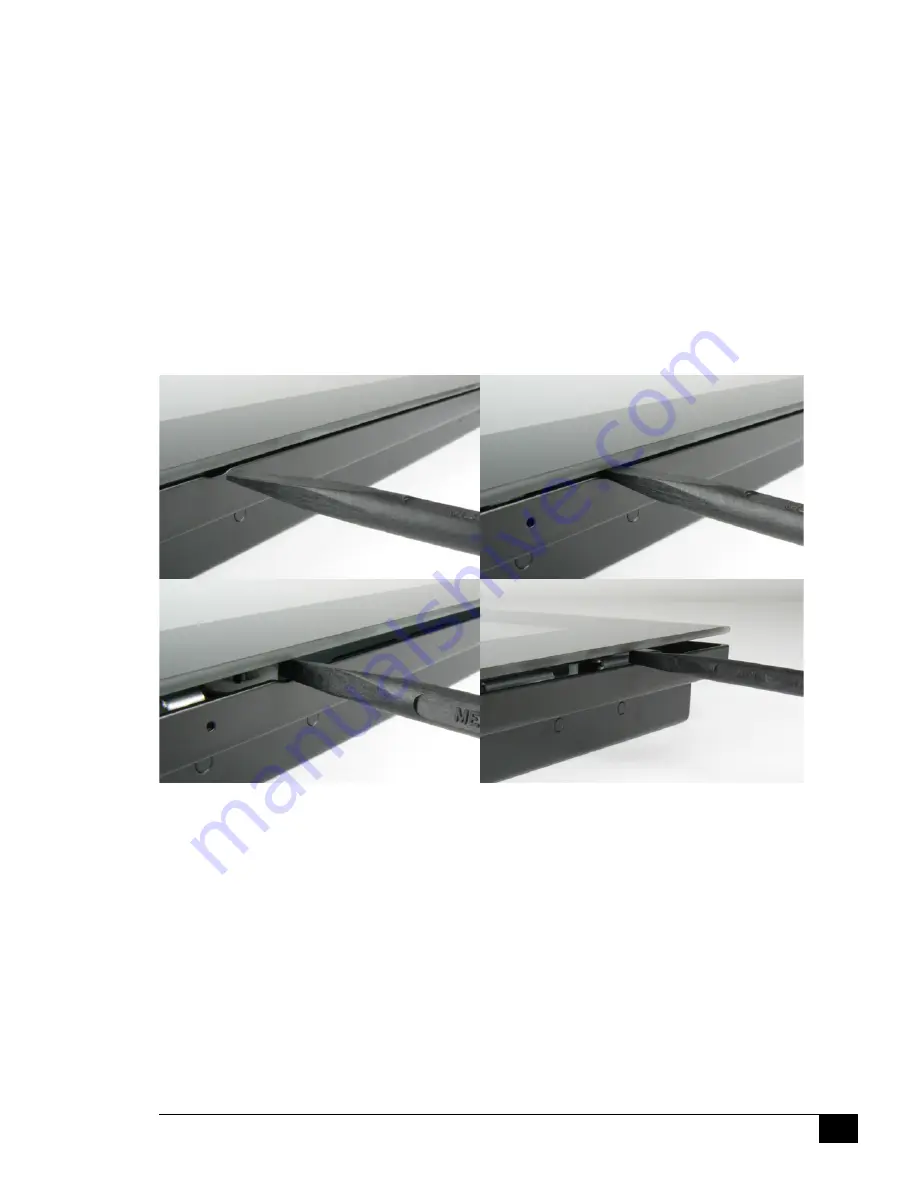
To remove the cover glass, insert the broad end of the pry tool into the notch opening near
the USB ports. While holding the glass, to prevent it from falling, twist the pry tool as if you
were turning a key in a door. This twisting action will release this corner of the cover glass
from the clip. Work your way all around the border of the glass, using the same twisting
motion, until all four clips have been disengaged.
Figure 7
Removing the cover glass from DisplayVue™ A15
Installing the Cover Glass on DisplayVue™ A15
Using two hands to hold the cover glass securely, carefully line up all four posts on the back of
the glass with the receiving clips inside the chassis. Once lined up, use approximately 5lbs of
force to push all four posts into the clips.
Powering on DisplayVue™ A15
The BIOS for DisplayVue™ A15 is configured to automatically turn it on when power is
applied. If for whatever reason it does not power on, you can turn on DisplayVue™ by
depressing the keyhole push-button momentary power switch found in Figure 1.
Power over Ethernet plus (PoE+) power option
If your DisplayVue™ A15 system is configured to be powered by Power over Ethernet plus
(PoE+), you must have a PoE+ switch or midspan PoE+ injector that is IEEE 802.3at-2009
Summary of Contents for DisplayVue A15
Page 13: ...13 Mechanical Dimensions Figure 3 Exterior Mechanical Dimensions ...
Page 19: ...19 Notes ...
Page 22: ...22 Notes ...
Page 23: ...23 ...


