16
1.
Connect one end of the Ethernet cable into the main
LAN port (PoE) of the Access Point and the other end to
the AP Ethernet port on the PoE injector.
2.
Connect the
Power Adapter
to the
DC-IN
port of the
PoE injector and plug the other end in to an electrical
outlet.
3.
Connect the second Ethernet cable into the
LAN port
of
the PoE injector and the other end to the Ethernet port
on the computer.
4. Screw on the provided antennas to the device. Once
both connections are secure, verify the following:
a) Ensure that the
POWER
light is on (it will be green).
b) Ensure that the 2.4 GHz/5 GHz WLAN light is on (it will
be green for both 5 GHz and 2.4 GHz).
c)
Ensure that the LAN (Computer/ENH900EXT
Connection) light is on (it will be green).
d) Once all three lights are on, proceed to set up the
Access Point using the computer.
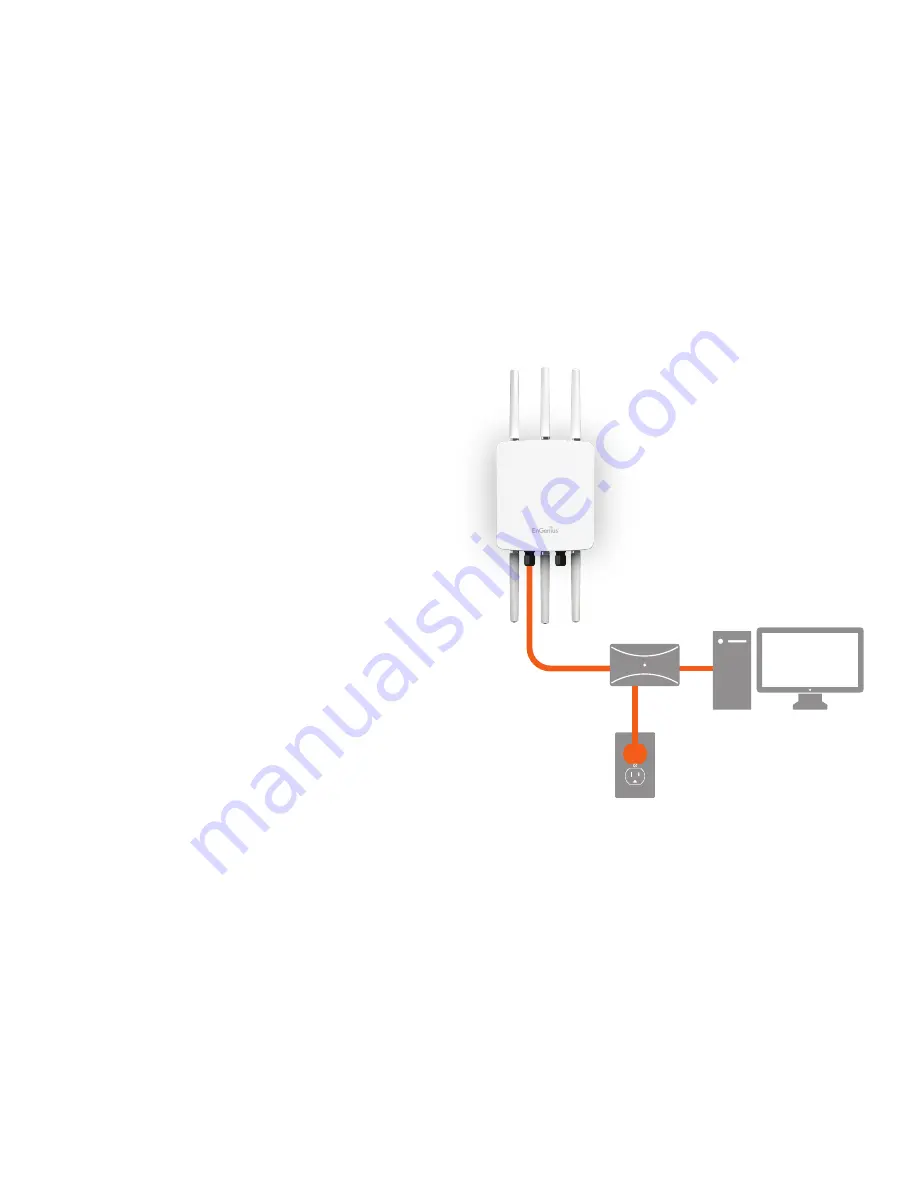
This diagram depicts the hardware configuration.
Note:
The Access Point supports both IEEE 802.3at PoE
(Power over Ethernet) or the included power injector.
You may use either one as the power source.
Do NOT
use both at the same time.
Hardware Installation
Ethernet
PC
Power
Outlet
PoE Injector/
PoE Swtich
Summary of Contents for ENH900EXT
Page 4: ...4 Chapter 1 Product Overview ...
Page 11: ...11 Chapter 2 Before You Begin ...
Page 20: ...20 Chapter 3 Configuring Your Access Point ...
Page 22: ...22 Chapter 4 Building a Wireless Network ...
Page 30: ...30 Chapter 5 Status ...
Page 36: ...36 Chapter 6 Network ...
Page 39: ...39 Chapter 7 2 4 GHz 5 GHz Wireless ...
Page 52: ...52 Chapter 8 Management ...
Page 68: ...68 Appendix ...


