Turbimax CUS52D
Operation
Hauser
33
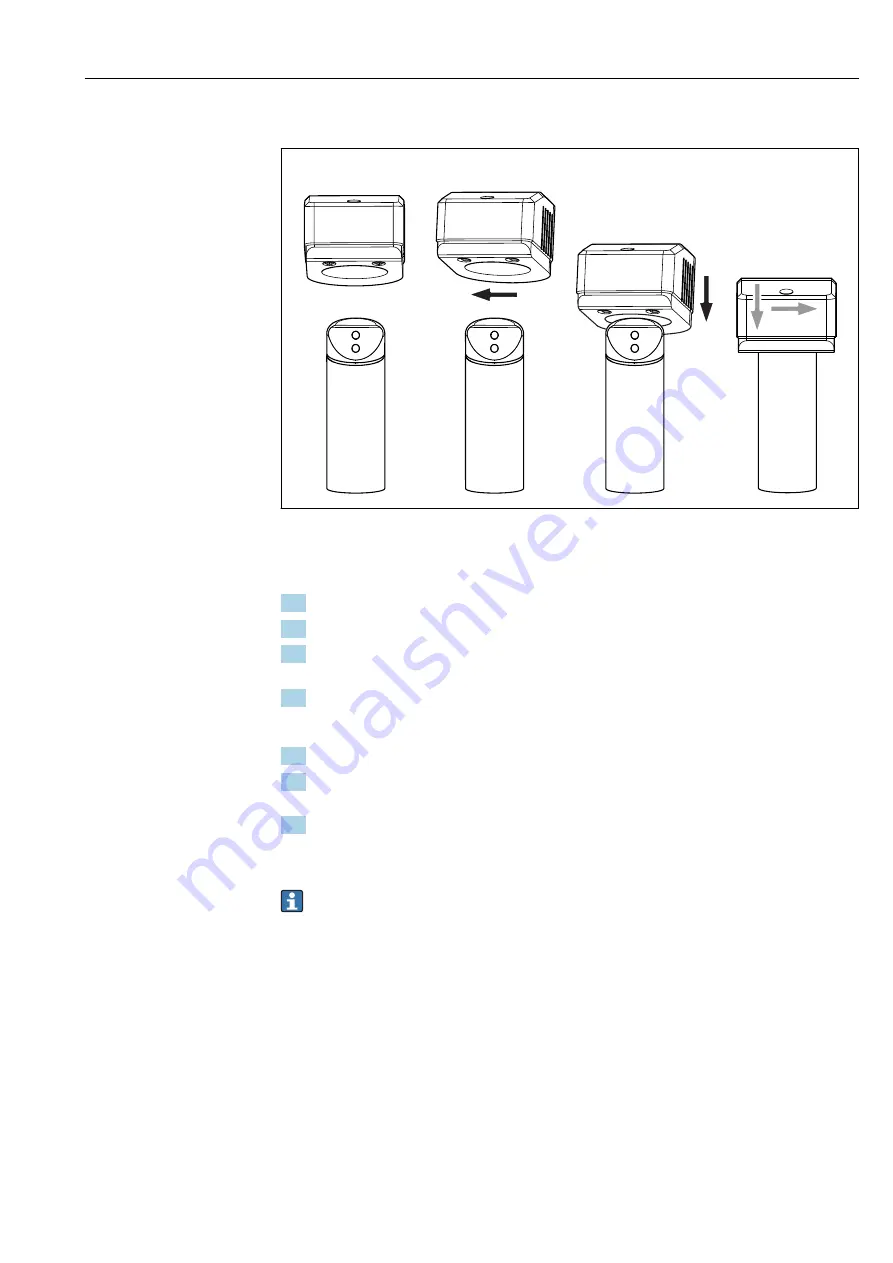
Function check with solid state reference
A
B
C
D
A0030842
36
Fitting the solid state reference on the sensor
Preparation:
1. Clean the sensor → 36.
2. Fix the sensor in place (e.g. with a laboratory stand).
3. With the solid state reference turned slightly (→ 36, B), fit it gently on the sensor
(C).
4. Slide the solid state reference into the final position (D).
Function check:
1. Enable the factory calibration on the transmitter.
2. Read the measured value at the transmitter (depending on the signal filter settings, it
can take 2 to 25 seconds until the correct measured value appears).
3. Compare the measured value with the reference value on the solid state reference.
The sensor is working correctly if the value deviation is within the imprinted
tolerance.
If you activate a calibration data record, other measured values will result. Therefore,
always select the factory calibration (formazine) when checking the function with the
calibration kit.
Calibration vessel
The CUY52 calibration vessel allows the sensors to be validated quickly and reliably. This
makes it easier to adapt to the actual measuring point by creating basic conditions that are
reproducible (e.g. vessels with minimal backscattering, shade from interfering light
sources etc.). There are two different types of calibration vessel into which the calibration
solution (e.g. formazine) can be transferred.


