Installation
5
3.3
Unloading the Knurr DCM
Before unloading a Knurr DCM, note the weight of the model (see 6.0 - Specifications. Use at least
two people when moving the unit.
1.
Using a pallet jack or forklift, move the Knurr DCM on its pallet to the installation location.
2.
Cut the shrink wrap and remove all packaging.
3.
Remove the lag bolts securing each shipping bracket to the shipping pallet; there is one bracket at
each corner of the Knurr DCM; each bracket has two lag bolts (see Figure 3).
4.
Raise the leveling feet so that the rack will rest on the feet:
a.
Use the supplied hex wrench to lower each caster until the Knurr DCM is not resting on the
shipping brackets.
b.
Remove the hex bolts securing the shipping brackets to the Knurr DCM.
Leave the shipping brackets attached if they will be used to secure the cabinet to the floor.
5.
Use a pallet jack or forklift to raise the Knurr DCM off the shipping pallet.
6.
Slide the shipping pallet out from under the rack.
The Knurr DCM may be positioned for installation either with the forklift, by two or more people
carrying it or by rolling the cabinet on its casters.
If the casters are to be used to move the cabinet, the leveling feet must be raised by reversing Step 4
above. Position the cabinet and either lower the leveling feet or bolt the cabinet to the floor with the
shipping brackets.
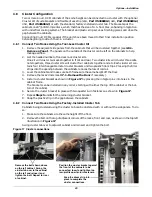
Figure 3
Removing rack from shipping pallet
3.4
Equipment Layout
To keep the unit’s center of gravity as low as possible, install equipment from the bottom up, starting
with the heavier units. Leave any unused space at the top of the enclosure.
!
CAUTION
After equipment is installed, the Knurr DCM may have a high center of gravity. Avoid tipping
the unit when it is being moved.
Raise leveling feet
by turning the hex
nut on each foot
(one at each corner).
... to free the shipping
braces from the pallet.
Remove lag bolts at each
corner of the rack ...


