Instruction Manual
D104197X012
NPS 8 CHP Valve
September 2016
9
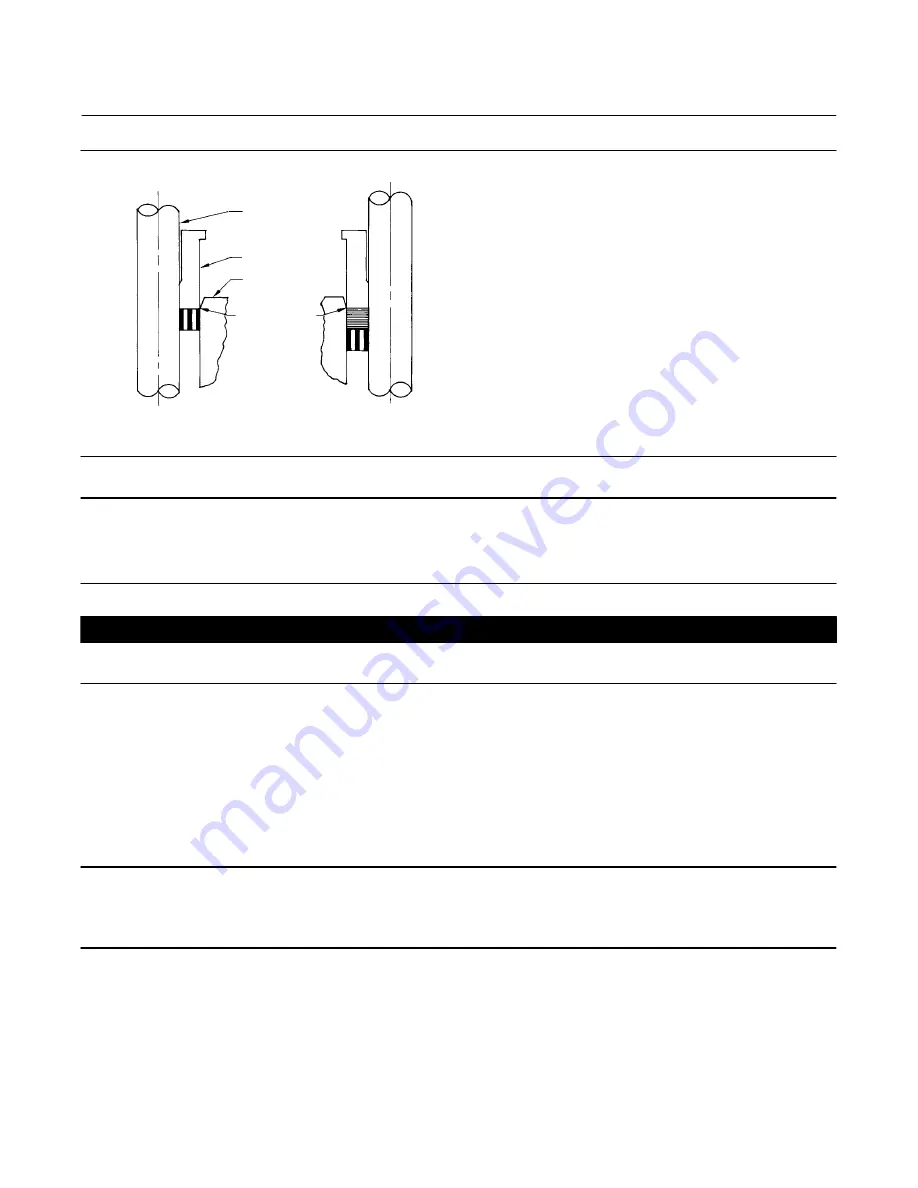
Figure 3. Installing Graphite Ribbon/Filament Packing Rings One at a Time
VALVE STEM
PACKING
FOLLOWER
BONNET
TOP OF
PACKING RING
EVEN WITH
BOTTOM OF
ENTRANCE
CHAMFER
INSTALLING
SECOND PACKING RING
A2207‐2
INSTALLING
FIRST PACKING RING
Note
The prelubricated hex nuts (key 12) referred to in step 14 can be identified by a black film coating on the nut threads.
The proper bolting procedures in step 14 include ‐‐ but are not limited to ‐‐ ensuring that the bonnet stud threads are clean, and
that the hex nuts are evenly tightened to the specified torque values.
CAUTION
Failure to comply with good bonnet‐to‐body bolting practices and the torque values shown in table 3 may result in damage
to the valve. Cheater bars or slug wrenches should not be used for this procedure. Hot torquing is not recommended.
14. Lubricate the stud threads and the faces of the hex nuts (key 12) with anti‐seize lubricant (not necessary if new
factory prelubricated hex nuts are used). Install the hex nuts and tighten them finger‐tight. Stroke the valve several
times to center the trim. Torque the nuts in a crisscross pattern to no more than 1/4 of the nominal torque value
specified in table 3.
When all nuts are tightened to that torque value, increase the torque by 1/4 of the specified nominal torque and
repeat the crisscross pattern. Repeat this procedure until all nuts are tightened to the specified nominal value. Apply
the final torque value again and, if any nut still turns, tighten every nut again.
Note
When installing packing rings, prevent entrapping air between the rings. Add the rings one at a time without forcing them below
the chamfer of the packing box entrance chamber. As each successive ring is added, the stack should not be pushed down more
than the thickness of the added ring (figure 3).
desired, packing parts may be pre‐lubricated with a silicon base grease for easier installation. Slip a smooth‐edged
pipe over the valve stem, and gently tap each soft packing part into the packing box, being sure that air is not
trapped between adjacent soft parts.
16. Slide the packing follower, wiper, and packing flange into position. Lubricate the packing flange studs and the faces
of the packing flange nuts. Install the packing flange nuts.


