Physical Connections
32
IND100133-71
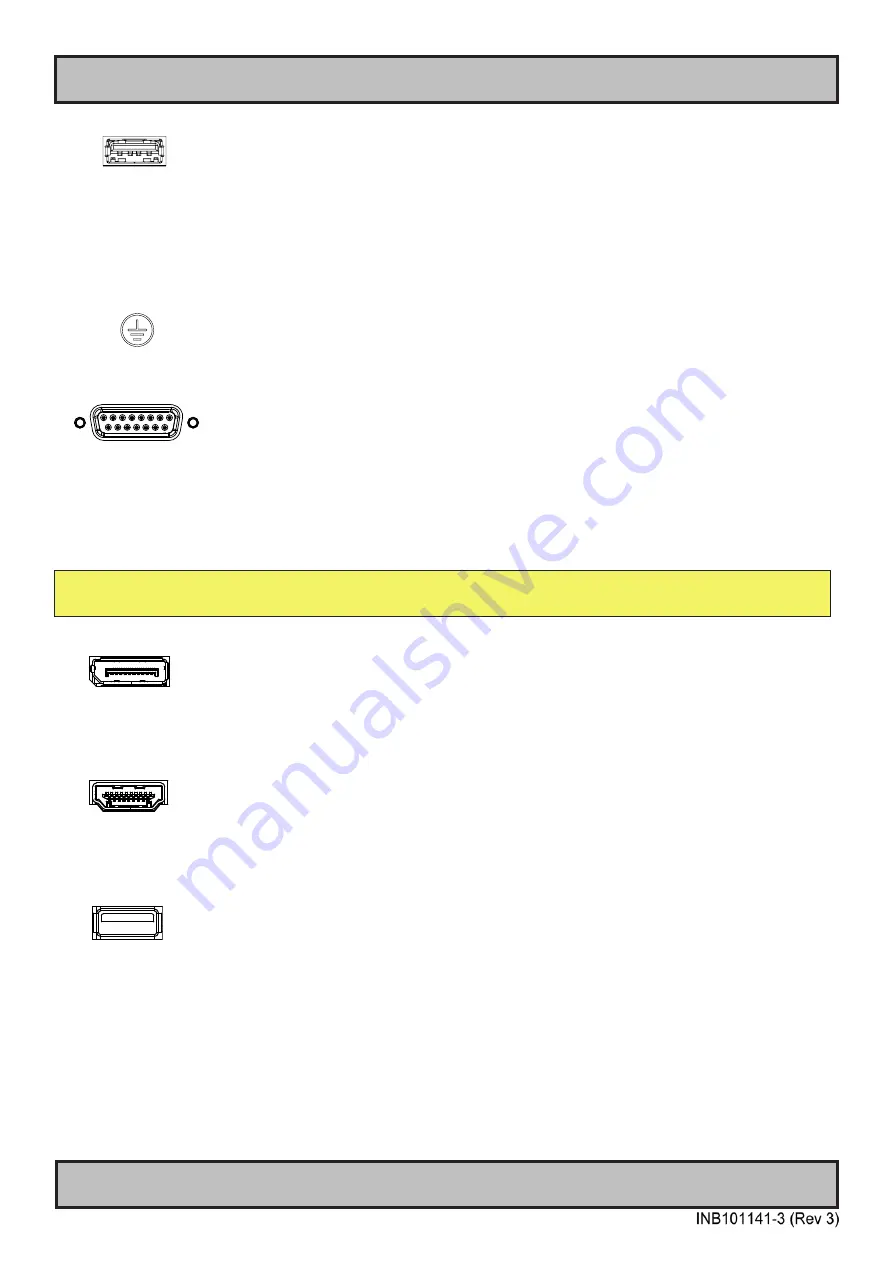
USB TOUCH SCOM:
Connect a TYPE A USB Cable between this connector and your PC. Port is USB2.0 (<5m). This connector will
allow Touchscreen connectivity and/or remote control of the display unit to control common functions like brightness,
input source and more via the Serial Remote Control (SCOM) as provided by Hatteland Technology.
Hatteland Technology’s Serial Remote Control Interface (SCOM) protocol document can be downloaded from:
https://www.hattelandtechnology.com/hubfs/pdfget/inb100018-6.htm
GROUNDING SCREW:
Please review “General mounting instructions” in the “Installation” chapter, pt. 7 for more information.
Interface Connector (External Tactile Display Controls
-
TDC):
This 15P DSUB (male) connector provides an interface for User Controls in order to Power On/OFF the unit as well as
full access to the OSD Menu, Brightness, Contrast functions and more. On certain models this connector is already by
factory default occupied and connected.
Secure the Interface cable to the hex spacers provided on the unit and make sure you do not bend any of the pins
inside the connector when connecting.
Note: Cable that connects the TDC unit to the Display unit must under no circumstances be connected or
disconnected while the Display unit is powered on. Failure to do so may result in a damaged TDC or Display Unit
DisplayPort (DP) IN:
Connect your DP (male) cable firmly into to the DisplayPort (v1.2)
20P connector (female) of the unit. For additional
secure mounting, consider using the provided “ATEN LockPro HDMI/DP Cablelock”. For optimal signal quality and
stability, use HDMI 1.4/2.0 compliant cable.
HDMI IN #1, #2, #3:
Connect your HDMI (male) cable firmly into to the HDMI 19
P connector (female) of the unit. HDMI1 = 2.0, HDMI2 and
HDMI3 = 1.4. For additional secure mounting, consider using the provided “ATEN LockPro HDMI/DP Cablelock”. For
optimal signal quality and stability, use HDMI 1.4/2.0 compliant cable.
FW (Firmware) Update:
Intended for on-site possibility to upgrade/service the internal Firmware inside the unit that could fix issues or to
improve functions for either Video Controller or Glass Display Control
™
(GDC). Upgrading should only be performed
by a skilled technician familiar with typical Firmware/Bios upgrading. Insert a TYPE A USB Memory Stick into this
connector. Port is USB2.0 (<5m).
Firmware Upgrade Procedure available on request, reference:
DOC206316-1
.
In case of problems during Firmware update, please visit our support webpage:
https://www.hattelandtechnology.com/support/contact
Summary of Contents for HATTELAND TECHNOLOGY HD 43T22 MVD-MA C Series
Page 8: ...8 This page left intentionally blank...
Page 9: ...9 General...
Page 16: ...16 This page left intentionally blank...
Page 17: ...17 Installation...
Page 33: ...33 Operation...
Page 64: ...64 This page left intentionally blank...
Page 65: ...65 Operation Advanced DDC CI...
Page 69: ...69 Specifications...
Page 71: ...71 Technical Drawings...
Page 74: ...74 This page left intentionally blank...
Page 75: ...75 Technical Drawings Accessories...
Page 80: ...80 This page left intentionally blank...
Page 81: ...81 Appendixes...
Page 93: ...93 Appendix IND100077 24 User Notes...
Page 95: ...95 Revision History Appendix IND100077 198...
Page 96: ...Hatteland Technology AS www hattelandtechnology com Enterprise no NO974533146...


