


82
www.elpro.com.au
245U-E Wireless Ethernet Modem User Manual
Rev Version 2.24
Extending a Wired Network
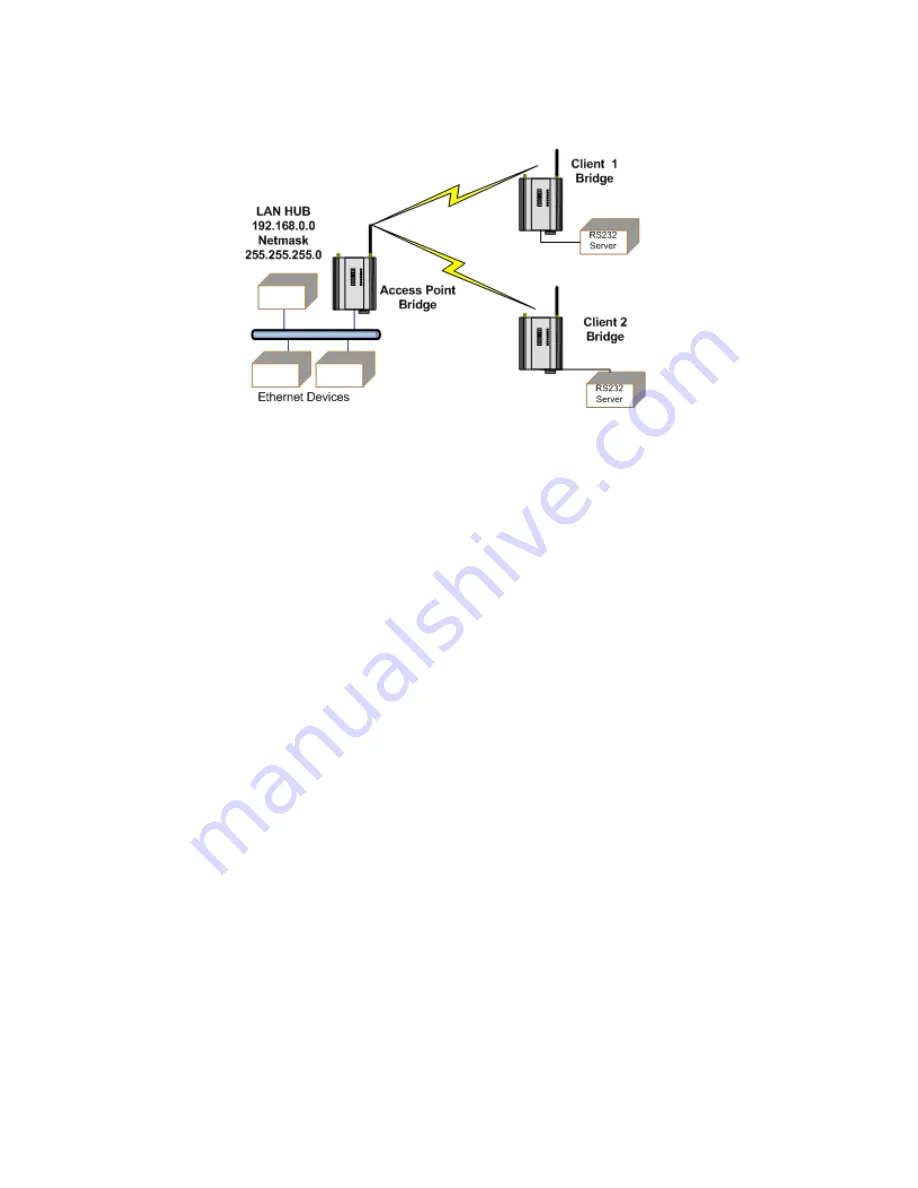
Figure 75 Example Configuration 1
Access Point Configuration
1. Connect a straight-through Ethernet cable between the PC and the 245U-E.
2. Ensure that the configuration of the PC and 245U-E are setup to communicate on the same network.
3. Set DIP switch to SETUP mode.
4. Power up the unit and wait for the OK LED to stop flashing.
5. Adjust the PC network settings.
6. Set Configuration PC network card with the network setting of IP address 192.168.0.1, netmask
255.255.255.0.
7. Open the Configuration webpage within Internet Explorer at https://192.168.0.1XX/, where “XX” is the
last two digits of the module’s serial number.
8. When prompted for the password, enter default username “user” and password “user.”
9. Click Network and set the Operating Mode to “Access Point.”
10. Set the Device Mode as “Bridge.”
11. Change the Gateway IP Address to 192.168.0.1.
12. Change the Ethernet and Wireless IP addresses to 192.168.0.200.
13. Change the Ethernet and Wireless Subnet masks to 255.255.255.0.
14. Enter a System Address (ESSID) string.
15. Select the radio encryption required.
16. Set DIP switch to RUN.
17. Save the changes and unit will restart with new settings.


