


26
ADVANCED
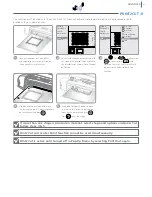
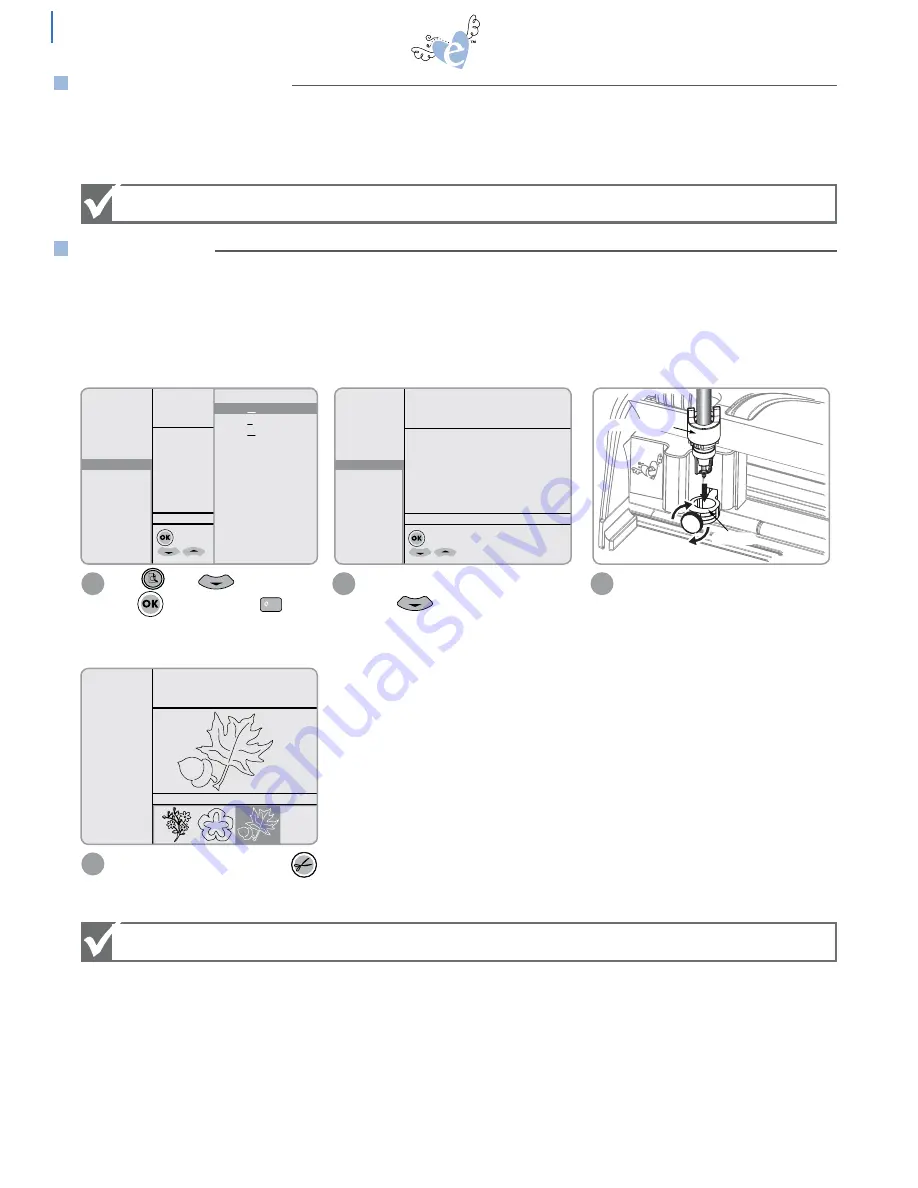
Press . Press to highlight
and to select, or press to
open pen options.
Select the appropriate pen type with
either or the “hot key.” The pen
type selected now appears as the mate-
rial type selection in the Options Menu.
1
2
SPEED: 4
PRESSURE: 2
12"x12"
Cardstock L
H: 5.00"
W: 5.38"
QTY: 1
Flowers
Frames
Phrases
Rockin’ Janie.f
Shapes
to open category
for more options
Select artwork from category
Starter and Rockin’
Jani
e
Pen Holder
- Pen Marker
- Pen Ball Point
- Pen Glue
SPEED: 2
PRESSURE: 1
12"x12"
Pen - Marker
H: 5.00"
W: 5.38"
QTY: 1
Flowers
Frames
Phrases
Rockin’ Janie.f
Shapes
to open category
for more options
Select artwork from category
Setup
Space
P
R
Setup
Space
P
R
Setup
Space
P
R
Setup
Space
P
R
Setup
Space
P
R
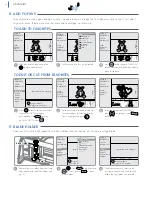
Remove the Blade Holder from the
Clamp and replace with the Pen Holder.
3
Pen Holder
Clamp
Select the desired shape and press
to draw.
4
SPEED: 2
PRESSURE:1
12"x12"
Pen - Marker
Solid
Outline
Shadow
Pieces
H: 5.00"
W: 6.05"
QTY: 1
Starter and Rockin’
Janie
Setup
Space
P
R
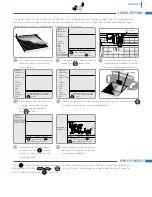
Have Machine lid open during Laser Cut Preview.
If Pen Holder function is not used, the pen will be pushed into the Cutting Mat and
will be ruined.
This function lets you preview the shape selected before cutting by using a laser to illustrate the path of the shape onto
the material. Watch as the laser moves across the material. If the laser crosses over an area previously cut or over the edge
of the paper, adjust the start point or image size.
Selecting this function changes the speed and pressure settings so that most types of pens can be used with the Pen Holder
(sold separately) in the eclips Machine.
The Marker settings use the least pressure and can be used for felt tip markers or soft lead pencils. The Ball Point settings
use medium pressure and work with most types of ballpoint pens. The Glue settings use heavy pressure for plunger-type
writing tools like glue pens.
LASER CUT PREVIEW
PEN HOLDER


