background image


Importance 

Before maintaining GTJZ1412 it is necessary to read, 
understand  and  observe  corresponding  safety  rules 
and operation instructions. 

This  Manual  provides  detailed  maintenance 
information  for  the  owner  and  the  operator,  and 
specifies inspection, maintenance and troubleshooting 
methods  and  procedures  for  the  competent 
professional maintenance personnel. 

The  execution  of  maintenance  procedures  requires 
basic  knowledge  on  machinery,  hydraulic  and 
electrical aspects. Some maintenance procedures need 
special skills, tools, lifting equipment and appropriate 
work place. Therefore, it is strongly recommended to 
maintain and repair at the designated service center of 
the SINOBOOM. 

Hunan  SINOBOOM  Heavy  Industry  Co.,  Ltd.  will 
provide  accurate  information  and  quality  services. 
However, the products will be improved continuously 
and  technical  specification  of  product  may  be 
modified  without  advance  notice.  We  suggest  the 
users  to  update  latest  product  maintenance 
specifications regularly. 

We  will  appreciate  if  the  customers  could  inform  us 
the  deficiencies  of  the  products  and  propose 
improvement  measures.  We  will  consider  all 
suggestions  carefully  and  use  them  as  the  reference 
for  the  preparation  of  maintenance  specification  and 
other  specifications.  Please  contact  us  by  E-mail  or 
fax.


Safety Rules 


Hazard 

Failure to observe the instructions in this Manual and 
corresponding operation manual would cause death or 
serious injury accident. 

Pay  attention  to  the  unsafe  operations  mentioned  in 
the operation manual when carrying out maintenance 
procedures. 


Do not operate, unless:


You  have  understood  and  observed  the  safe 
operation rules in the operation manual 


You shall have read, understood and observed 

—Manufacturer’s instructions and safety rules 

—User’s safety rules and workplace regulations 

—All the applicable government regulations 


You  must  use  appropriate  tools,  lifting 
equipment and work place.


Personal safety 

All  working staff on  or around the  machine  must be 
aware  of  any  possible  safety  hazards.  The  personal 
safety  and  the  continuous  and  safe  operation  are  the 
most important. 

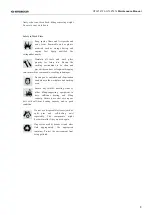
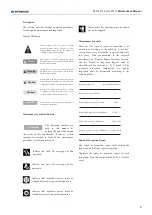
Read the procedures carefully. The marks used in the 
labels in this manual and on the machine are defined 
as follows: 


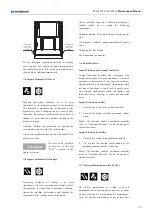
Safety warning mark- It is used to prompt 
potential  personal  injuries.  Observe  all 

safety  prompts  behind  this  mark  for  the 
purpose  of  avoiding  personal  injuries  or 
death. 

Red mark- It is used to prompt the urgent 

hazardous  cases;  if not  avoided, it  would 
lead to death or serious injuries. 

Orange  mark-  It  is  used  to  prompt 
potential  hazardous  cases; if not  avoided, 
it would lead to death or serious injuries. 

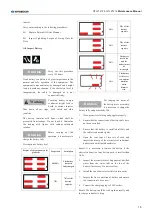
Orange  mark  with  safety  warning-  It  is 
used  to  prompt  potential  hazardous  case; 
if  not  avoided,  it  might  lead  to  mild  or 

moderate personal injury. 

Orange mark without safety warning- It is 
used  to  prompt  potential  hazardous  case; 
if  not  avoided,  it  might  lead  to  property 
losses. 

Green  mark-  It  is  used  to  prompt 
operation or maintenance information.


It is necessary to wear protective goggles, 
and work clothes. 


With potential hazards such as movable 
parts,  components  which  could  rotate 

Hazard 

Warning


Caution


Caution


Attention


2

GTJZ1412 & GTJZ1414 

Maintenance Manual

Summary of Contents for Sinoboom GTJZ1412

Page 1: ...0800 222 111 sales elevatedaccess co nz 021 500 486 www elevatedaccess co nz GTJZ1412 GTJZ1414 Maintenance Manual ...

Page 2: ...g Speed Platform in Fully Retracted State 18 B 9 Test Full Lifting and Full Lowering Time 18 B 10 Inspect Hydraulic Oil 19 B 11 Check the hydraulic tank ventilation system 19 Procedure C 20 C 1 Replace Air Filter of Hydraulic Oil Tank 20 C 2 Inspect Platform Weighing System Optional 20 Procedure D 20 D 1 Inspect Scissor Arm Installation Bearing 20 D 2 Inspect Base Frame Slider 20 D 3 Replace Retur...

Page 3: ... Schematic Diagram34 Electrical System 35 5 1 Use and Maintenance of Lead Acid Storage Battery 35 5 2 Trouble Diagnosis Deltatech System 40 5 3 Fundamental Troubleshooting43 5 4 Electrical Symbols 46 5 5 Electrical Schematic Diagram Deltatech system 47 1 GTJZ1412 GTJZ1414 Maintenance Manual ...

Page 4: ...ntioned in the operation manual when carrying out maintenance procedures Do not operate unless You have understood and observed the safe operation rules in the operation manual You shall have read understood and observed Manufacturer s instructions and safety rules User s safety rules and workplace regulations All the applicable government regulations You must use appropriate tools lifting equipme...

Page 5: ...ents resulting in damages Ensure good ventilation and illumination conditions in the work place and working area Ensure any forklift traveling crane or other lifting supporting equipment to have sufficient bearing and lifting capacity Ensure to use steel wire rope or belt with sufficient bearing capacity and in good condition Do not use disposable fasteners such as split pins and self locking nuts...

Page 6: ...rm bearing capacity kg 120 Allowable quantity of people working on the platform Person 2 indoor 1 outdoor Wheel base m 2 22 Wheel span m 1 25 Turning radius Internal wheel m 0 External wheel m 2 56 Maximum allowable yawing force indoor outdoor N 400 200 Control voltage DC V 24 Platform dimensions Length m 2 64 Height m 0 81 Tire size Diameter mm 380 Height mm 125 Oil volume Hydraulic oil tank L 14...

Page 7: ...m h 0 0 8 Gradeability 25 Lifting lowering time s 83s 92s 55s 65s No load Maximum allowable wind speed indoor outdoor m s 0 12 5 Gale Level 6 Maximum allowed inclined angle Front and rear 3 Left and right 1 5 5 GTJZ1412 GTJZ1414 Maintenance Manual ...

Page 8: ...ump Flow rate at 3000r min 12L min Maximum driving pressure 248bar Traveling motor Type Orbit motor Displacement 375cc r Functional valves Pressure of function main safety valve 248bar Pressure of lifting overflow valve 210bar Pressure of steering overflow valve 120bar Pressure of travelling overflow valve 248bar Opening pressure of travelling brake 28 bar Oil return filter Oil return filter of hy...

Page 9: ...26 1 5 90 6 M30 2 120 8 M36 2 150 12 Tightening Procedures 1 Replace the O ring It is necessary to replace the O ring if the seal has been damaged The O ring shall not be reused if the pipe fitting or the hose has between tightened 2 Lubricate the O ring before installation 3 Ensure to place and fix the O ring properly 4 Align the hose nut to the pipe fitting and tighten the nut 5 Tighten the nut ...

Page 10: ...eeds 3 the alarm will be triggered and the machine could not lift travel or turn Travel switch shall be used to confirm if the pit protective mechanism is opened enough If the platform is lifted off ground by 2 5m the pit protective plate is not stretched and the sensor has not detected the signals the platform will stop rising Regular Maintenance Procedures Compliance The maintenance and inspecti...

Page 11: ...ools for carrying out this operation Indicate new parts for carrying out this operation Indicate that hydraulic motor must be stopped before carrying out this operation Indicate that hydraulic motor must be started before carrying out this operation Indicate that this operation must be carried out by the supplier Maintenance Schedule There are five types of repair inspection to be carried out acco...

Page 12: ...ccording to the provisions of this Manual Description Use the operation manual for this machine The preparation before delivery includes inspection before delivery maintenance procedures and functional inspections Record the inspection results If any inspection result is N it is necessary to stop the machine repair the machine and then re inspect the machine and mark R Notes Y Yes the machine is i...

Page 13: ... trouble R Repaired the machine has been repaired Record Form A Items Y N R A 1 Inspect All Manuals A 2 Inspect All Labels A 3 Inspect Damaged Loose or Lost Parts A 4 Inspect Hydraulic Oil Level A 5 Inspect Hydraulic Oil Leakage A 6 Functional Inspections Carry out Inspections of New Vehicle after 40 Working Hours A 7 Carry out Maintenance after 30 Days Carry out Inspections Every 125 Hours A 8 In...

Page 14: ...ecord Form D Items Y N R D 1 Inspect Scissor Arm Installation Bearing D 2 Inspect Base Frame Slider D 3 Replace Return Oil Filter of Hydraulic Oil Tank Record Form E Items Y N R E 1 Inspect and Replace Hydraulic Oil 12 GTJZ1412 GTJZ1414 Maintenance Manual ...

Page 15: ...y and might result in unsafe operation 1 Consult to the label section in the GTJZ1412 Operation Manual and determine the correct positions of the labels according to the label list and chart 2 Inspect whether all labels are legible and intact replace the damaged and illegible labels timely If needing to replace the labels please contact with Hunan SINOBOOM Heavy Industry Co Ltd A 3 Inspect Damaged...

Page 16: ...hydraulic cylinders pumps and Manual release valve All hydraulic valve blocks The area around the machine A 6 Functional Tests Inspect Platform and Ground Controller Testing functional switches and emergency stop buttons of machine is of great importance to the safe operation of the machine If any function could not operate normally or the emergency stop buttons could not stop all functions it wou...

Page 17: ... battery capacity 30 30 of the battery capacity 20 The batter level is low and the battery must be re charged 10 The battery level is very low and the machine action becomes slow For judging the status of the battery more accurately it is necessary to charge the battery fully and put aside by 24h 1 Wear protective clothing and goggles properly 2 Ensure that the connections of battery cable have no...

Page 18: ...ring harness of storage battery Charger harness Wiring harness of scissor arm Power unit harness Ground controller junction box Platform controller junction box 2 Inspect the flexile joints and confirm that the joints have not become loosened and the sensor lines have not been damaged B 2 Inspect Rim and Tire Including Mounting Nuts Good maintenance of rims and tires is great importance to the saf...

Page 19: ...form in danger The ground controller shall precede over the platform controller including emergency stop buttons 1 Release the emergency stop button of lower and upper platforms and turn the key switch to the ground control position 2 Press the emergency stop button on the ground operation panel Result All actions of the machine become inoperative 3 Release the emergency stop button of lower and u...

Page 20: ...sh the control handle to the maximum position and drive the vehicle from start point to end point Result Run at low speed 0 8km h B 8 Testing Traveling Speed Platform in Fully Retracted State Reasonable driving speed is of great importance to the safe operation of the machine The driving function shall respond to the operations of the operator rapidly and stably free from swinging impact and abnor...

Page 21: ...E 1 for replacement steps B 11 Check the hydraulic tank ventilation system Good ventilation of hydraulic oil tank cap is of great importance to the normal operation of hydraulic pump and the extension of service life The hydraulic pump would operate abnormally if the air filter of hydraulic oil tank is dirty or blocked and the components may be damaged if such filter is used further It may be nece...

Page 22: ...t larger the overweight indicator lights on and alarms the workbench is prohibited from moving after removing the overloaded items the movement can start again Procedure D D 1 Inspect Scissor Arm Installation Bearing Good maintenance of scissor arm installation bearing is of great importance to safe operation of the machine Sustained use of an old bearing may cause damage of parts and unsafe opera...

Page 23: ...articularly dirty working environment requires frequent replacement of hydraulic oil Before replacing the hydraulic oil it is necessary to inspect the hydraulic oil Replace the hydraulic oil if required The procedure shall be executed when the platform is fully retracted 1 Open the left door of the chassis and remove the battery cable Shock hazard Contact with hot or live wires can result in death...

Page 24: ...ost procedures in this section should be carried out in the special maintenance service center After detecting the troubles it is necessary to select appropriate maintenance procedures Symbol Definition Safety warning mark It is used to prompt potential personal injuries Observe all safety prompts behind this mark for the purpose of avoiding personal injuries or death Red mark It is used to prompt...

Page 25: ...hes on the platform control panel and ground control panel to OFF position Find the cable connected to the bottom of the platform control box 2 Disconnect the cable from the bottom of control box Remove the platform control box assembly and mounting bracket and move the cable away from the working platform 3 Screw off the bolt in the slider at the fixed end of the chute at the bottom of the platfo...

Page 26: ...hute 7 Remove the scissor arm as a whole 2 2 How to Remove Lifting Cylinder Hot or jetted hydraulic oil may cause injury to human body Therefore it has to be confirmed that hydraulic oil has cooled down before removing the pipe joint of the hydraulic cylinder 1 Fix the scissor arm with the travelling crane and lift the arm until the safety poles can be set up 2 Support the arm with support poles 3...

Page 27: ...ng bolts from the brake 8 Remove the brake 3 2 How to dismantle the driving motor The driving motor not only plays the role of braking but also plays the role of fixing during the installation of front wheel Therefore before removing the driving motor the equipment should be fixed on a proper shelf or the wheeljack with sufficient bearing capacity should be placed under the chassis platform Attent...

Page 28: ... oil might cause personal injuries Thus before removing the hydraulic pump it is necessary to confirm that the hydraulic oil has cooled down When installing the previously removed hoses and fittings it is necessary to tighten with specified torque Refer to Page 6 Installation Instructions for Hydraulic Hoses and Fittings 1 Open the right door of the chassis on the side of installing the power unit...

Page 29: ...draulic System 4 1 Detection of Function Pump The pump is connected to the motor to form the hydraulic power unit How to Inspect Hydraulic Pump Please abide by the specified torque strictly after dismantling the hose and the hose nippler with the details as shown in Page 6 Instructions for the Installation of Hydraulic Hose and Hose Nippler Risk of physical injury The oil that is jetted out will p...

Page 30: ...Installation Instructions for Hydraulic Hoses and Fittings 1 Turn off the power supply Electric shock Touching live conductor might lead to death or serious injuries Take down all ear rings wrist watch and other jewelries 2 Label and loosen the cable on the driving motor 3 Label disconnect and plug rubber hoses and joints on the pump 4 Remove the mounting bolts from the power unit Remove the power...

Page 31: ...ue if necessary Name Position Function and Tightening Torque of Valves No Name Function Tightening Torque 1 2 position 4 way solenoid valve Platform lifting 34 Nm 2 3 position 4 way solenoid valve Left right steering 34 Nm 3 3 position 4 way solenoid valve Forward and backward 34 Nm 4 2 position 2 way solenoid valve Braking pressure relief 34 Nm 5 Steering overflow valve Steering overflow 24 Nm 6 ...

Page 32: ...ith a wrench and screw off the nuts 7 Regulate the inner hexagon screwing it in the clockwise direction to increase the pressure and in the anticlockwise direction to reduce the pressure Tip over risk Improper pressure adjustment would cause the machine to be damaged and lead to death or serious injury Do not adjust the pressure value to be higher than the specified value 8 Install the nuts proper...

Page 33: ...hine if there is an air suction of the pump How to regulate the emergency descent lever How to regulate the descending speed manually 1 Lift the platform for 2 1 2 8m 2 Erect the safety rod 3 Descend the platform and support the scissors fork arm with the safety rod Risk of crushing The two hands should be kept away from the scissors fork arm while descending the platform 4 Pull the emergency desc...

Page 34: ...d by pressure gauge 7 Shut down the machine Remove the nuts from the steering overflow valve 8 Regulate the inner hexagon screwing it in the clockwise direction to increase the pressure and in the anticlockwise direction to reduce the pressure Risk of component damage The pressure value of the valve should not exceed the specified value 9 Install the nuts properly 10 Repeat steps 5 6 to determine ...

Page 35: ...Three position four way solenoid directional valve Manual lowering release valve Travelling high and low speed reversing valve One way throttle valve Priority valve Manual braking relief valve Brake Hydraulic motor Check valve 33 GTJZ1412 GTJZ1414 Maintenance Manual ...

Page 36: ...4 5 Hydraulic Schematic Diagram GTJZ1412 Hydraulic Schematic Diagram Overweight sensor Lower lifting cylinder Steering cylinder Brake valve set 34 GTJZ1412 GTJZ1414 Maintenance Manual ...

Page 37: ... too low Do not put any object on the battery for avoiding short circuit The wet lead acid battery will release little gas in the process of use particularly in the charging process thus it is necessary to charge the battery in a well ventilated place Do not add acid into the battery Always keep the battery vertical The electrolyte in the battery may flow over if the batter is placed sidelong or t...

Page 38: ... plate electrode it indicates that it is unnecessary to fill in water if the level height has not reached the plate electrode it is necessary to fill in distilled water or deionized water With regard to standard battery fill in water to the position 3mm below the vent cap the plastic cap in the vent hole After filling in water re fix the vent cap on the battery e Battery Charging Proper charging i...

Page 39: ...vity and open circuit voltage Percentage Charging Specific Gravity Open circuit Voltage Battery Cell 6V 12V 100 1 277 2 122 6 37 12 73 90 1 258 2 103 6 31 12 62 80 1 238 2 083 6 25 12 50 70 1 217 2 062 6 19 12 37 60 1 195 2 040 6 12 12 24 50 1 172 2 017 6 05 12 10 40 1 148 1 993 5 98 11 96 30 1 124 1 969 5 91 11 81 20 1 098 1 943 5 83 11 66 10 1 073 1 918 5 75 11 51 It is necessary to re charge th...

Page 40: ... the specific gravity difference between any battery units in the battery rack is over 0 050 it is necessary to equalize this battery rack The battery in the battery rack may have trouble if the difference still exists Open circuit Voltage Test Rarely Used To obtain accurate voltage reading it is necessary to keep the battery idle at least by 6 hours but it would be the best if staying idle by 24 ...

Page 41: ...lit up when charging the green indicator lamp will be lit up after charging and the red indicator lamp will be lit up if the battery has trouble Charging brake All actions of the machine will be cut off when charging 39 GTJZ1412 GTJZ1414 Maintenance Manual ...

Page 42: ...hich are located on the ECU control box of lower platform and the control box of upper platform which They are used to display the machine parameter information and the trouble types ECU control box Display screen of the control box on the upper platform 40 GTJZ1412 GTJZ1414 Maintenance Manual ...

Page 43: ...t machine mode has been selected 32 Angle sensor trouble All actions Inspect the harness of the angle sensor and the angle sensor Meanwhile check to verify whether correct machine mode has been selected 42 Left turn button of platform has been pressed before powering on Only displaying trouble information Confirm that the left turn button has been pressed before powering on if pressed consider to ...

Page 44: ...en circuited 57 The left turning solenoid valve breaks down Limiting the lifting and traveling Inspect whether the harness connected to the solenoid valve connector has been inserted tightly and meanwhile inspect whether the solenoid valve is short circuited or open circuited 58 The braking solenoid valve breaks down disuse Limiting the lifting and traveling Inspect whether the harness connected t...

Page 45: ...r platforms is in good contact 4 Inspect whether the upper platform controller is abnormal 5 Inspect whether the Deltatech plug of lower platform controller is firm or correct Operation of lower platform is invalid The key switch has not been turned to the operation of lower platform 1 The key switch is not placed on the position of base frame control 2 The system has not been powered off after th...

Page 46: ...hen it is no load indoor The height has not been calibrated the travel switch is incorrect 1 Re calibrate the height 2 Change the setting calibrate of travel switch The platform could not rise up further after reaching certain position The travel switch setting is incorrect Reset the travel switch Overweight warning when it is no load The load has not been calibrated this is the first lifting lowe...

Page 47: ...The lower platform controller is abnormal No overload warning The load has not been calibrated or the height is incorrect 1 The sensor has not been calibrated 2 The wiring of load sensor is wrong 3 The sensor is not in good condition The machine moves and then stops intermittently The battery level is low or the calibration is incorrect 1 Re calibrate the parameters 2 The battery is out of power T...

Page 48: ...age battery Toggle switch Fuse Motor controller Button Oil pump motor Charger Power off switch Hour meter Limit switch Warning lamp Buzzer Indicator lamp Key switch Two circuits are connected Two circuits are not connected Level switch Blue Brown Black 46 GTJZ1412 GTJZ1414 Maintenance Manual ...

Page 49: ...ngeover Pressure sensor Battery 6V Pump controlled motor Pump controlled motor controller Normal close Normal open Rising to proper place Lowering to proper place Implementat ion of testing Up Blue Brown Black Red Red Green Green Yellow Yellow High low speed Reverse Up Down Forward Steer left Steer right Platform control box Power supply and communication External power source socket Charger plug ...

Reviews:

Related manuals for Sinoboom GTJZ1412