background image


71

CHAPTER 2:   
GASOLINE 


o


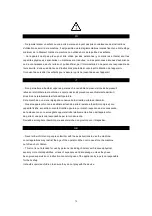
NEVER FILL GASOLINE INTO FUEL TANK WHILE THE MACHINE IS IN AN ENCLOSED 

AREA.                                                                                                                                                                                                             

o


DO NOT FILL GASOLINE INTO FUEL TANK WHILE THE ENGINE IS RUNNING OR 

STILL HOT.                           

o


NEVER SMOKE WHILE YOU FILL UP GASOLINE INTO THE FUEL TANK.           

o


DO NOT USE YOUR MOBILE PHONE WHILE YOU FILL UP GASOLINE INTO THE 

FUEL TANK. 

o


DON’T START OR RUN THE ENGINE IN AN UNVENTILATED AREA (the carbon 

monoxide is a toxic and scentless gas).                                                                                                                 

o


ALWAYS WIPE CAREFULLY ANY TRACE OF GASOLINE BEFORE STARTING THE 

ENGINE.     

o


USE A FUNNEL WHILE YOU PUT GASOLINE INTO THE FUEL TANK. 

o


CAUTION: THE MUFFLER AND AROUND AREA CAN BECOME VERY HOT, 

TEMPERATURE ABOVE 65°C, DO NOT TOUCH THOSE PARTS. 


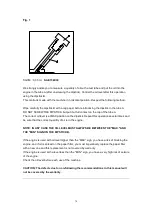
Fig. 2   


Gasoline Tank Capacity : 

SG350 :1000 ml 


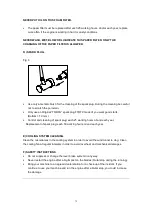
Be sure that storage is correctly done in a tank which is normally used for gasoline.                                                       


Do not store gasoline for more than 30 days (In the fuel tank as well as in the store tank). For 

storage more than 30 days you must add to the gasoline a stabilizer (available in all service 

station dealers).                                                                                                   


Carefully wipe around the fuel cap before refuelling gas into the fuel tank. Do not fill up 

completely (leave an empty space of 5 to 6 cm between gas and the top of spout of the fuel 

tank). It is necessary in order to allow the expansion of the gas in the fuel tank 


Summary of Contents for 5411074177263

Page 1: ...RBA A BENZINA TRADUZIONE DELLE ISTRUZIONI ORIGINALI GB PETROL LAWN MOWER ORIGINAL INSTRUCTIONS S46 M11 Y2016 Cette tondeuse est livr e SANS HUILE NI ESSENCE dans le moteur Questo tosaerba consegnato s...

Page 2: ...aux mains et aux pieds de l op rateur pour viter toute blessure Fum es toxiques n utilisez pas l int rieur Le carburant est inflammable tenir loign des flammes N ajoutez pas de carburant lors du fonc...

Page 3: ...couper Ne coupez pas l herbe sur des pentes excessivement raides Ce produit est conforme aux directives CE en vigueur Pour les tondeuses rotatives roues tondez au travers de l inclinaison des pentes...

Page 4: ...ardez l esprit que l op rateur ou l utilisateur est responsable des accidents ou blessures arrivant d autres personnes ou leurs biens Pr paration Pendant la tonte portez toujours des chaussures r sist...

Page 5: ...ni ne transportez jamais une tondeuse dont le moteur est en fonctionnement Arr tez le moteur et d branchez le c ble de la bougie d allumage assurez vous que les pi ces mobiles sont compl tement arr t...

Page 6: ...ioration Remplacez les pi ces us es ou endommag es pour des raisons de s curit La cas ch ant vidangez le r servoir de carburant en ext rieur AVERTISSEMENT Ne touchez pas la lame en mouvement AVERTISSE...

Page 7: ...iez les meilleurs r sultats de votre tondeuse gazon essence veuillez lire toutes les instructions de s curit et de fonctionnement avec soin avant d utiliser ce produit TABLE DES MATIERES 1 DESCRIPTION...

Page 8: ...8 1 DESCRIPTION 1 Capot 2 Moteur 3 Poign e inf rieure 4 Collecteur d herbe 5 Poign e sup rieure 6 Poign e d acc l ration du moteur...

Page 9: ...le d flecteur et mettez en place le collecteur d herbe Fig B 3 MONTAGE DE LA POIGNEE Ouvrez la poign e et vissez ensembles les parties de la poign e avec les deux vis et crous en plastiques Placez le...

Page 10: ...eur de coupe c Pendant que le moteur tourne ne mettez jamais vos mains ou vos pieds sous la tondeuse ni dans la zone de rejet des herbes Fig E d Avant de tondre retirez tous les objets pr sents sur la...

Page 11: ...thode 1 1 D montez la commande d acc l rateur et d montez le haut du c ble puis utilisez une cl pour desserrer l crou ou r gler la vis Fig 6 1 1 2 Tournez la vis pour allonger la partie en plastique c...

Page 12: ...12 6 1 1 6 1 2 6 1 3 6 1 4...

Page 13: ...stiques loign s pendant le fonctionnement de la machine 4 Avant de tondre d barrassez la pelouse de tous les objets qui pourraient tre projet s par la machine et restez vigilant au cas o certains obje...

Page 14: ...teur de coupe pour retirer et vider le collecteur d herbe apr s avoir heurt un objet arr tez le moteur et v rifiez soigneusement la tondeuse afin de voir si elle n a pas t endommag e Apportez la tonde...

Page 15: ...en ext rieur Portez des gants pais pour monter et aiguiser la lame V rifiez que la lame est toujours bien quilibr e 8 ENTRETIEN ATTENTION arr tez le moteur et d branchez les bougies avant de r aliser...

Page 16: ...plus bas VOUS DEVEZ UNIQUEMENT UTILISER UNE LAME D ORIGINE DU FABRICANT ELLE DOIT PORTER UNE REFERENCE ET LA MARQUE DU FABRICANT ELEM GARDEN TECHNIC Pour retirer la lame d vissez la vis v rifiez le su...

Page 17: ...ple maximal N m 5 Vitesse r gul e d utilisation Min 1 3000 Allumage Manuel lanceur rappel Bougie F7RTC TORCH F6TC NST Ecartement des lectrodes 0 7 0 8 mm Carburant recommand 95 98 oct sans plomb Capac...

Page 18: ...ation au cours de l utilisation r elle de l outil lectrique peut diff rer de la valeur totale d clar e selon les m thodes d utilisation de l outil et signifiant la n cessit d identifier les mesures de...

Page 19: ...mettre de l huile dans le moteur avant de d marrer Utilisez une huile d tergente propre et de haute qualit SAE30 et classification API SG SH ou SJ Vous pouvez utiliser une huile multigrade SAE classif...

Page 20: ...ur la jauge d huile R p tez cette op ration plusieurs fois et v rifiez que la quantit d huile correcte se trouve dans le moteur REMARQUE DANS TOUS LES CAS LE NIVEAU D HUILE DOIT TOUJOURS SE TROUVER EN...

Page 21: ...CARBURANT o ATTENTION LE SILENCIEUX ET LA ZONE ADJACENTE PEUVENT DEVENIR TR S CHAUDS TEMP RATURE SUP RIEURE 65 C NE TOUCHEZ PAS CES PARTIES Fig 2 Capacit du r servoir d essence SG350 1000 ml Veillez c...

Page 22: ...contacteurs leviers de la machine et du moteur sont en position de fonctionnement V rifiez que le capuchon du r servoir carburant est en place et correctement ferm Placez la poign e du d marreur en p...

Page 23: ...ETTRE LE FEU AU CARBURANT OU AUX VAPEURS DE CARBURANT CHAPITRE 5 MAINTENANCE ATTENTION LE SILENCIEUX ET LA ZONE ADJACENTE SONT TR S CHAUDS ET PEUVENT D PASSER 65 C NE TOUCHEZ PAS CES PARTIES D CONNECT...

Page 24: ...ous devez remplacer l huile plus souvent Retirez la jauge d huile Fig 4 Fermez le circuit d arriv e d essence Mettez le filtre air de c t afin d viter de le salir d essence Apr s avoir mis un r cipien...

Page 25: ...LAVER HUMIDIFIER SOUFFLER NI LUBRIFIER CE FILTRE EN PAPIER SEUL LE REMPLACEMENT DU FILTRE EN PAPIER EST AUTORIS D BOUGIE D ALLUMAGE Fig 6 Utilisez uniquement une brosse m tallique pour le nettoyage de...

Page 26: ...soit dans le r servoir carburant ou dans un jerrycan Apr s une longue p riode de stockage mettre de l essence fra che dans votre moteur permet d viter de graves difficult s de d marrage du moteur Si v...

Page 27: ...teur ELEM TECHNIC GARDEN B Toutes les op rations de maintenance doivent tre effectu es uniquement par une station de service apr s vente ou des distributeurs agr s par le fabricant C Notre responsabil...

Page 28: ...tti Prestare particolare attenzione a mani e piedi per evitare lesioni Fumi tossici Non utilizzare in casa La benzina infiammabile tenere lontano da sorgenti di incendio Non aggiungere benzina quando...

Page 29: ...apparecchiature di taglio Le lame sono molto taglienti ed molto facile da tagliare se stessi Non tagliare l erba su pendii eccessivamente ripidi Per falciatrici rotative ruote falciare attraverso l i...

Page 30: ...tero e non fumare durante l operazione aggiungere il carburante prima di avviare l apparecchio Non rimuovere il tappo del serbatoio o aggiungere carburante se l apparecchio in funzione o quando il mot...

Page 31: ...mobili siano completamente fermi e se presente rimuovere la chiave quando l apparecchio incustodito prima di riempire il serbatoio Ridurre l accelerazione durante lo spegnimento del motore e se prese...

Page 32: ...risultati dal vostro tosaerba a benzina leggere tutte le istruzioni operative e di sicurezza prima di utilizzare questo prodotto SOMMARIO 1 DESCRIZIONE 2 ASSEMBLAGGIO DEL RACCOGLI ERBA DEFLETTORE 3 A...

Page 33: ...33 1 DESCRIZIONE 1 Carter 2 Motore 3 Maniglia inferiore 4 Raccogli erba 5 Maniglia superiore 6 Barra di controllo del motore...

Page 34: ...ettore e posizionare il raccogli erba fig B 3 ASSEMBLAGGIO DELLA MANIGLIA Aprire la maniglia e avvitarne i componenti utilizzando le due viti e dadi di plastica in dotazione Posizionare il dispositivo...

Page 35: ...zza di taglio c Quando il motore acceso non introdurre mai mani e piedi sotto l apparecchio o sotto l area di espulsione dell erba fig E d Prima dell utilizzo rimuovere tutti i corpi estranei eventual...

Page 36: ...ontrollo dell acceleratore e la sommit del cavo Utilizzare una chiave per allentare il dado che regola la vite fig 6 1 1 2 Svitare la vite per allentare le parti di plastica ci evita la lunghezza del...

Page 37: ...37 6 1 1 6 1 2 6 1 3 6 1 4...

Page 38: ...sicurezza quando l apparecchio in funzione 4 Prima dell utilizzo rimuovere ogni corpo estraneo dal prato che potrebbe essere tirato via dall apparecchio Prestare attenzione agli oggetti non rimossi I...

Page 39: ...r colpito un corpo estraneo arrestare il motore e verificare attentamente l apparecchio per riscontrare eventuali danni Recarsi presso un centro di assistenza autorizzato nel caso in cui ci sia bisogn...

Page 40: ...montaggio e l affilatura della lama Assicurarsi che la lama sia sempre ben bilanciata 8 MANUTENZIONE ATTENZIONE Arrestare il motore e scollegare la candela prima di qualsiasi operazione di manutenzio...

Page 41: ...VAMENTE LAME ORIGINALI REFERENZIATE E RECANTI IL MARCHIO DI FABBRICA ELEM GARDEN TECHNIC Per rimuovere la lama svitare la vite verificare il supporto e sostituire le parti di ricambio usurate o danneg...

Page 42: ...massima N m 5 Uso regolamentato di velocit Min 1 3000 Accensione Manuale launcher Candela F7RTC TORCH F6TC NST Distanza fra gli elettrodi 0 7 0 8 mm Combustibile consigliato 95 98 oct benzina senza pi...

Page 43: ...sizione Avviso che indica che l emissione di vibrazioni durante l utilizzo reale dello strumento pu differire dal valore totale dichiarato in funzione dei metodi di utilizzo dello strumento e che comu...

Page 44: ...viene fornito senza olio si assicuri di inserire l olio nel motore prima dell avviamento Utilizzi un olio detergente pulito di alt qualit classificazione SAE30 e API Classificazione SG SH o SJ Pu util...

Page 45: ...tta MAX sull asta di livello Ripeta questa operazione diverse volte e si assicuri che nel motore vi sia la quantit di olio corretta ATTENZIONE IN OGNI CASO IL LIVELLO DELL OLIO DEVE SEMPRE TROVARSI TR...

Page 46: ...E L AREA AD ESSA CIRCOSTANTE POSSONO DIVENTARE MOLTO CALDE CON TEMPERATURE OLTRE I 65 C NON TOCCHI QUESTE PARTI Fig 2 Capacit Serbatoio di Benzina SG350 1000 ml Si assicuri che la benzina venga conser...

Page 47: ...eruttori le leve del dispositivo e il motore siano in posizione di funzionamento Si assicuri che il coperchio del serbatoio del carburante sia al suo posto e sia chiuso correttamente Posizioni la mani...

Page 48: ...E O I VAPORI DEL CARBURANTE CAPITOLO 5 MANUTENZIONE ATTENZIONE LA MARMITTA E L AREA AD ESSA CIRCOSTANTE SONO MOLTO CALDE E POSSONO SUPERARE I 65 C NON TOCCARE RIMUOVA SEMPRE LA COPERTURA DELLA CANDELA...

Page 49: ...iare l olio pi spesso Estragga l asta di livello dell olio Fig 4 Chiuda il circuito di immissione di benzina Allontani il filtro dell aria per evitare che venga rovinato dalla benzina Dopo aver posizi...

Page 50: ...o ricchi di polvere MAI LAVARE BAGNARE VENTILARE O LUBRIFICARE QUESTO FILTRO DI CARTA IL FILTRO DI CARTA PU ESSERE SOLTANTO SOSTITUITO D CANDELA Fig 6 Per pulire la candela utilizzi esclusivamente una...

Page 51: ...serbatoio del carburante sia in una tanica Dopo un lungo periodo di conservazione l utilizzo di benzina fresca nel suo motore le consentir di evitare serie difficolt nell avviamento del motore stesso...

Page 52: ...LEM GARDEN TECHNIC B Tutte le operazioni di manutenzione devono essere eseguite esclusivamente dalle stazioni di servizio o dai rivenditori autorizzati dal produttore C Qualora venga effettuata un ope...

Page 53: ...YMBOLS MARKED ON THE PRODUCT Read operator s manual Keep bystanders away Pay more attention to the operator s hands and feet to avoid injured Toxic fumes Don t operate inside house Fuel is flammable k...

Page 54: ...oves during service and maintenance work on the cutting equipment The blades are very sharp and it is very easy to cut yourself Do not cut grass on excessively steep slopes For wheeled rotary mowers m...

Page 55: ...mable store fuel in containers specifically designed for this purpose refuel outdoors only and do not smoke while refueling add fuel before starting the engine Never remove the cap of the fuel tank or...

Page 56: ...lug wire make sure that all moving parts have come to a complete stop and where a key is fitted remove the key whenever you leave the lawn mower before refueling Reduce the throttle setting during eng...

Page 57: ...ensure that you get the best results from your Gasoline Lawnmower please read all of these safety and operating instructions carefully before using this product TABLE OF CONTENTS 1 Product Specificat...

Page 58: ...58 1 DESCRIPION 1 Carter 2 Engine 3 Inferior handle 4 Grass catcher 5 Superior handle 6 Engine control bar...

Page 59: ...p the deflector and place the grass catcher at its place fig B 3 ASSEMBLY OF THE HANDLE Open out the handle and screw the handles parts with the two screws and plastic nuts Put the recoil starter on t...

Page 60: ...fore you change the cutting height c While the engine is running never introduce your hands or feet under the lawnmower or under the grass ejection area fig E d Before mowing remove all foreign object...

Page 61: ...1 Dismantle throttle control and Dismantle the top of cable then use spanner Loosen the nut of regulate the screw Fig 6 1 1 2 Revolve the regulate the screw to make the plastics set lengthen then will...

Page 62: ...62 6 1 1 6 1 2 6 1 3 6 1 4...

Page 63: ...bject from the lawn which may be thrown by the machine stay alert for any foreign objects which may have been missed USING INSTRUCTIONS 1 Check that all nuts bolts and screws are well tightened 2 Befo...

Page 64: ...a foreign object stop the engine and check thoroughly the mower in order to see if it is damage Bring the mower in a agreed service station to do the repairing if necessary WARNING After you stopped...

Page 65: ...ide Wear thick gloves for the mounting and the sharpening of the blade Be sure that the blade is always well balance 8 MAINTENANCE WARING stop the engine and unplug the spark plug before any repairing...

Page 66: ...YOU MUST ONLY USE THE MANUFACTURER BALDE IT SHOULD BE REFERENCED AND WEAR THE MANUFACTURER BRAND ELEM GARDEN TECHNIC To remove the blade unscrew the screw 1check the blade support and change all spar...

Page 67: ...aximum torque N m 5 Vitesse r gul e d utilisation Min 1 3000 ignition Manual recoil Spark Plug F7RTC TORCH F6TC NST Electrode gap 0 7 0 8 mm Recommended fuel 95 98 oct Unleaded Fuel tank capacity cm 1...

Page 68: ...that the vibration emission during actual use of the power tool can differ from the declared total value depending on the ways in which the tool is used and of the need to identify safety measures to...

Page 69: ...WHAT OIL This engine is delivered without oil be sure to put oil in the engine before the starting Use a clean detergent and high quality oil SAE30 and API SG SH or SJ classification You could use a S...

Page 70: ...tion on the dipstick Repeat this operation several times and be sure that the correct quantity of oil is in the engine NOTE IN ANY CASE THE OIL LEVEL MUST ALWAYS BE BETWEEN THE MAX AND THE MIN SIGN ON...

Page 71: ...SOLINE INTO THE FUEL TANK o CAUTION THE MUFFLER AND AROUND AREA CAN BECOME VERY HOT TEMPERATURE ABOVE 65 C DO NOT TOUCH THOSE PARTS Fig 2 Gasoline Tank Capacity SG350 1000 ml Be sure that storage is c...

Page 72: ...l different contactors levers of the machine and engine are in working position Be sure that the cap of the fuel tank is in place and correctly closed Put the starter handle in place on its support on...

Page 73: ...TOUCH ALWAYS DISCONNECT THE SPARK PLUG COVER AND REMOVE IT AS FAR AS POSSIBLE BEFORE ANY MAINTENANCE ON LOWER PART OF THE MACHINE ALWAYS PLACE THE MACHINE WITH THE CARBURATOR IN TOP POSITION A OIL LE...

Page 74: ...nutes Put back the lawnmower in a flat position Refill with oil as explained above on the oil engine chapter Put the air filter back in place C AIR FILTER MAINTENANCE Fig 5 The foam filter if it is pr...

Page 75: ...m 19 mm Control and cleaning of spark plug each 25 working hours or and each year Replacement of spark plug each 50 working hours or and each year E COOLING SYSTEM CLEANING Clean the miscellanies in t...

Page 76: ...ndations are not accepted in warranty because they are not the result of defective fabrication or quality of the product At the end of a normal season use fill up your engine with a minimum of gasolin...

Page 77: ...operation was done in a non agreed service station dealer D Before any request for warranty make sure that all recommendations in this manual have been respected E Using spare parts which are not com...

Page 78: ...78...

Page 79: ...prevedono eventualmente dei limiti di restrizione relativamente all et dell operatore Se la macchina non viene impiegata conservarla fuori della portata dei bambini Questo apparecchio non destinato a...

Page 80: ...O 5395 1 2013 EN ISO 5395 2 2013 AfPS GS 2014 01 PAK EN ISO 14982 2009 EN ISO 3744 1995 ISO 11094 1991 Caract ristiques techniques Produit TONDEUSE A GAZON A ESSENCE Type TTPL41P CC99 99cm 400mm Nivea...

Page 81: ...2 46 EU GAS Toegepaste geharmoniseerde normen EN ISO 5395 1 2013 EN ISO 5395 2 2013 AfPS GS 2014 01 PAK EN ISO 14982 2009 EN ISO 3744 1995 ISO 11094 1991 Technische Daten Product Grasmaaier met benzin...

Page 82: ...rmonizzate applicate EN ISO 5395 1 2013 EN ISO 5395 2 2013 AfPS GS 2014 01 PAK EN ISO 14982 2009 EN ISO 3744 1995 ISO 11094 1991 Dati tecnici Product TOSAERBA A BENZINA Type TTPL41P CC99 99cm 400mm li...

Page 83: ...dards EN ISO 5395 1 2013 EN ISO 5395 2 2013 AfPS GS 2014 01 PAK EN ISO 14982 2009 EN ISO 3744 1995 ISO 11094 1991 Technical Data Product PETROL LAWN MOWER Type TTPL41P CC99 99cm 400mm The sound pressu...

Page 84: ...2014 30 EU EMC 2005 88 EW NOISE 2012 46 EU GAS Angewandte harmonisierte Normen EN ISO 5395 1 2013 EN ISO 5395 2 2013 AfPS GS 2014 01 PAK EN ISO 14982 2009 EN ISO 3744 1995 ISO 11094 1991 Technische Da...

Page 85: ...0 86 S A V sav eco repa com Service Parts separated 32 71 29 70 83 32 71 29 70 86 Fabriqu en Chine Vervaardigd in China Made in China Hergestellt in China 2016 Sous r serve de modifications Con riserv...

Reviews: